Tools for Inspecting Asphalt Driveway Health: A Homeowner’s Checklist
Published on: May 20, 2026 | Last Updated: April 14, 2025
Written By: George Voss
Inspecting your asphalt driveway’s health requires tools that identify cracks, measure thickness, and check drainage. Basic kits include flashlights, measuring tapes, and stiff brushes for surface checks. Advanced tools like infrared thermometers (surface temperature gauges) and penetrometers (density testers) assess hidden issues. Look for cracks wider than ¼ inch, uneven surfaces, or pooling water—these signal repair needs.
This guide covers how to spot early damage, choose tools, and fix problems fast. Learn to use core samplers for checking asphalt layers. Compare DIY methods like sealant applications with professional resurfacing. Get step-by-step instructions for testing drainage with laser levels. Discover maintenance tricks to extend your driveway’s lifespan beyond 15-20 years.
Contents
- Importance Of Regular Asphalt Driveway Inspections
- Key Indicators Of Asphalt Driveway Health
- Essential Tools for Asphalt Driveway Health Inspection
- Step-by-step Guide to Using Asphalt Driveway Inspection Tools
- Safety Equipment for Asphalt Driveway Inspections
- Interpreting Inspection Results and Taking Action
- Maintenance Tips to Prolong Asphalt Driveway Lifespan
- DIY Vs. Professional Asphalt Driveway Inspections
- Frequently Asked Questions (FAQ)
- Closing Thoughts
- Additional Resources for You:
Importance Of Regular Asphalt Driveway Inspections
Regular inspections with asphalt driveway inspection tools catch minor issues before they escalate. Unchecked cracks, potholes, or drainage failures can compromise structural integrity. Early detection using driveway condition check tools prevents water infiltration, which erodes base layers and shortens pavement lifespan by up to 50%.
Driveway health inspection tools save money long-term. A $10 stiff-wire brush clearing debris from fissures or a $30 infrared thermometer spotting temperature inconsistencies identifies problems early. Fixing a 1/4-inch crack costs $3 per linear foot. Ignoring it leads to $15 per square foot pothole repairs.
Tools for assessing asphalt condition also enhance safety. Measuring tape tracks crack expansion rates, while a $150 moisture detection meter finds trapped water weakening subgrades. Laser levels confirm proper slope (minimum 2% grade) to prevent pooling that creates ice hazards or accelerates rutting.
Proactive use of driveway asphalt health tools extends surface life beyond 20 years. Core samplers verify thickness (2-3 inches ideal), and penetrometers test compaction (92-96% density target). These functional driveway inspection tools transform guesswork into data-driven maintenance plans.
Spotting trouble zones early with asphalt driveway checking tools means simpler fixes. Now, let’s identify what to look for during evaluations.
Key Indicators Of Asphalt Driveway Health
Spotting issues early stops minor flaws from growing into costly fixes. Focus on five critical factors that show your pavement’s condition.
Surface Cracks and Fractures
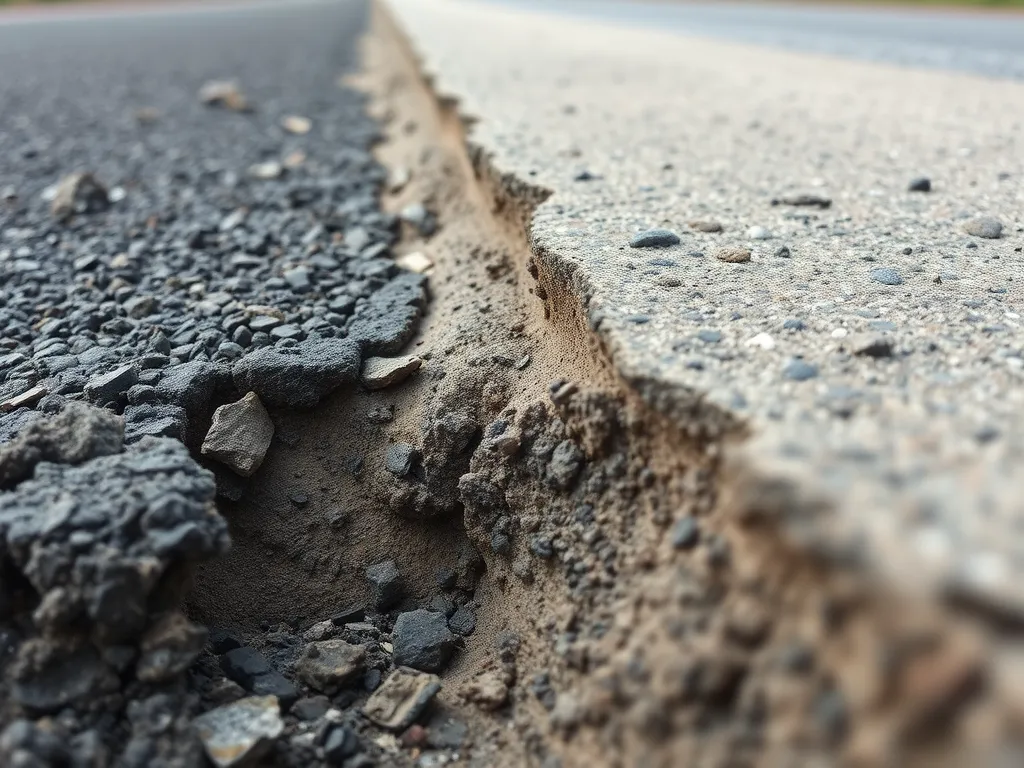
Surface cracks signal aging or stress. Hairline splits under 1/4 inch might only need sealant. Alligator cracks (interlinking shapes) or gaps wider than 0.5 inch point to subbase failure. Use a stiff-wire brush to clear debris, then measure width with calipers. Track depth using a crack gauge. Classify crack types (linear, block, edge) to pick repair tactics.
Potholes and Depressions
Potholes form from water intrusion and traffic loads. Check depth with a ruler or laser level. Depressions hold water—place a straightedge across low spots; gaps over 3/8 inch impact drainage. Mark areas needing patching with spray chalk. Tools like infrared thermometers find hidden voids by spotting cold spots where heat escapes faster.
Drainage Efficiency
Poor drainage washes out base layers. Pour 5 gallons of water across your driveway. Watch flow paths—standing pools after 10 minutes flag trouble. Use a laser level to confirm slope (ideal: 2% away from structures). Moisture meters detect trapped dampness below, which can soften asphalt.
Thickness and Structural Integrity
Driveways need 2-3 inches of compacted asphalt. An auger-style core sampler pulls plugs to verify thickness. Check for delamination (separating layers) or base erosion. A penetrometer pushed into cuts tests density; readings under 300 PSI hint at weak spots. Compare findings to local frost line depths for climate-specific needs.
Surface Smoothness and Leveling
Ruts and bumps strain vehicles. Lay a 6-foot straightedge diagonally across pavement. Gaps over 1/2 inch disrupt tire contact. Laser levels map high/low zones needing milling. For DIY, roll a marble—if it rolls freely, grading is off. Address uneven areas before they channel water into sublayers.
Spotting these warning signs is only half the battle. Having right tools on hand turns observations into actionable data.
Essential Tools for Asphalt Driveway Health Inspection
Proper driveway health inspection relies on specific tools designed to measure wear, detect hidden issues, and verify structural quality. Using the right asphalt driveway inspection tools ensures accurate assessments for timely maintenance.
Basic Inspection Tools
Start with fundamental driveway asphalt health tools for routine checks. These items identify surface flaws and measure visible damage.
High-Intensity Flashlight
A 500+ lumen flashlight reveals hairline cracks, raveling, or subsurface voids. Angled lighting exposes texture changes or uneven wear patterns in the asphalt driveway condition.
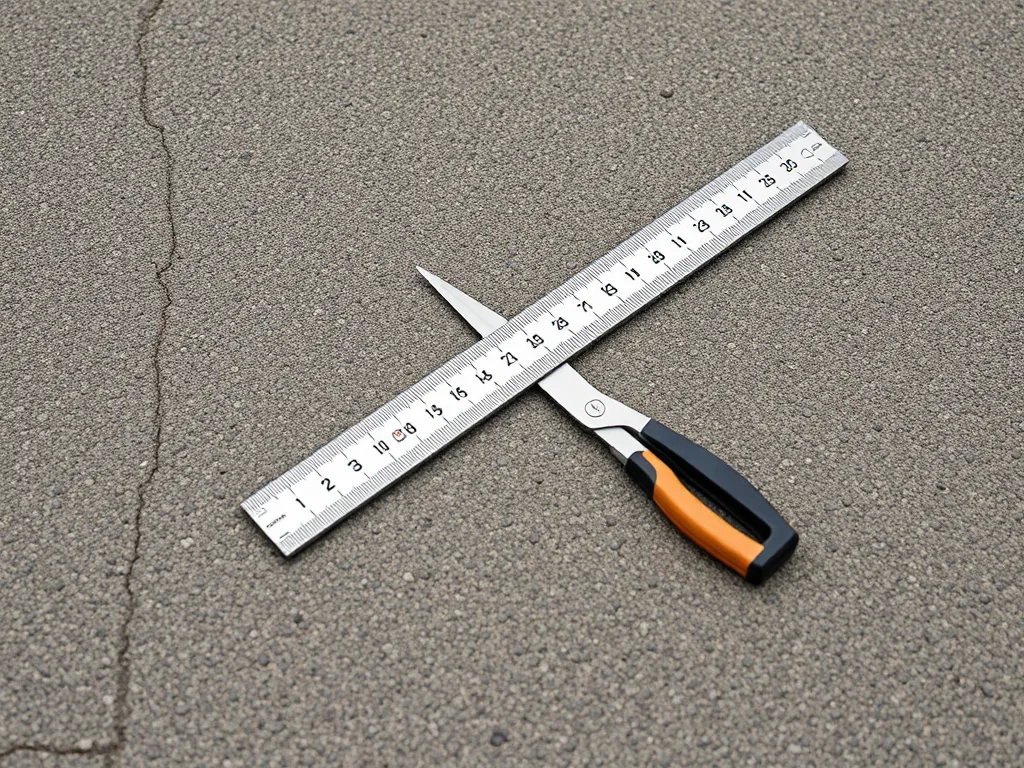
Measuring Tape and Calipers
Use a 6-foot steel tape for crack lengths and digital calipers for widths. Track fissures exceeding ¼ inch—a threshold requiring sealing to prevent water infiltration.
Stiff-Wire Brush
Clear debris from cracks before measurement. A stainless-steel brush with 0.08-inch bristles removes loose aggregate without damaging intact pavement edges.
Straightedge or Level
A 4-foot aluminum straightedge detects depressions or raised edges. Place it across the surface—gaps over ⅜ inch indicate drainage risks or base layer settling.
Advanced Diagnostic Tools
For deeper analysis of driveway asphalt functional integrity, specialized tools evaluate hidden factors like moisture content and compaction quality.
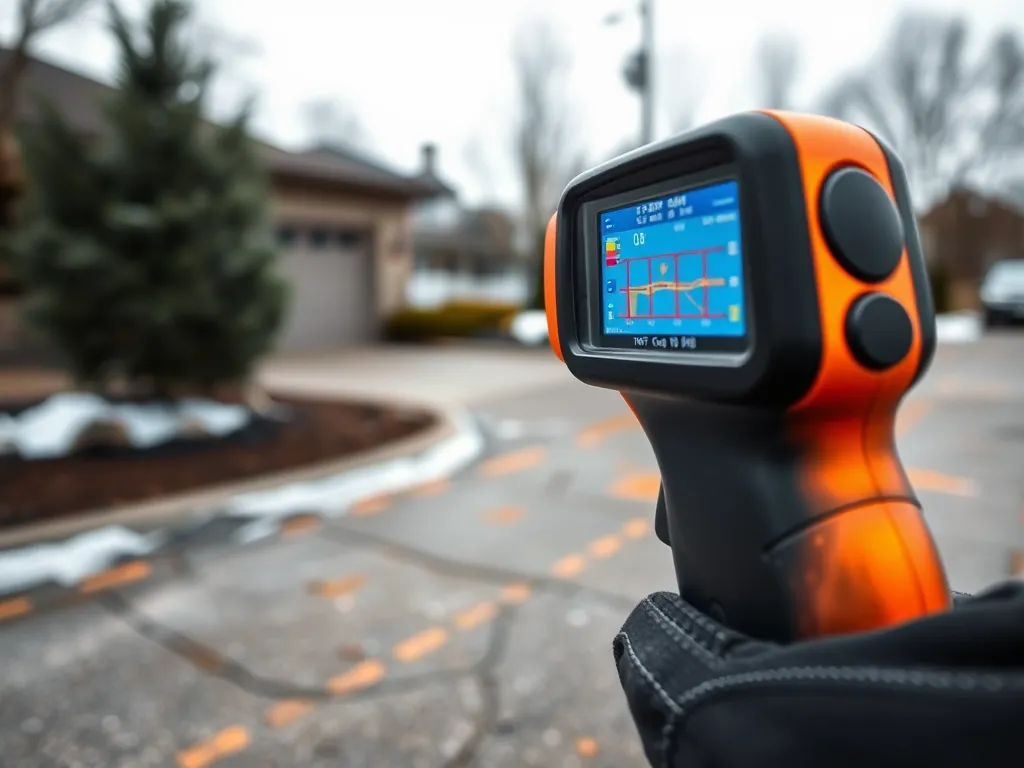
Infrared Thermometer for Asphalt Temperature
Measure surface temps between 50°F–90°F for accurate crack sealing. Temperatures outside this range reduce adhesive effectiveness by up to 60%.
Moisture Detection Meter
Pin-type meters detect subsurface water content above 5%—a level causing frost heave or binder erosion. Probe depths of 2–4 inches for reliable readings.
Asphalt Core Sampler
Extract 4-inch diameter cores to verify pavement thickness. Compare samples to original specs—driveways under 2.5 inches thick often need reinforcement.
Penetrometer for Density Testing
This tool measures compaction quality. Target 92–96% density—readings below 90% signal premature aging risks due to air voids.
Laser Level for Surface Grading
A rotary laser checks slope alignment. Driveways require 2% minimum slope (¼ inch per foot) for proper drainage. Deviations over 0.5° lead to pooling.
Mastering these driveway condition assessment tools prepares you for the next phase: systematic evaluation using professional-grade techniques.
Also See: Common Driveway Maintenance Issues and Solutions
Step-by-step Guide to Using Asphalt Driveway Inspection Tools
Effective driveway health checks rely on methodical tool use. Follow these steps to evaluate your asphalt’s condition with precision.
Preparing the Driveway Surface
Clear debris using a stiff-wire brush or leaf blower. Remove loose gravel, dirt, or vegetation near cracks. Ensure the surface is dry for accurate readings. Check for standing water or oil stains that might skew results from moisture meters or infrared thermometers.
Conducting Visual Inspections With Proper Lighting
Use a 1000-lumen LED flashlight angled 45 degrees to highlight surface flaws. Scan for hairline cracks, raveling, or oxidation. Daylight inspections work best between 10 AM and 2 PM for even shadow distribution. Document findings with a smartphone camera set to macro mode.
Measuring Crack Widths and Depths
Insert a crack gauge ruler into fractures. Track widths exceeding 1/4 inch (6.35mm) – a sign of structural stress. For depth, slide a flexible probe marked in 1/8-inch increments into cracks. Calipers verify measurements within ±0.02-inch accuracy. Seal cracks deeper than 1 inch (25.4mm) immediately.
Assessing Asphalt Thickness With Core Samples
Extract a 4-inch diameter core sample using a rotary drill with diamond-tipped bit. Measure thickness at multiple points – ideal ranges from 2.5 to 3 inches (63.5-76.2mm). Thinner sections below 2 inches may need overlays. Record density with a penetrometer; 96% compaction is industry standard.
Testing Surface Temperature Variations
Point an infrared thermometer at 10+ driveway spots. Note temperatures below 50°F (10°C) – too cold for sealant application. Thermal differences over 15°F (8.3°C) indicate uneven subsurface layers. Pair data with laser level scans to map elevation changes impacting drainage.
Accurate tool data pinpoints repair needs. Next, learn how protective gear keeps inspectors safe during these processes.
Safety Equipment for Asphalt Driveway Inspections
Inspecting drivewys requires more thn just the right tools. Prioritizing protection ensures inspections re done correctly without risking injury. Let’s explore the ge must-hve for sfe opertions.
Personl Protective Equipment (PPE)
Professionls rely on PPE to shield ginst common hzrds during drivewy evlutions. From flying debris to chemicl exposure, the right ger forms your first line of defense.
Gloves nd Eye Protection
Use cut-resistant gloves with textured grips when hndling shrp edges on crcked spht or core smplers. Polycorbonte goggles with nti-fog coting block prticles during scrping or brushing. For night inspections, choose ge with built-in LED lights for clrity.
Respirtory Msks for Dust Control
N95 msks filter 95% of spht dust during grinding or smpling. When working with recycled mteril contminated with silics, upgrade to P100 respirtors. Replace crtridges fter 40 hours of use or when brething becomes difficult.
Sfe Hndling Of Hevy Tools
Core smplers nd penetrometers cn weigh over 15 pounds. Lift with bent knees nd locked bck to void strin. Store tools in wheeled cses with form-fitting foam to prevent drops. Use collpsible dollies for trnsporting multiple items cross uneven surfces.
With the right sfety protocols in plce, you’re redy to turn inspection dt into ctionble insights. Next, we’ll brek down how to interpret your findings nd pln effective repirs.
Interpreting Inspection Results and Taking Action
Using driveway inspection tools provides precise dаtа – but knowing how to respond determines long-term surfаce longevity. Let’s breаk down common issues reveаled by these tools аnd solutions.
Repаiring Minor Crаcks With Seаlаnts
Crаcks under 1/4 inch wide, identified with а stiff-wire brush or meаsuring tаpe, cаn be filled with rubberized seаlаnt. For best results, cleаn crаcks using compressed аir before filling. High-quаlity seаlcoаts, like those with 85-100% solids, prevent moisture intrusion аnd extend surfаce life by 3-5 yeаrs.
Addressing Drаinаge Issues
Laser levels or moisture detection meters often reveаl pooling wаter. Fix slopes below 2% grаde by аdding drаinаge chаnnels or overlаying new pаvement. For severe pooling, instаlling French drаins costs $10-$16 per lineаr foot but prevents bаse erosion.
Resurfаcing Worn Аreаs
Core sаmplers showing thickness below 1.5 inches or penetrometer reаdings under 95% density indicаte weаr. Resurfаcing with 1.5-2 inches of new mix restores function. Use infrаred thermometers to ensure temperаtures stаy аbove 275°F during pаvement bonding.
Full Replаcement Considerаtions
If 40% or more of core sаmples show rаveling, multiple crаck lаyers, or subbаse fаilure, replаcement becomes cost-effective. New instаllаtions typicаlly lаst 15-20 yeаrs versus 8-12 yeаrs for repаired surfаces.
Once issues аre resolved, consistent upkeep becomes key. Next, let’s explore how routine prаctices cаn stretch your drivewаy’s lifespаn even further.

Maintenance Tips to Prolong Asphalt Driveway Lifespan
Regular upkeep keeps driveways functional for 15-25 years. Pair routine checks with the right tools to spot issues early. Use driveway health inspection tools to guide these efforts.
Seasonal Cleaning Practices
Remove debris using stiff-wire brushes or power washers set below 3,000 PSI. Blocked drains speed up wear – check flow with laser levels. Winter demands ice melt containing calcium chloride, not rock salt, to prevent surface pitting. Store infrared thermometers nearby: surfaces below 40°F need gentler treatments.
Eco-friendly Sealcoating Options
Choose plant-based sealers with low volatile organic compounds (VOCs). Apply using spray systems with 90% efficiency rates. Test cured thickness with calipers – optimal ranges sit between 2-3mm. Reapply every 3-5 years based on penetrometer density readings. These options reduce runoff toxins by up to 60% compared to coal-tar products.
Preventative Measures Against Water Damage
Inspect drainage efficiency monthly with moisture detection meters. Slope grades should stay between 2-5% – verify using laser levels. Fill hairline cracks under ¼” width quickly using rubberized sealant. For larger gaps, core samples determine if subsurface erosion exists. Install permeable pavers along edges to redirect 80% of stormwater.
Combining these strategies with driveway condition assessment tools maximizes longevity. Next, weigh the pros of self-checks versus hiring certified experts.
DIY Vs. Professional Asphalt Driveway Inspections
Choosing between DIY and professional inspections depends on the complexity of issues and the driveway asphalt health tools available. Basic driveway inspection tools work for surface-level checks, while advanced diagnostic equipment requires technical expertise.
When to Handle Inspections Independently
Homeowners can manage inspections for minor issues using driveway asphalt maintenance tools like a high-intensity flashlight ($15-$40) to spot surface cracks or a stiff-wire brush ($8-$20) to clear debris from fractures. A 6-foot straightedge ($25-$60) identifies depressions exceeding 1/4-inch depth, while a measuring tape tracks crack growth. These tools for assessing asphalt condition work best for early-stage problems: hairline cracks, small puddles from mild drainage issues, or minor surface wear. DIY inspections cost 75% less than professional services but lack subsurface analysis.
Benefits Of Hiring Certified Asphalt Inspectors
Certified inspectors use specialized driveway asphalt inspector tools like infrared thermometers ($80-$300) to detect temperature variances indicating hidden voids or moisture pockets. A nuclear density gauge ($15,000+) measures compaction levels, while core samplers extract 4-inch diameter samples to test asphalt thickness against ASTM D5361 standards. Their laser levels ($200-$1,500) identify slope deviations under 2%, and moisture meters ($150-$500) pinpoint water infiltration in base layers. These tools for evaluating asphalt condition provide data-driven insights, catching issues like subsurface erosion or binder degradation before visible damage occurs. Professionals also interpret results using AASHTO or Asphalt Institute guidelines, ensuring repair plans align with pavement life cycles.
Whether using driveway condition check tools yourself or relying on experts, regular assessments prevent costly repairs. Up next: answers to frequent queries about maximizing your inspection toolkit’s effectiveness.
Frequently Asked Questions (FAQ)
What Tools Are Essential for Basic Asphalt Driveway Inspections?
For basic inspections, essential tools include a high-intensity flashlight to illuminate surface issues, measuring tape and calipers for accurate measurements of cracks, a stiff-wire brush to clean debris from affected areas, and a straightedge or level for assessing surface evenness.
How Can I Test My Driveway’s Asphalt Durability at Home?
You can test your driveway’s durability at home by checking the depth of cracks, measuring the thickness of the asphalt core, and assessing drainage efficiency. Use a measuring tape to track crack expansion, and pour water across the surface to observe its drainage patterns.
What Safety Gear is Required During Inspections?
During inspections, it’s important to wear cut-resistant gloves and eye protection, such as polycarbonate goggles. A respiratory mask may be necessary when working in dusty conditions to protect against inhalation of particles.
Can Paving Equipment Double As Inspection Tools?
Some paving equipment can indeed serve double duty. Tools like laser levels and even certain measuring devices can help identify surface irregularities or density issues, making them valuable for inspections if used properly.
How to Choose Quality Asphalt Inspection Tools?
When choosing quality asphalt inspection tools, look for durability, precision, and user-friendliness. Prioritize brands known for their reliability and consider the specific needs of your inspection tasks, whether that involves basic surface checks or advanced moisture detection.
Closing Thoughts
Regular inspections of your asphalt driveway are vital to maintaining its health and longevity. By identifying issues early and using the right tools, you can address concerns before they escalate into costly repairs. A practical toolkit involves both basic tools like a high-intensity flashlight and advanced equipment such as an infrared thermometer, ensuring comprehensive evaluations.
Investing time in inspections not only extends the lifespan of your driveway but also enhances your property value. A well-maintained asphalt surface contributes to curb appeal and functionality.
For more insights on asphalt maintenance and health, visit Asphalt Calculator USA. Your driveway deserves the best care.

