How to Seal Coat Your Asphalt Driveway: A Complete Step-by-step Guide
Published on: February 9, 2026 | Last Updated: April 14, 2025
Written By: George Voss
Sealcoating your asphalt driveway means applying a protective liquid layer that blocks sun damage, water intrusion, and oil stains. Unlike basic cleaning or crack repairs, this process uses specialized sealants (like coal tar or asphalt-based formulas) to create a flexible, weatherproof shield. When applied every 2-3 years, sealcoating can prevent up to 70% of driveway cracks and add 5+ years to your pavement’s lifespan. This guide covers product selection, surface prep, safety gear, application methods (spray vs. squeegee), and includes video tutorials for each phase.
We’ll walk through choosing between oil-based and water-based sealers, fixing cracks with rubberized filler, and calculating how much material you need (most driveways require 4-6 gallons). Learn ideal weather conditions (70°F+ with 48 dry hours), curing times (24-48 hours), and cost comparisons: DIY costs $80-$300 vs. pro services at $250-$600. Get tips for eco-friendly options like low-VOC sealants and answers to common questions about timing, durability, and maintenance schedules.
Contents
- Why Seal Coat an Asphalt Driveway?
- Preparing Your Asphalt Driveway for Sealcoating
- Choosing the Right Asphalt Sealant
- How to Apply Sealant to an Asphalt Driveway
- Curing and Drying Process
- Cost to Seal Coat an Asphalt Driveway
- Environmental Considerations for Asphalt Sealcoating
- FAQs About Asphalt Driveway Sealcoating
- Closing Thoughts
- Useful References for You:
Why Seal Coat an Asphalt Driveway?
Seal coat driveways to guard your paved surface from wear. This thin layer shields the asphalt mix of stone, sand, and sticky binder. Without it, driveways fade, crack, and break down faster.
Key Benefits Of Asphalt Sealcoating
Sealcoating asphalt driveways adds years to their life. It blocks harm from sun, rain, and daily use. A well-sealed drive stays smooth, safe, and looks new.
Protects Against UV Damage and Oxidation
Sun rays break down the black binder in asphalt. Seal coat forms a shield, slowing this damage. Tests show sealed asphalt lasts 2-3x longer against UV rays. This stops surface fading and keeps the asphalt flexible.
Prevents Water Penetration and Freeze-Thaw Damage
Water seeps into tiny cracks, then freezes and expands. Seal coating fills these gaps. One inch of ice can push with 50,000 psi force – enough to split unsealed asphalt. Annual sealing cuts this risk by 80%.
Reduces Asphalt Cracking and Surface Deterioration
Sealcoat acts like armor against tire wear and weather. It fills hairline cracks before they spread. Data shows sealed drives have 60% fewer cracks after 5 years. This saves $300-$800 in repair costs per 1,000 sq ft.
Enhances Curb Appeal with a Fresh Black Finish
A new seal coat gives driveways that “just paved” look. The deep black color boosts home value. Studies prove sealed drives add 2-3% to property resale price versus unsealed ones.
Ready to start? Let’s walk through how to prep your drive for the best seal coat results.
Preparing Your Asphalt Driveway for Sealcoating
A flawless seal coat starts with meticulous prep work. Proper surface preparation creates lasting bonds between existing asphalt and new sealant. Follow these steps to ready your driveway for optimal results.
Step 1: Thoroughly Clean the Asphalt Surface
Dirt, leaves, and grease block sealant from bonding with asphalt. Work in dry conditions above 50°F for best cleaning results.
Remove Oil Stains and Debris
Scrape away loose particles with a steel push broom. Treat oil spots with trisodium phosphate (TSP) or commercial degreaser. Apply product, scrub with stiff brush, then rinse. Repeat until stains fade.
Power Wash for Optimal Adhesion
Use a 3,000-4,000 PSI pressure washer at 15° nozzle angle. Start at the driveway’s high point, moving downward to prevent water pooling. Allow 24-48 hours for complete drying before sealcoating.
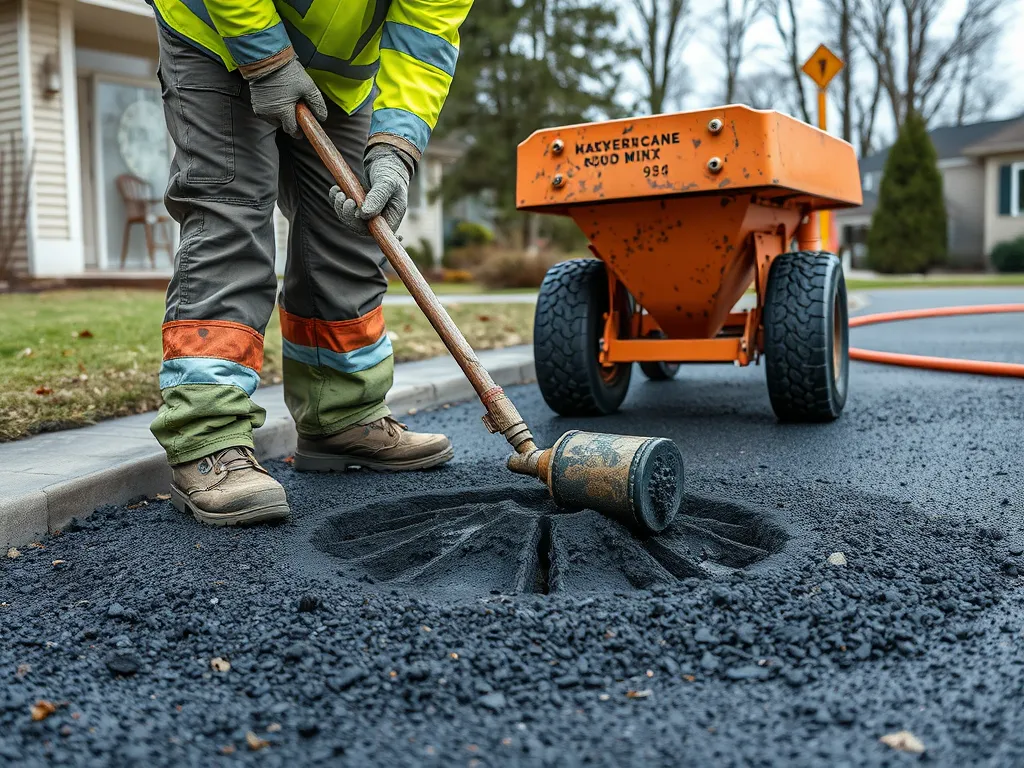
Step 2: Repair Asphalt Damage
Sealant won’t fix existing cracks or holes. Address these issues to prevent further deterioration under the new coating.
Fill Cracks with Asphalt Crack Filler
- Clear debris from cracks using wire brush or air compressor
- Pour rubberized crack filler into openings wider than 1/8″
- Smooth with putty knife – $12-$25 per gallon covers 50-75 linear feet
Patch Potholes with Cold Mix Asphalt
- Cut damaged area into clean rectangle using masonry chisel
- Compact 2″ gravel base into hole with hand tamper
- Fill with cold mix asphalt, overfilling by 1/2″ to account for settling
- Compact layer until flush with surrounding surface
A properly prepped driveway sets the stage for successful seal coating. Next, we’ll break down how to pick the ideal sealant type for your climate and budget.
Choosing the Right Asphalt Sealant
Selecting the best sealer impacts performance and longevity. Quality depends on material composition, climate factors, and surface demands.
Types Of Asphalt Driveway Sealers
Two primary categories dominate the market: coal tar and asphalt emulsion. Each offers distinct advantages for seal coat driveway projects.
Coal Tar vs. Asphalt Emulsion Sealers
Coal tar sealants provide heavy-duty protection against oil spills and UV rays. These petroleum-based products last 3-5 years but face restrictions in 12 states due to environmental concerns. Asphalt emulsion sealers mix liquid asphalt with clay polymers, offering a safer alternative with 2-4 year durability. They emit fewer fumes and align better with eco-friendly practices.
Oil-Based vs. Water-Based Sealants
Oil-based formulas penetrate deeper into asphalt surfaces, ideal for older driveways needing structural reinforcement. They require 24-48 hours drying time. Water-based sealants dry faster (4-8 hours) and work well in humid climates. Most DIY kits use water-based products for easier cleanup with just soap and water.
Calculating Quantity Needed
Accurate measurements prevent wasted material or incomplete coverage. Follow these steps to determine how much sealcoat a driveway requires.
Measure Driveway Square Footage
Multiply length by width for rectangular areas. For irregular shapes, break into sections and add totals. A 20’x50’ driveway equals 1,000 sq ft. Standard sealcoating asphalt driveway products cover 50-80 sq ft per gallon per coat.
| Driveway Size | Single Coat | Two Coats |
|---|---|---|
| 500 sq ft | 6-10 gallons | 12-20 gallons |
| 1,000 sq ft | 12-20 gallons | 24-40 gallons |
Account for Multiple Coats
Most projects need two thin layers instead of one thick application. Double the calculated amount for optimal protection. Factor in 15% extra material for surface imperfections or overlap during spreading.
Proper tool selection ensures smooth application of your chosen sealant. Next, we’ll compare roller and spray methods for sealing an asphalt driveway.
Also See: Common Compaction Errors and How to Fix Them Quickly
How to Apply Sealant to an Asphalt Driveway
Two primary tactics exist for putting sealant on an asphalt driveway: roller and spray. Both work but suit distinct situations. Pick your approach based on driveway size, tools at hand, and skill level.
Method 1: Roller Application
Tools Needed: Stiff-Bristle Squeegee and Roller
Grab a 12″-18″ stiff-bristle squeegee and a 3/4″ nap roller with extension pole. Coal tar formulas typically work with this setup. Mix 1.5 gallons of sealer with 3 quarts of water per manufacturer specs for spreadability.
Technique for Even Coverage
Start at your garage door. Push the squeegee uphill in 6′-8′ sections, applying firm downward pressure. Follow immediately with the roller in crisscross strokes. Aim for 1/8″ thickness – about 1 gallon per 100 sq ft. Overlap passes by 4″ to avoid gaps.
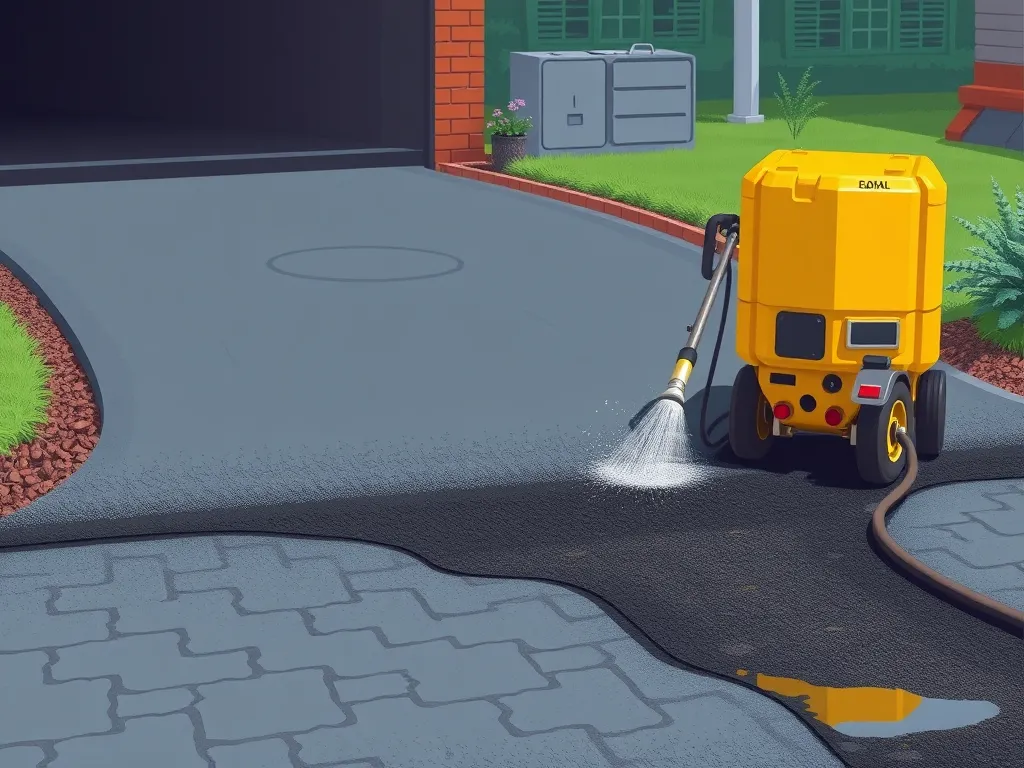
Method 2: Spray Application
Using a Asphalt Sealcoating Spray System
Rent a diaphragm pump spray rig (2-3 GPM flow rate) for large jobs. Thin water-based acrylics to 35-40 sec viscosity via Zahn cup. Hold nozzle 3′ from surface, moving at 3 fps. Maintain 50 psi for atomized mist without drips.
Tips for Professional Results
Block wind with temporary barriers if spraying. Work in 10’x10′ grids with 30% overlap. Back-brush high-traffic zones for better bonding. Two thin coats beat one thick application – wait 4-6 hours between layers.
With your driveway now shielded, timing becomes critical for maximum bond strength. What follows will clarify how long until vehicles can roll on your revitalized surface.
Curing and Drying Process
Proper curing turns liquid sealant into a solid shield for your asphalt driveway. This phase impacts long-term performance – rushing it risks surface flaws or tracking.
Ideal Weather Conditions for Sealcoating
Timing your project around climate factors boosts success. Aim for dry days with stable air flow to aid liquid dispersion.
Temperature and Humidity Requirements
Apply sealant only if air stays above 50°F and below 85°F. Humidity must stay under 70% to stop moisture from mixing with the coating. Avoid direct sunlight during application; hot surfaces cause fast drying that leads to lap marks. If rain might fall within 24 hours, delay your work.
When Can You Drive on a Newly Sealed Driveway?
Vehicles put weight on a surface still hardening. Wait until no sticky spots remain and shoe prints don’t show when walking on it.
24-48 Hour Cure Time Guidelines
Most coal tar sealants need 24 hours before foot traffic and 48 hours for cars. Water-based formulas sometimes allow driving in 12-18 hours if temps hit 70°F+. For heavy trucks or RVs, add 12 extra hours. Park on plywood sheets if urgent access is required during curing.
Weather impacts drying speed: 85°F with 30% humidity may cut wait times by 25%, while 60°F with 80% humidity adds 15-20 hours. Check product labels for brand-specific instructions.
With your driveway now shielded, let’s break down what this project costs upfront versus long-term savings.
Cost to Seal Coat an Asphalt Driveway
Seal coat costs depend on size, method, and who does the work. Plan for $0.10 to $0.35 per square foot. This range covers DIY kits or hiring a pro.
DIY Vs Pro Sealcoating Costs
DIY jobs cost less up front. Pro work adds labor fees but saves time. Rent gear like spray rigs or rollers for $50 to $100 per day. Buy sealant in 5-gallon pails for $20 to $40 each. Pro crews bring their own tools and team.
Price per Square Foot Compare
DIY: $0.10 to $0.25 per square foot. Pro: $0.15 to $0.35. A 1,000-square-foot drive costs $100 to $250 DIY or $150 to $350 pro. Pros often give bulk rates for large jobs.
Long-term Savings From Upkeep
Seal every 2-3 years. This stops cracks, potholes, and base damage. Fixing these later costs 3x more than sealcoating. A well-kept drive lasts 10-15 years vs 5-8 years with no care. Use less fuel for fixes. Cut waste by reusing old seal layers during repairs.
Thinking about costs? Also weigh how sealcoating choices affect the earth.
Environmental Considerations for Asphalt Sealcoating
Protecting your driveway shouldn’t harm the environment. Modern sealcoating practices balance surface preservation with ecological responsibility through material choices and waste management.
Eco-friendly Sealant Options
Not all driveway sealers perform equally for the planet. Two main categories dominate sustainable choices: low-VOC formulas and plant-based alternatives.
Low-VOC and Biodegradable Formulas
Traditional coal tar sealants contain 20-35% polycyclic aromatic hydrocarbons (PAHs) linked to soil contamination. Opt for water-based asphalt emulsion sealers with under 100 grams per liter of volatile organic compounds (VOCs). These formulas release 50% fewer airborne toxins during application. Some brands now integrate soybean oil or pine resin derivatives that decompose naturally without leaching chemicals.
Proper Disposal Of Sealcoating Materials
Leftover sealer requires careful handling. Never rinse equipment or dump excess material into storm drains—1 gallon of spilled sealant can pollute 250,000 gallons of groundwater. Check local regulations: Many areas mandate taking unused coal tar products to hazardous waste facilities. For water-based sealers, let residue solidify in the container before trashing with household waste. Clean brushes and sprayers with biodegradable detergents away from vegetation.
Next, let’s tackle frequent questions homeowners face when planning their sealcoating project.
FAQs About Asphalt Driveway Sealcoating
Can You Seal an Asphalt Driveway Yourself?
Yes, sealcoating an asphalt driveway is a feasible DIY project for many homeowners who are willing to put in the time and effort. Gather the right tools and materials, follow the preparation and application steps, and you can achieve professional-looking results.
Is It Better to Spray or Roll Driveway Sealer?
Both spray and roller methods have their advantages. Spraying allows for quicker application over large areas and can yield a smoother finish, while rolling provides more control and is often better for small or intricate areas. Your choice may depend on your comfort level with the tools and the specific needs of your driveway.
What’s the Best Time to Seal an Asphalt Driveway?
The best time to seal an asphalt driveway is during warm weather, typically in late spring or early fall, when temperatures are consistently between 50°F and 85°F with low humidity. Avoid rainy or extremely hot days, as these conditions can hinder the curing process.
How Often Should You Sealcoat Asphalt?
It’s generally recommended to sealcoat your asphalt driveway every 2 to 3 years. Frequent inspections can help you determine if your driveway needs attention sooner, especially if you observe wear, fading, or the development of cracks.
What’s the Average Cost for Professional Sealcoating?
The average cost for professional sealcoating typically ranges from $0.15 to $0.35 per square foot. For a standard 1,000-square-foot driveway, professional services can cost between $150 and $350, depending on complexity and regional pricing variations.
Closing Thoughts
Seal coating your asphalt driveway is a smart investment in its longevity and appearance. The process not only protects against UV damage and weather elements but also enhances your property’s curb appeal. By following the preparation steps, choosing the right sealant, and applying it properly, you ensure that your driveway remains durable and attractive.
Remember to consider environmental factors and seek eco-friendly sealant options whenever possible. Proper maintenance through seal coating can save you money in the long run by preventing costly repairs.
For more information on driveway maintenance and asphalt solutions, check out Asphalt Calculator USA.

