How to Prepare Asphalt for Sealcoating: Your Roadmap to a Perfect Finish
Published on: February 5, 2026 | Last Updated: April 14, 2025
Written By: George Voss
Preparing asphalt for sealcoating means cleaning the surface, fixing cracks, and making sure it’s bone-dry before applying sealant. Start by sweeping debris with a stiff-bristle broom or leaf blower. Use a pressure washer (1,500-3,000 PSI) to blast oil stains or dirt. Fill cracks wider than 1/8 inch with asphalt crack filler and patch potholes with cold-mix compound. Let repairs cure for 24-48 hours. Gather tools: broom, pressure washer, crack filler, squeegee, and plastic sheeting to protect plants.
This guide walks through each step to prep driveways, parking lots, or walkways. Learn which cracks need filling, how to test asphalt dryness, and why 50°F+ temperatures matter. Get pro tips on choosing coal-tar vs asphalt-based sealants and avoiding common mistakes like sealing over moisture. We’ll cover drying times, safety gear, and eco-friendly cleanup methods too.
Contents
- Why Proper Preparation is Critical for Sealcoating Asphalt
- Tools and Materials Needed for Asphalt Sealcoating Preparation
- Step-by-step Asphalt Sealcoating Prep Process
- Timing and Weather Considerations
- Environmental and Safety Precautions
- Frequently Asked Questions
- Closing Thoughts
- Additional Resources for You:
Why Proper Preparation is Critical for Sealcoating Asphalt
Sealcoat sticks best to clean, dry, crack-free asphalt. Skip prep work, and your sealant may fail within months. Proper steps boost bond strength by up to 70% and block water from wrecking the base layers.
Longevity and Performance Benefits
Sealcoating lasts 2-3 years with good prep. Clean asphalt lets sealant grip tight, stopping UV rays and road salts from eating the surface. Fixing cracks first stops them from spreading under the new coat. A smooth base also cuts wear from tires, saving $0.15-$0.30 per sq.ft. in early repairs.
Common Issues From Inadequate Prep Work
Dirt or oil stains cause patchy peeling. Wet cracks trap moisture, creating bubbles that crack the seal. Unfilled potholes let water seep in, freezing and thawing to wreck the pavement base. Grass clippings or leaves left on edges make sealcoat clump, leaving weak spots for gas or oil to attack.
Ready to gather your tools? Let’s break down what you’ll need for each prep step.
Tools and Materials Needed for Asphalt Sealcoating Preparation
Properly equipping yourself ensures efficient prep work and optimal results. Let’s break down the gear required for cleaning, repairs, and application.
Essential Cleaning Tools
Clearing dirt, oil, and debris creates a bond-ready surface. Missing this step risks poor adhesion and premature coating failure.
Pressure Washer or Garden Hose
A 2500-3500 PSI pressure washer strips embedded grime and grease stains. For light cleaning, a garden hose with a spray nozzle works. Both methods require a minimum of 5 gallons per minute flow rate.
Stiff-Bristle Broom and Leaf Blower
Push brooms with synthetic bristles sweep loose gravel and organic matter. Leaf blowers clear fine particles from cracks. Target 98% debris removal before advancing.
Repair Supplies
Addressing flaws prevents moisture infiltration under the sealant. Skip repairs, and cracks will telegraph through the new coat within months.
Asphalt Crack Filler
Rubberized fillers handle cracks up to ½” wide. Cold-pour options require no heating—simply apply between 50°F and 90°F. Budget $0.15-$0.30 per linear foot for materials.
Patching Compound for Potholes
Fast-setting mixes like UPM® Cold Patch repair holes deeper than 1”. Compact layers in 2” lifts with a hand tamper. Allow 2-4 hours cure time before proceeding.
Application Equipment
Choosing the right tools affects coverage rates and finish quality. Match equipment to project size and sealant type.
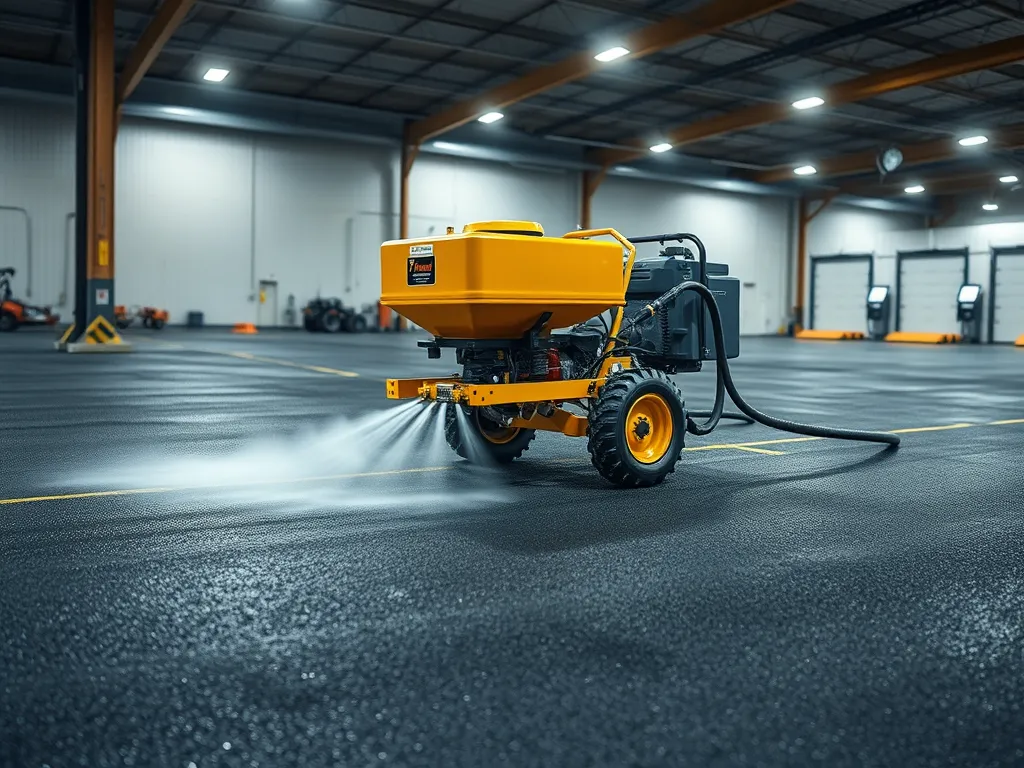
Sealcoat Sprayer or Squeegee
Sprayers cover 1000+ sq ft/hour but demand skill to avoid overspray. Squeegees suit driveways under 500 sq ft, yielding thicker coats. Expect 50-75 sq ft per gallon coverage.
Armed with these tools, you’re set to tackle the hands-on prep phases. Next, we’ll walk through each action step for transforming rough asphalt into a sealant-ready canvas.
Step-by-step Asphalt Sealcoating Prep Process
Proper prep work forms the base for long-lasting sealcoat results. Follow these steps to ready your asphalt.
Step 1: Clean the Surface Well
Dirt, leaves, or oil stains block sealcoat bonds. Start with basic tools, then tackle tough grime.
Clear Debris with a Broom or Blower
Sweep loose grit with a stiff broom. Use a leaf blower for dust in cracks. Remove all rocks bigger than 1/4 inch.
Power Wash for Tough Stains
Spray oil spots with degreaser. Scrub with a brush, then rinse at 2,500-3,000 PSI. Aim for a clean, gray surface free of shine.
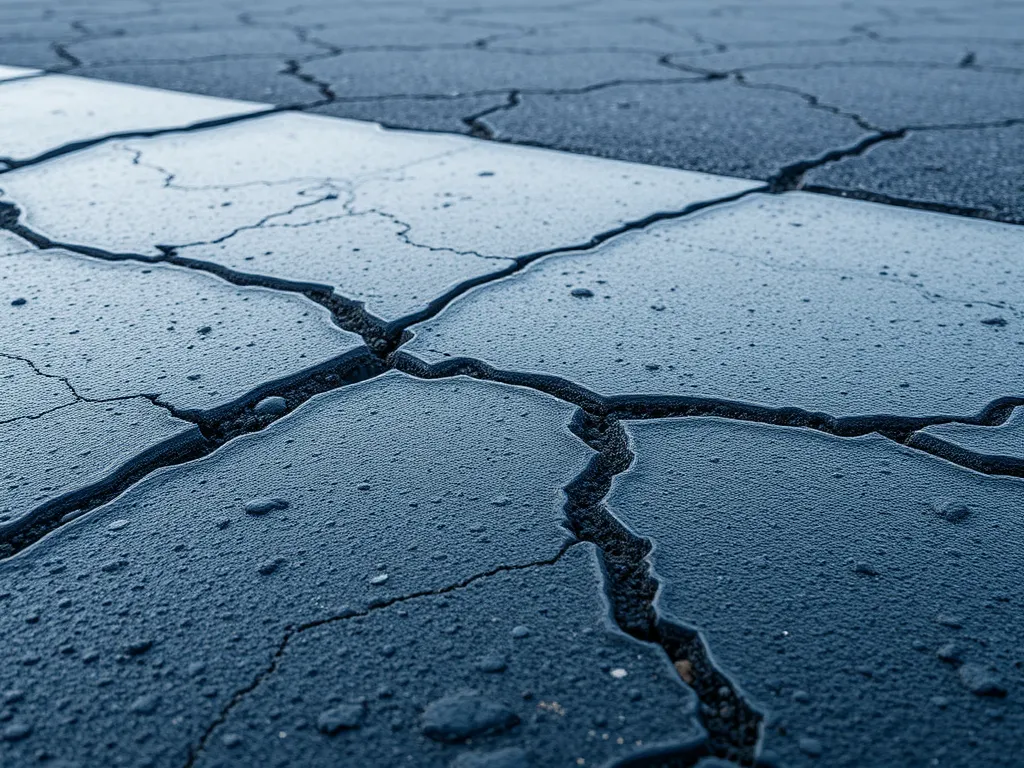
Step 2: Fix Cracks and Holes
Sealcoat won’t fill gaps. Repair flaws first to stop water damage under the new layer.
Fill Small Cracks
Use rubberized asphalt filler for cracks up to 1/2 inch wide. Pour slowly, then smooth with a trowel. Let cure 2-4 hours.
Patch Big Damage
Cut loose edges from potholes. Pour cold patch mix, then compact with a tamper. Add layers until 1/2 inch above the surface.
Step 3: Dry the Asphalt Fully
Moisture traps under sealcoat cause bubbles and cracks. Wait 24-48 hours after rain or washing.
Why Dry Matters
Wet asphalt repels sealant. Test by taping plastic wrap to the surface overnight. Condensation means more drying time.
Step 4: Guard Nearby Zones
Sealcoat stains concrete, plants, and walls. Take steps to shield edges before spraying.
Soak Grass and Curbs
Water plants and turf near the work zone. This makes clean-up easier and stops sealant from sticking to dry blades.
With the asphalt prepped and safe zones set, you’re ready to pick the right day for sealcoating. Up next: timing tips for best results.
Also See: How to Assess and Prepare Your Site for an Asphalt Driveway
Timing and Weather Considerations
Properly preparing asphalt for sealcoating hinges on weather awareness. Temperature swings or rain delays ruin even meticulous prep work. Track forecasts for a 48-hour window of stable conditions.
Ideal Temperature Range for Sealcoating
Sealants bond best between 50°F and 85°F. Below 50°F, materials thicken and fail to penetrate cracks. Above 90°F, rapid evaporation creates weak spots. Apply during morning hours in summer to avoid midday heat spikes. For hill asphalt sealcoating preparation, shaded areas might need adjusted timing.
Curing Time After Repairs
Fresh patches demand patience. Rushing this step traps moisture, causing sealant blistering. Let filler materials set fully—cold-pour crack sealants need 3-6 hours, while hot-applied rubberized fillers cure in 1-2 hours.
How Long Should Asphalt Cure Before Sealcoating?
Wait 24-72 hours post-repairs. Polymer-modified patches often cure faster (12-24 hours) versus standard mixes. Test readiness by pressing a thumb into repaired areas—no imprint means it’s set. For pothole fixes using asphalt emulsion patching, extend curing to 48 hours if temperatures dip below 60°F.
With temperatures tracked and cure times respected, the next phase tackles safeguarding plants, sidewalks, and drainage systems during application.
Environmental and Safety Precautions
Sealcoating preparation requires attention to ecological impact and worker protection. Balancing effective surface treatment with responsible practices ensures long-term pavement health while safeguarding ecosystems.
Eco-friendly Sealcoating Options
Choose low-VOC (volatile organic compound) sealants with under 50 grams per liter emissions for reduced air pollution. Asphalt emulsion-based formulas outperform traditional coal tar sealers, avoiding polycyclic aromatic hydrocarbons (PAHs) linked to environmental harm. Bio-based alternatives like soybean-oil-modified binders offer comparable durability at 2-3 mil thickness while cutting fossil fuel use by 30%.
Look for Green Seal GS-36 certified products meeting strict sustainability benchmarks. These water-based formulas dry faster (90 minutes vs 4+ hours) and reduce tracking onto surrounding surfaces. Though priced 10-15% higher than standard options, they extend resealing intervals by 12-18 months through enhanced UV resistance.
Proper Disposal Of Cleaning Runoff
Pressure washing during asphalt seal coating preparation generates runoff containing oil residues, loose aggregates, and chemical cleaners. Use absorbent boom barriers or vacuum systems to capture debris-laden water before reaching storm drains. For small driveways, divert runoff to vegetated areas using gravel trenches – soil acts as natural filtration for particles above 50 microns.
Check local regulations for contaminated water disposal. Many municipalities require pH-neutralizing agents for wastewater with alkalinity levels exceeding 9.0 from cleaning solutions. Never pour unused sealant down drains; cure excess material in sealed containers and dispose as solid waste through approved facilities.
Following these protocols maintains compliance with EPA stormwater regulations (40 CFR 122.26) while prepping asphalt surfaces. Now let’s tackle frequent queries about achieving flawless sealant adhesion.
Frequently Asked Questions
How Do You Prep Asphalt for Sealing?
To prep asphalt for sealing, start by thoroughly cleaning the surface to remove all debris and stains. Then, repair any cracks and potholes to ensure a smooth surface before allowing it to dry completely. Protect surrounding areas before applying the sealant for optimal results.
Do I Need to Pressure Wash My Driveway Before Sealcoating?
Yes, pressure washing is recommended, especially for stubborn stains and deep-seated dirt. It helps create a clean surface that ensures better adhesion of the sealant, building a robust barrier against elements.
Should You Fill Cracks in Asphalt Before Sealing?
Absolutely. Filling cracks before sealing is crucial as it prevents water from seeping underneath the sealant. This step also helps in avoiding the expansion of cracks and ensures a uniform surface for sealing.
How Long Does Asphalt Need to Cure Before Sealcoating?
Asphalt should ideally cure for 24-72 hours after repairs before sealcoating. This waiting period allows the materials to set properly, thereby preventing issues like bubbling or cracking in the sealant.
Closing Thoughts
Preparing asphalt for sealcoating is a vital process that significantly impacts the durability and appearance of your surface. Clean, well-repaired asphalt ensures even application and extends the life of the sealcoat. Remember, thorough cleaning, sealing cracks, and allowing for proper drying are key steps that shouldn’t be overlooked.
When you follow the outlined preparation steps and consider environmental factors, your sealcoating project will yield optimal results. Preparedness leads not only to a smoother finish but also to long-lasting protection against harsh weather and wear.
For more information and resources on asphalt and sealcoating, don’t hesitate to check out Asphalt Calculator USA.

