How to Install Asphalt Sidewalks: A Step-by-step Guide
Published on: February 5, 2026 | Last Updated: April 14, 2025
Written By: George Voss
Installing asphalt sidewalks involves building durable pathways with hot mix asphalt (HMA), a combination of crushed stone, sand, and sticky bitumen binder. Unlike concrete, asphalt sets faster, costs less upfront ($3–$7 per square foot), and adapts better to soil movement. This guide covers eight key steps: marking the area, excavating soil, adding geotextile fabric and crushed rock layers, compacting the base, laying HMA at 275–300°F, final rolling, curing for 24 hours, and sealing edges. Avoid mistakes like uneven slopes (aim for 2% grade), skipping compaction (95% density required), or paving in temperatures below 50°F.
This article explains how to plan layouts, choose base materials like #57 gravel, and use tools like plate compactors or asphalt rakes. Find cost comparisons to concrete, maintenance tips (seal every 2–3 years), and eco-friendly options like recycled asphalt pavement (RAP). Learn safety measures, design choices like stamped borders, and answers to FAQs on thickness (2–3 inches recommended) and installing over existing concrete.
Contents
- Introduction to Asphalt Sidewalk Installation
- Benefits Of Asphalt Sidewalks
- Asphalt Vs. Concrete Sidewalks: Key Comparisons
- Planning &Amp; Preparation
- Required Tools &Amp; Materials
- Step-by-step Asphalt Sidewalk Installation
- Installing Asphalt Sidewalks Over Concrete
- Common Mistakes to Avoid
- Cost Of Asphalt Sidewalk Installation
- Time Required for Installation
- Maintenance Tips for Longevity
- Safety Precautions During Installation
- Environmental Impact Of Asphalt Sidewalks
- Aesthetic Customization Options
- Frequently Asked Questions (FAQs)
- Closing Thoughts
- Useful References for You:
Introduction to Asphalt Sidewalk Installation
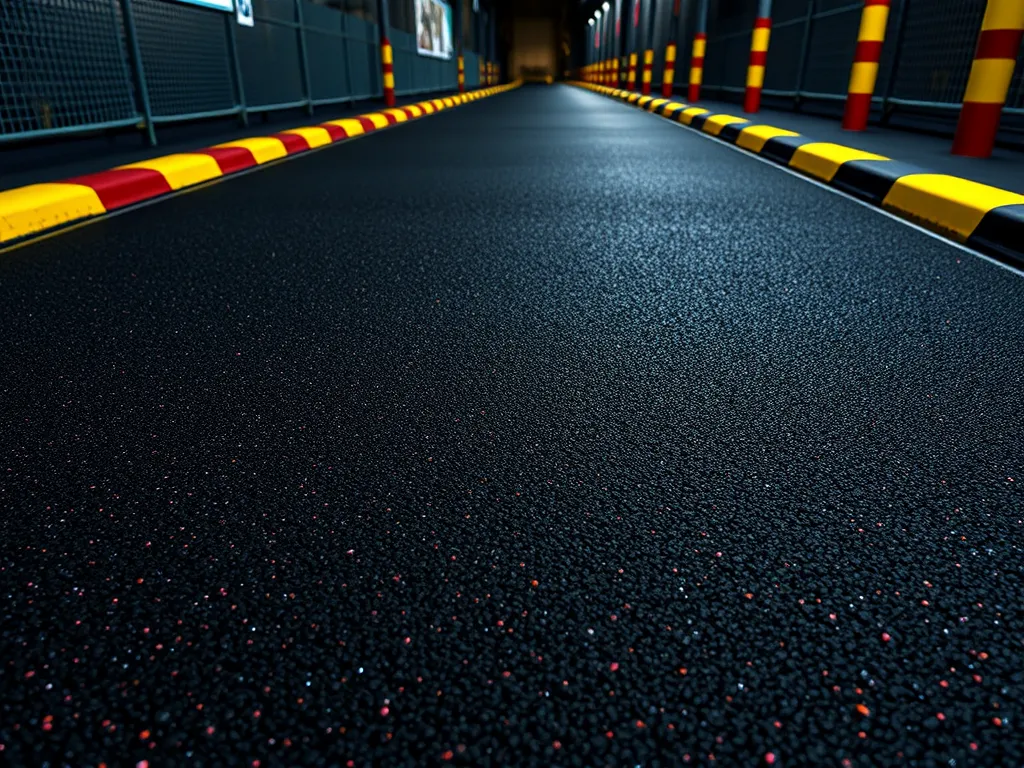
Asphalt sidewalk construction starts with the right mix: 95% crushed stone, gravel, or sand (aggregates) bound by 5% asphalt cement (bitumen). This mix creates durable surfaces that handle foot traffic and seasonal shifts. Unlike roads, sidewalks use finer aggregates for smoother finishes. Hot mix asphalt (HMA) heated to 300°F remains standard, though warm mix options at 250°F gain traction for lower emissions.
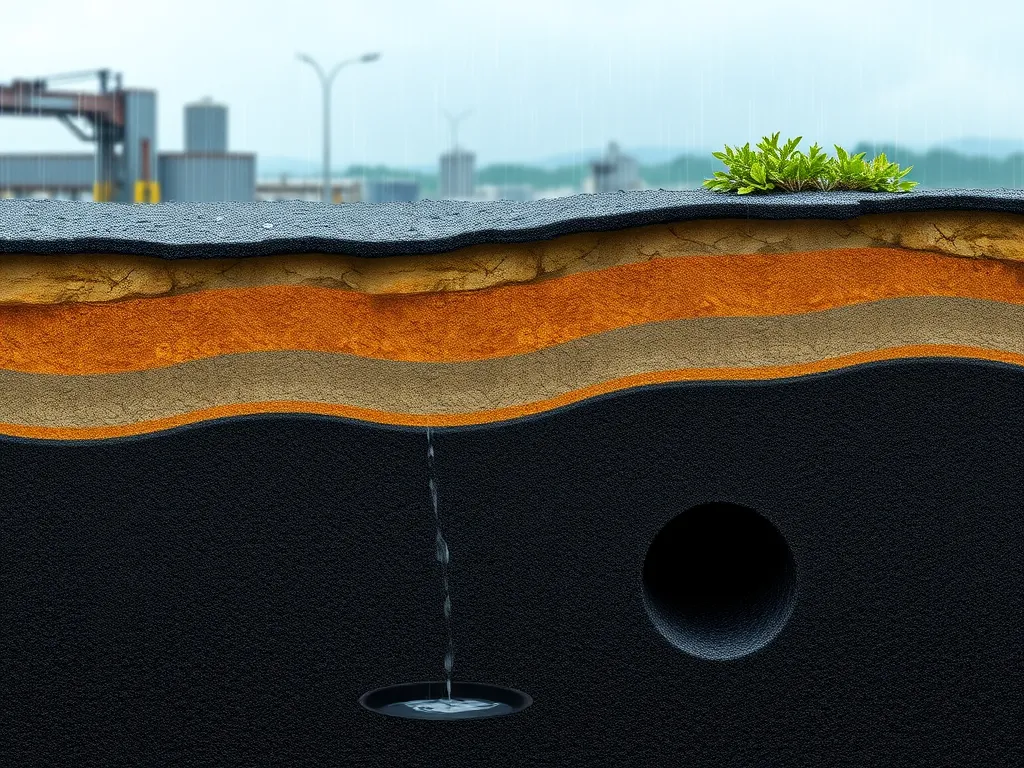
Proper asphalt sidewalks installation requires 2-3 inches of compacted asphalt over a 4-6 inch base layer. The base typically uses dense-graded aggregate or recycled concrete crushed to 1.5” minus. Geotextile fabric between soil and base prevents shifting in clay-heavy soils. Cross slopes of 2% ensure drainage, meeting ADA standards for public pathways.
Local codes often mandate permits for curb cuts, tree root barriers, or stormwater management. In freeze-thaw zones like Minnesota, engineers may specify PG 58-28 binders for cold resistance. Coastal areas like Florida favor PG 76-22 mixes to resist rutting in heat. Always verify regional specs before laying asphalt sidewalks.
Next, we’ll explore why these materials and methods make asphalt a top choice for pedestrian pathways.
Benefits Of Asphalt Sidewalks
Asphalt sidewalks offer practical advantages for residential and commercial projects. Their flexibility handles ground movement better than rigid concrete, reducing cracks from freeze-thaw cycles. This makes them ideal for regions with temperature swings between 20°F and 110°F.
Installation speed stands out. Hot mix asphalt (HMA) applied at 300°F allows foot traffic within 24 hours. Contractors complete most residential paths in 1-2 days versus concrete’s 7-day cure time. Costs run $3-$5 per square foot installed – 35% cheaper than poured concrete.
| Feature | Asphalt | Concrete |
|---|---|---|
| Installation Time | 1-2 days | 3-7 days |
| Cost per sq.ft | $3-$5 | $6-$10 |
| Crack Resistance | High | Medium |
Maintenance stays simple. Sealcoating every 3-5 years protects against UV damage and oil spills. Small repairs use infrared heaters to blend patches seamlessly. PG 64-22 binder grades resist rutting under heavy loads up to 5,000 psi.
Modern mixes boost sustainability. Recycled asphalt pavement (RAP) replaces 20-30% of virgin materials. Permeable asphalt options manage stormwater with 18% void spaces, draining 5 inches of rain hourly. These features meet LEED credit standards for green building projects.
With proper base prep and 3-inch thickness, asphalt walkways last 15-20 years. Their dark color melts snow faster, improving winter safety. The smooth surface meets ADA slope requirements of 1:12 max cross-slope.
Next, let’s compare asphalt against concrete to clarify which material suits your project needs.
Asphalt Vs. Concrete Sidewalks: Key Comparisons
When choosing materials for walkways, property owners often weigh asphalt against concrete. Each offers distinct advantages based on budget, climate, and project goals.
Cost Differences
Asphalt sidewalks typically cost $3-$5 per square foot, while concrete ranges from $6-$10. The lower upfront price comes from asphalt’s simpler mix of aggregates (95%) and bitumen binder (5%). Concrete requires pricier cement and steel reinforcements. Over 10 years, asphalt may need $1-$2 per square foot for sealcoating every 3-5 years, whereas concrete cracks often demand full slab replacement.
Durability &Amp; Longevity
Properly installed asphalt walkways last 15-20 years. Their flexibility handles freeze-thaw cycles better than rigid concrete, which can crack under soil shifts. Concrete lasts 30-40 years but shows surface spalling or heaving faster in cold climates. Asphalt’s dark color melts snow quicker but may develop alligator cracking without routine maintenance.
Installation Complexity
Asphalt requires hot mix (280-325°F) delivered by dump trucks and spread with a paver. Crews must compact layers quickly before the mix cools. Concrete needs formwork setup, precise slurry mixing, and 7-day curing. Asphalt projects finish faster—most sidewalks become usable within 24 hours versus concrete’s week-long wait. Both need skilled labor, but asphalt’s temperature sensitivity adds unique timing challenges.
With these comparisons in mind, proper planning becomes key to maximizing asphalt’s benefits while avoiding common pitfalls.
Also See: Long-term Effects Of UV Exposure on Asphalt Vs Concrete
Planning &Amp; Preparation
Proper planning ensures your asphalt sidewalk lasts 15-20 years. Focus on three critical factors before breaking ground.
Evaluating Local Regulations
Check municipal codes for sidewalk permits, ADA compliance, and setback rules. Most cities require 36-48″ clear widths for wheelchair access. Verify right-of-way boundaries to avoid encroaching on public land. Call 811 to mark underground utilities like gas lines or fiber optics. Noncompliance can lead to fines up to $5,000 or project delays.
Designing the Sidewalk Layout
Sketch the path using spray paint or stakes. Account for 1-2% cross-slope to prevent water pooling. For curved designs, keep radii above 5 feet to accommodate asphalt paving equipment. Avoid sharp turns near tree roots or drainage systems. Use PG 64-22 binder asphalt for regions with seasonal temperature swings between -22°F and 122°F.
Determining Asphalt Thickness Requirements
Residential sidewalks need 2-3 inches of compacted asphalt over a 4-6″ crushed stone base. High-traffic areas may require 3.5″ surfaces with geotextile fabric reinforcement. Calculate material quantities using this formula: (Length × Width × Depth) ÷ 27 = Cubic Yards. For a 50’×4′ walkway with 3″ asphalt layer: (50×4×0.25) ÷ 27 ≈ 1.85 cubic yards.
With permits secured and dimensions finalized, you’ll need the right equipment to execute the project. Next, we’ll review tools and materials for efficient asphalt sidewalk construction.
Required Tools &Amp; Materials
Proper tools and quality materials determine success when building new paths. Using industry-grade equipment ensures precise results while cutting rework risks.
Essential Tools for Laying Asphalt Sidewalks
Start with these seven tools for efficient work:
- Plate compactor (6+ HP for 95% density)
- Asphalt rake with tempered steel teeth
- Lute for smoothing surfaces
- Laser level or transit for 1-2% slope grading
- Infrared thermometer (250-325°F ideal laying temps)
- Tamping bar for edge compaction
- Proctor hammer to test base stability
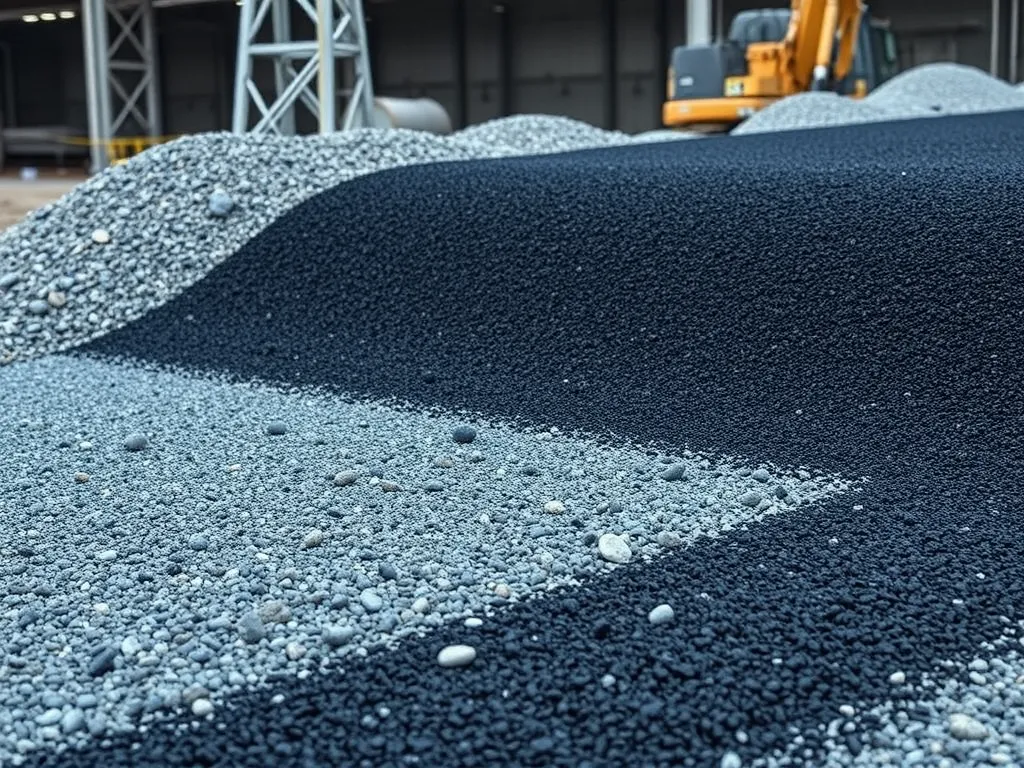
Materials for Base Preparation and Asphalt Paving
Quality materials prevent cracks and sinking. Use:
- Class 2 road base (3/4″ minus crushed rock)
- Geotextile fabric (4 oz/sq yd minimum)
- PG 64-22 binder for thermal stability
- Hot mix asphalt (HMA) with 1/2″ aggregate
- SS-1h tack coat (0.05 gal/sq yd application)
Hot mix costs $75-$150 per ton. Budget 1.5 tons per 50 sq ft for 3″ thick layers. Superpave mixes (common in northern states) resist freeze-thaw cycles better than standard HMA.
With tools prepped and materials sourced, focus shifts to precise execution. Next, we’ll break down each phase of the paving process from ground marking to final sealing.
Step-by-step Asphalt Sidewalk Installation
Follow these steps to create durable asphalt walkways that last 15-20 years with proper care.
Step 1: Marking the Sidewalk Area
Use wooden stakes and mason’s string to outline the sidewalk path. Check local codes for width requirements – most municipalities mandate 36-60 inches for pedestrian walkways. Spray paint works well for marking edges on grass or soil surfaces.
Step 2: Excavation & Soil Compaction
Remove soil to a depth of 8-12 inches using a shovel or mini-excavator. Compact the exposed subgrade with a plate compactor (95% Proctor density minimum). Slope the trench 2% away from structures for proper drainage.
Step 3: Installing Geotextile Fabric & Base Materials
Lay geotextile fabric over compacted soil to prevent weed growth and base contamination. Add 2-3 inches of coarse gravel (¾” angular aggregate works best) as the initial base layer. Overlap fabric seams by 12 inches for full coverage.
Step 4: Crushed Rock Layer Installation
Spread 4-6 inches of crushed rock (Class 5 or Item 4 base) across the fabric. Grade the material to maintain the planned slope and elevation. Leave 3 inches below final sidewalk height for asphalt thickness.
Step 5: Compacting the Base
Compact the base with a vibratory roller (1,500-2,000 lbs force) in 2-inch lifts. Perform three passes minimum per layer. Spray water lightly to improve compaction efficiency when needed.
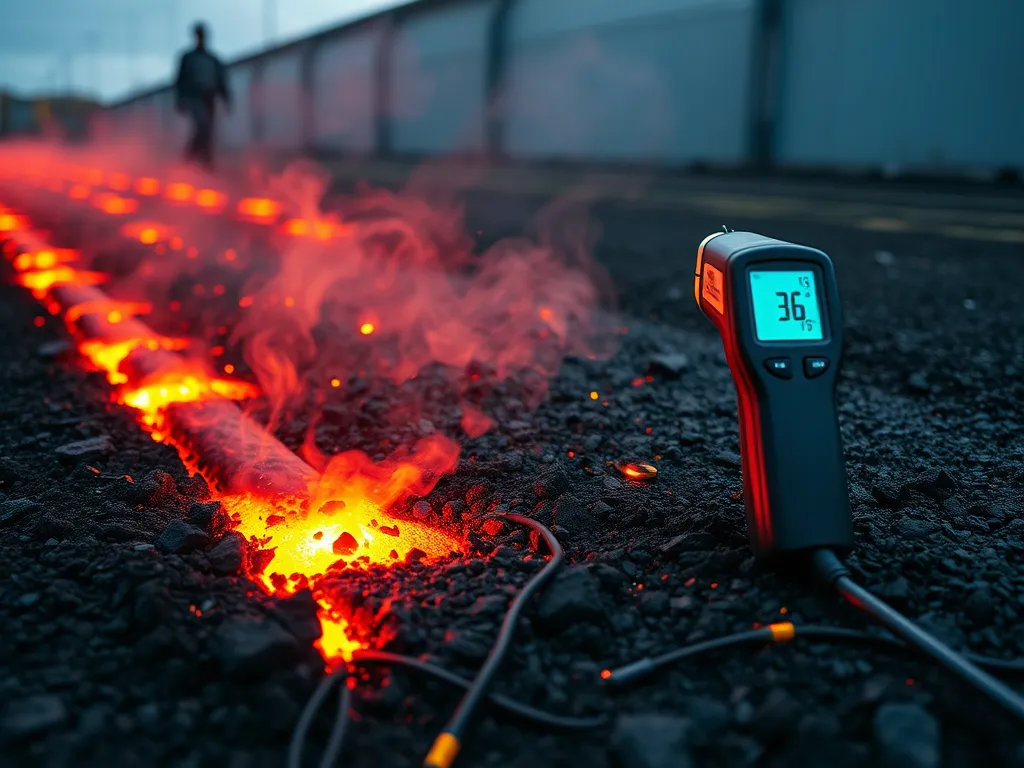
Step 6: Asphalt Laying Procedure
Pour hot mix asphalt at 275-300°F (135-149°C) onto the prepared base. Spread the material with a lute or asphalt rake to achieve 3-inch thickness. Work quickly – you have 15-20 minutes before the mix cools below 220°F.
Step 7: Final Compaction & Smoothing
Compact the surface with a 5-ton steel wheel roller within 30 minutes of placement. Make four passes minimum at 3 mph. Use a trowel to smooth edges and joints before the asphalt cools below 185°F.
Step 8: Curing & Sealing
Allow the asphalt to cure for 24-48 hours before foot traffic. Apply coal-tar emulsion sealant after 30 days (1 gallon per 100 sq ft). Re-seal every 3-5 years for maximum surface protection.
Proper base preparation ensures longevity, but challenges arise when working with existing concrete slabs.
Installing Asphalt Sidewalks Over Concrete
Existing concrete slabs offer viable foundations for new asphalt sidewalks if properly prepped. Overlaying eliminates full removal costs, reduces labor by up to 40%, and maintains structural stability. Follow these steps for lasting results when paving over concrete.
Evaluate Concrete Condition: Check for cracks wider than ¼” or uneven sections exceeding ½” height difference. These require grinding or patching before proceeding. Pressure-wash surfaces to remove debris, oil stains, or loose material.
Apply Tack Coat: Use PG 64-22 binder sprayed at 0.05–0.15 gallons per square yard. This sticky layer bonds new asphalt to old concrete, preventing slippage. Let it cure until tacky—usually 20–45 minutes depending on humidity.
| Material | Specification |
|---|---|
| Asphalt Thickness | Minimum 2″ compacted (3″ recommended for heavy traffic) |
| Compaction Density | 92–95% of maximum density (per ASTM D6925) |
Lay Hot Mix: Spread 300°F–350°F asphalt in single lifts using screed boards. Slope surfaces 2%–4% toward drainage points to prevent pooling. Compact immediately with vibratory rollers—3–5 passes achieve optimal density.
Overlaying costs $3–$7 per square foot versus $8–$15 for full demolition and replacement. Ensure expansion joints in the concrete align with new control joints in the asphalt to minimize thermal cracking.
Proper prep work sets the stage for smooth paving, but execution matters just as much. Even minor errors during installation can lead to costly repairs down the line.
Common Mistakes to Avoid
Avoiding errors during asphalt sidewalk construction ensures long-lasting results. Even small oversights can lead to cracks, pooling water, or uneven surfaces within months.
Poor Base Compaction
Skimping on base compaction causes sinking and cracks. Use a plate compactor or vibratory roller to achieve 95% Proctor density in the crushed stone layer. Test with a nuclear density gauge or sand cone test. Weak bases shift under weight, creating surface deformities.
Incorrect Slope for Water Runoff
Sidewalks need a 2% cross slope (1/4″ drop per foot) to prevent water damage. A 4-foot-wide walkway requires a 1-inch elevation difference edge-to-edge. Flatter slopes cause pooling; steeper grades create tripping hazards. Verify slope accuracy using a laser level during grading.
Ignoring Temperature Requirements
Asphalt must stay above 275°F during installation for proper binding. Lay mix between 275°F-300°F in ambient temperatures above 50°F. Cold asphalt hardens too fast, preventing compaction. Use infrared thermometers to monitor material heat. Postpone work if weather drops below 40°F.
Proper technique during installation directly affects long-term expenses. Let’s break down what factors influence the final price.
Cost Of Asphalt Sidewalk Installation
Installing asphalt sidewalks costs $3-$7 per square foot. This price covers materials, labor, and site prep. For a standard 4-foot-wide path, expect to pay $1,200-$2,800 for 100 linear feet. Hot mix asphalt (HMA) makes up 40-60% of total costs, priced at $80-$120 per ton. PG 64-22 binder grades work best for sidewalks in most climates.
Three factors drive costs: – Base depth: 4-6 inches of crushed stone (3/4″ aggregate) adds $0.50-$1.50/sq ft – Site access: Narrow spaces may need mini-pavers, increasing labor by 15-20% – Recycled content: Mixes with 20-30% RAP (reclaimed asphalt pavement) cut material costs by 10-25%
Permit fees range from $50-$300 based on local codes. Some cities require ADA-compliant slopes (1-2% cross-slope, 5% max ramp grade). Rentals add $150-$300/day for plate compactors or asphalt rollers. DIYers save 30-50% on labor but risk errors in mix temp (290-330°F) or compaction (92-96% density).
Pro tip: Schedule paving between May-September. Cold weather requires warm mix additives, adding $0.25-$0.40/sq ft. Get 3 quotes to compare crew rates ($45-$75/hour) and asphalt plant delivery fees ($100-$250 per load).
Proper planning keeps costs in check. Next, learn how project timelines affect your budget and workflow.
Time Required for Installation
Most residential projects need 3-5 days from start to finish. This includes base prep, paving, cooling, and curing. Larger jobs (500+ sq.ft) or complex layouts might extend to 7 days. Key factors influencing timelines:
- Project size: 150 sq.ft takes ~6 hours for base work + paving
- Weather: Rain delays base curing by up to two days
- Base condition: Unstable soil requires extra grading (adds 8-12 hours)
- Material temps: Hot mix cools faster, enabling same-day compaction
Breakdown by Phase
Base preparation: 40% of total time. Excavation, geotextile installation, crushed rock layers (6″ minimum), and compaction need 1-2 days. Paving: 25% of time. Laying 2-3″ thick asphalt mat takes 2-4 hours for typical drive paths. Curing: 35% of timeline. Fresh pavement needs 24-48 hours before foot traffic, longer if sealed.
Contractors using infrared heaters or cold mix can cut curing by 30%. For DIY jobs, rent vibratory plate compactors ($95/day) to speed up base work. Keep mix temps between 275-325°F during laying for proper binding.
Proper curing leads to stronger surfaces. Next, learn how regular upkeep extends pavement life beyond 15 years.
Maintenance Tips for Longevity
Protect your asphalt sidewalk investment with routine care. Proper upkeep extends lifespan beyond 15 years while preventing cracks, potholes, and surface degradation.
- Sealcoat every 2-3 years: Apply asphalt emulsion sealant at 0.15-0.25 gallons per square foot. This shields against UV rays, water penetration, and de-icing salts. Best applied when temps stay above 50°F for 24 hours.
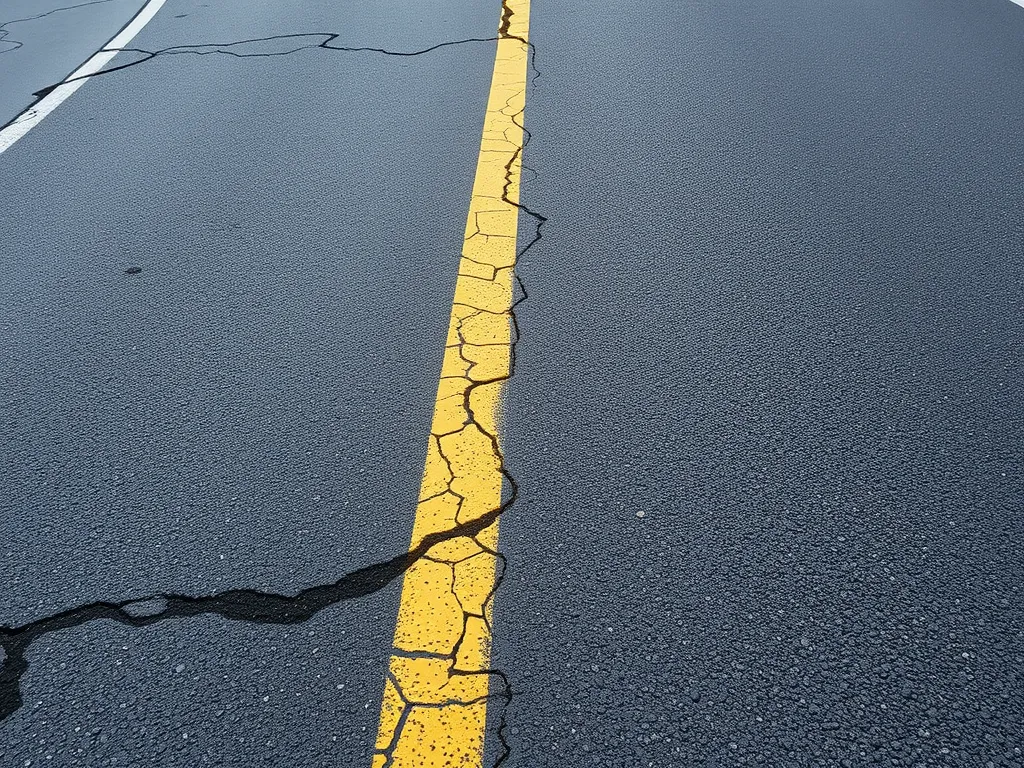
- Fill cracks immediately: Use rubberized crack filler for gaps under ½”. For larger fissures, employ hot-pour asphalt repair compounds. Left untreated, cracks let water erode the base layers.
- Clear debris weekly: Remove leaves, dirt, and standing water to prevent surface softening. Use stiff-bristle brooms – pressure washers exceeding 1,200 PSI can damage the asphalt binder.
- Avoid heavy loads: Asphalt sidewalks handle up to 300 PSI. Keep vehicles, construction equipment, and heavy machinery off the surface to prevent indentations.
Address drainage issues quickly. Standing water reduces asphalt’s load-bearing capacity by 40% within six months. Maintain a 2% cross slope (¼” per foot) to ensure proper runoff.
With seasonal temperature swings, inspect for alligator cracking or raveling. These indicate base failures requiring professional repairs. Annual infrared thermography scans can detect subsurface voids before they become visible.
Well-maintained surfaces stay functional for decades. Next, let’s review critical safety measures needed during installation work.
Safety Precautions During Installation
Workers must wear personal protective equipment (PPE) during asphalt sidewalk construction. Heavy-duty gloves, steel-toe boots, and ANSI-approved eye protection shield against hot mix asphalt (HMA) temperatures reaching 275-325°F. Heat-resistant clothing prevents burns when handling fresh pavement or operating machinery near the laydown area.
Maintain a 15-foot clearance around compaction equipment like vibratory rollers or plate compactors. Untrained personnel should never operate these tools—OSHA reports 12% of construction fatalities involve struck-by incidents. Use barricades or caution tape to mark active work zones, especially near roads or pedestrian pathways.
Monitor weather conditions to prevent heat exhaustion. Schedule tasks during cooler morning hours when summer temperatures exceed 85°F. Provide shaded rest areas and enforce mandatory water breaks every 30 minutes. First-aid kits stocked with burn gel and cool packs must be accessible on-site.
Ventilate areas where asphalt binders or sealants are applied. Fumes from polymer-modified PG 64-22 binders can cause dizziness without proper airflow. Gas-powered tools like asphalt saws require carbon monoxide detectors in enclosed spaces.
Following these protocols creates safer conditions for laying asphalt sidewalks. Next, let’s examine how eco-friendly practices align with responsible project execution.
Environmental Impact Of Asphalt Sidewalks
Asphalt sidewalks have clear earth benefits. The mix uses recycled asphalt pavement (RAP) – old pavement ground into new mix. RAP cuts landfill waste by 20-30% per project. It also lowers the need for new raw rock and bitumen.
Proper install methods boost eco perks. A 4-inch base of crushed rock lets rain soak into soil. This reduces storm drain loads. Permeable bases prevent water pooling and soil loss.
Heat matters. Dark asphalt soaks up sun, raising local temps. Using light-colored sealcoats or adding cool-roof tech can lower this “heat island” effect by up to 10°F.
New plant tech helps too. Warm-mix asphalt needs 50°F less heat than standard hot-mix. This cuts fuel use by 20% and fumes during install. PG binders (made for local climates) last longer, needing fewer fixes over 15-20 years.
Green sealants matter. Low-VOC options keep air clean. Oil-based sealers release more toxins – water-based types are safer for plants and streams.
Smart paving choices make asphalt walks earth-smart from base to surface. Next, see how design options let your walk match your style.
Aesthetic Customization Options
Asphalt sidewalks offer more style choices than most think. Mix in color dyes during paving for deep reds, greens, or browns. Add 5-8% iron oxide pigments to hot mix for bold shades. Costs rise $1-$3 per square foot but boost curb appeal.
Surface Textures
Stamp patterns into warm asphalt for brick, slate, or stone looks. Use polyurethane molds at 250°F-300°F. Roller-compact edges first to lock shapes. Textures add slip resistance but need resealing every 2-3 years.
Borders & Edging
Frame walks with bricks, pavestones, or concrete strips. Set edging 1-2 inches above asphalt to block soil creep. Space metal stakes every 4 feet for firm holds. Borders cut weed growth by 40% and add clean lines.
| Option | Cost Range | Key Benefit |
|---|---|---|
| Color Dyes | $1-$3/sq ft | Unique looks |
| Stamped Texture | $4-$8/sq ft | Slip resistance |
| Stone Borders | $6-$12/linear ft | Edge protection |
Seal Coat Finishes
Pick glossy, matte, or tinted sealers. Gloss boosts color but shows cracks. Matte hides flaws better. Apply 2 coats 24 hours apart. Use spray rigs for even cover—1 gallon seals 80-100 sq ft.
Mix in glass beads or rubber grit for night glow or extra grip. Spread 1 lb per 100 sq ft during sealing. These tweaks cost $0.50-$1.50 extra per square foot but boost safety.
Ready to make your walk stand out? Dial in colors, textures, and edges to match your space. Next up: get quick answers to top asphalt questions.
Also See: How to Lay Asphalt Driveway: A Simple DIY Guide
Frequently Asked Questions (FAQs)
What Do You Put Down Before Installing Asphalt Sidewalks?
Before installing asphalt sidewalks, it is essential to lay down a geotextile fabric to prevent soil contamination and weed growth. This is followed by a base layer of crushed stone or gravel to provide stability and proper drainage.
How Thick Should an Asphalt Walkway Be?
An asphalt walkway should ideally be 2-3 inches thick after compaction. For areas with higher foot traffic, a thickness of up to 3.5 inches may be recommended for additional durability.
How Do You Install Asphalt Sidewalks on Concrete?
To install asphalt on concrete, you must first evaluate the concrete’s condition and clean the surface. Apply a tack coat of binder to ensure adhesion, and then lay a hot mix asphalt layer that is at least 2 inches thick, ensuring proper compaction immediately after placement.
What is the Asphalt Paving Process?
The asphalt paving process involves several steps: preparing the site, applying a tack coat, laying down hot mix asphalt, spreading and leveling the asphalt, followed by compaction using rollers to achieve a smooth, durable surface.
What is the Cost Of Asphalt Installation?
The cost of asphalt installation typically ranges from $3 to $7 per square foot, encompassing both materials and labor. Additional factors such as base preparation, project size, and site conditions can influence the final price.
How Should I Maintain My Asphalt Sidewalk for Longevity?
To maintain your asphalt sidewalk, seal it every 2-3 years, fill any cracks promptly, keep it clear of debris, and avoid heavy loads on the surface. Regular inspections can help identify early signs of wear or damage.
Closing Thoughts
Installing asphalt sidewalks offers a durable, cost-effective solution for enhancing outdoor spaces. With proper planning, the right tools, and a solid understanding of the installation steps, you can create long-lasting walkways that stand up to daily use.
Remember to pay attention to local regulations and design your layout carefully. Avoid common pitfalls, like poor base compaction and incorrect slope, to ensure a successful project. Regular maintenance will further extend the life of your asphalt sidewalks.
For further information and resources related to asphalt and construction, check out Asphalt Calculator USA.

