How to Get Your Property Ready for a Smooth Asphalt Driveway
Published on: January 17, 2026 | Last Updated: April 14, 2025
Written By: George Voss
Assessing and preparing your site for an asphalt driveway requires evaluating drainage patterns, soil stability, and utility lines while planning proper grading and sub-base installation. This process includes six core steps: site analysis (slope, soil type, buried utilities), debris removal, excavation to 8-12 inches, compacting soil to 95% Proctor density, adding 6-8 inches of crushed stone base, and final grading at 2% slope. Homeowners can handle basic tasks like clearing vegetation or marking sprinkler lines, but professionals should manage soil testing or heavy equipment work.
This guide breaks down driveway prep into actionable phases. Learn to identify poor drainage zones needing French drains, choose between Class 5 gravel or recycled concrete base materials, and avoid cracks from inadequate compaction. We’ll compare DIY soil prep ($3-$7 per sq ft) versus pro services ($7-$15 per sq ft), review 20×20 driveway costs ($2,800-$4,500), and share tips to protect tree roots during excavation.
Contents
- Assessing Your Site for an Asphalt Driveway
- Assessing Your Site for an Asphalt Driveway
- Preparing Your Site for Asphalt Installation
- Cost Considerations for Asphalt Driveway Installation
- DIY Vs Professional Site Preparation
- Environmental Considerations for Asphalt Projects
- Frequently Asked Questions
- Final Words
- Additional Resources for You:
Assessing Your Site for an Asphalt Driveway
Assessing your lot forms a foundation for lasting asphalt work. A full analysis spots issues that might impact structural quality or void warranties. Missing this step risks cracks, pooling water, or sinking within 3-5 years.
Key Factors to Evaluate During Site Assessment
Four main factors dictate if your lot can support asphalt long-term:
Existing Drainage Patterns and Slope Analysis
Track how water flows across your lot during rain. Aim for a 2% minimum slope (1/4″ per foot) away from buildings. Use a laser transit to map high/low spots. Poor drainage washes away sub-base materials at 1.5″ per hour flow rates.
Soil Type and Stability Evaluation
Clay soils swell with moisture, pushing up asphalt. Sandy soils shift under load. Drive a soil probe 18″ deep to check composition. Add 6-8″ of compacted limestone sub-base if native soil lacks bearing capacity below 95% Proctor density.
Utility Line Identification and Marking
Call 811 to flag buried gas, water, or power lines. Installations need 36″ clearance from marked utilities. Cutting a fiber optic line costs $3,000-$10,000 in repairs plus project delays.
Traffic Flow and Space Requirements
Plan for garbage trucks (12,000 lb axle loads) or RVs (40’ turning radius). Allow 10’ width for single-car pads, 20’ for two-car. Mark parking zones with spray paint to visual layout options.
Tools Needed for Effective Site Assessment
Gauging your lot right demands specific instruments:
Builder’s Level and Soil Probe
A builder’s laser level ($150-$400) maps slopes within 1/8″ accuracy. Pair with a 36″ soil probe ($45-$75) to test compaction. Look for uniform resistance when pushing into ground—soft spots signal unstable zones.
Survey Flagging Tape and Measuring Tools
Mark utility locations with bright flagging tape. Use a 100’ steel tape ($22) or measuring wheel ($65) to plot dimensions. Note all findings on grid paper for contractor review.
With your lot fully mapped, shifting focus to physical groundwork comes next.
Assessing Your Site for an Asphalt Driveway
Proper site assessment determines your driveway’s longevity. Missing critical factors now leads to cracks, potholes, or drainage failures within 12-24 months.
Key Factors to Evaluate During Site Assessment
Four elements dictate asphalt performance: water flow, soil strength, buried utilities, and usage demands. Ignoring one risks costly repairs.
Existing Drainage Patterns and Slope Analysis
Asphalt needs a 2% minimum slope (1/4″ per foot) to shed water. Use a builder’s level to map runoff paths. Pooling water softens subgrades, causing premature ruts. Test percolation rates: soils absorbing less than 0.5″ per hour require drainage systems.
Soil Type and Stability Evaluation
Clay soils expand when wet, requiring 6-8″ excavation. Sandy soils need geotextile fabric to prevent washouts. Measure California Bearing Ratio (CBR): values below 20 require sub-base reinforcement. Compact native soil to 95% Proctor density before adding aggregates.
Utility Line Identification and Marking
Call 811 to mark gas, water, and electrical lines 3 days before digging. Buried utilities typically sit 18-24″ deep. Flag locations with pink survey tape. Damaging lines during excavation adds $3,000-$10,000 in repair costs.
Traffic Flow and Space Requirements
Single-car driveways need 10′ width; double-car layouts require 20′. Plan 12′ turning radii for trucks. Heavy vehicles demand 4″ asphalt thickness versus 2.5″ for passenger cars. Mark parking zones with orange flags during assessment.
Tools Needed for Effective Site Assessment
Professional-grade tools provide precise data for durable driveways. Homeowner-grade equipment often misses critical details.
Builder’s Level and Soil Probe
A builder’s level measures slope to 1/8″ accuracy. Pair it with a 36″ soil probe to check moisture content and compaction depth. Probes detect soft spots needing 6-12″ of crushed stone fill.
Survey Flagging Tape and Measuring Tools
Use pink flagging tape for utilities, blue for water flow paths. A 100-foot steel tape measures exact driveway dimensions. Laser distance meters verify clearances within 1/4″ tolerance.
With your site fully assessed, the next phase transforms raw land into a stable base. Proper grading and sub-base installation separate 15-year driveways from those failing in half that time.
Preparing Your Site for Asphalt Installation
Proper groundwork determines asphalt driveway performance. Follow these steps to create a stable foundation that lasts 15-20 years with minimal cracking.
Step-by-step Site Preparation Process
Every inch matters when building asphalt driveways. Use laser-guided tools for precision and industry-grade materials for lasting results.
Clearing the Area: Removing Debris and Vegetation
Strip all organic matter within 6 feet of the planned edges. Roots and topsoil hold moisture – major causes of base failure. Rent a skid-steer loader for large projects or use shovels for areas under 500 sq ft.
Excavation and Soil Compaction Requirements
Dig 8-12 inches below final pavement height. Compact native soil to 95% Proctor density using plate compactors (4,000-6,000 lbf models). Test with nuclear density gauges – target 98% for clay-heavy soils.
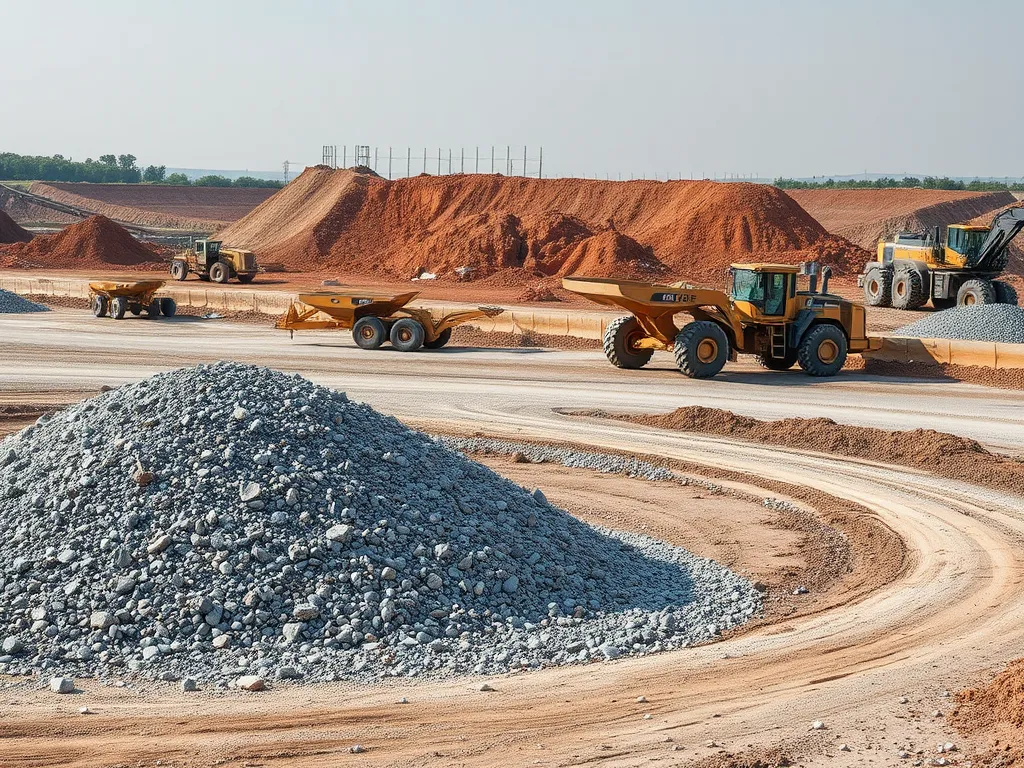
Installing Proper Sub-Base Materials
Lay 6-8 inches of crushed stone (MDOT 22A or equivalent). This layer handles 80% of load distribution. Geotextile fabrics boost strength by 40% in sandy soils.
Choosing Aggregate Materials for Stability
Select angular stones (3/4-inch minus) that lock together. Avoid rounded gravel – it shifts under pressure. Mix 60% crushed granite with 40% limestone for optimal compaction in freeze-thaw zones.
Drainage System Installation and Grading
Slope the base 1-2% away from structures. Install perforated PVC pipes (4-inch diameter) along edges if groundwater levels sit above 18 inches. Top with 2-inch washed gravel beds for filtration.
Common Preparation Mistakes to Avoid
Cut repair costs by 75% with proactive error prevention. These oversights cause 90% of early asphalt failures.
Inadequate Soil Compaction
Skipping compactor passes creates air pockets. Expect 1/2-inch settlement per uncompacted foot – leads to potholes in 3-5 years.
Neglecting Utility Line Marking
Call 811 before digging, but also scan for irrigation lines and gas meters. Hitting buried cables adds $2,500+ to project costs.
Improper Slope Alignment
Driveways need 2% cross-slope – that’s 1/4-inch drop per foot. Use builder’s levels to check grade. Standing water reduces asphalt life by 40%.
With your site fully prepped, let’s examine how material choices and labor rates impact total installation costs.
Also See: Asphalt Cost-effectiveness in Commercial Settings
Cost Considerations for Asphalt Driveway Installation
Planning costs for a 20×20 asphalt driveway requires balancing site conditions with material needs. Prices swing from $3,000 to $7,500 depending on prep work quality and local rates.
Factors Affecting 20×20 Driveway Costs
A 400-square-foot driveway costs $2.50-$4.50 per square foot for asphalt alone. Site prep adds $1.50-$3.00 per square foot. Key factors:
- Sub-base depth: 6-8 inches of crushed stone adds $800-$1,200
- Soil fixes: Clay soils need $500-$2,000 in stabilization
- Drainage work: Adding catch basins or French drains costs $1,000-$3,000
- Slope adjustments: Regrading steep sites adds $1.00-$1.50 per square foot
Budgeting for Sub-base Materials and Labor
Allocate 40% of your budget to sub-base and labor. A proper base uses 6-8 inches of compacted aggregate. Common options:
| Material | Cost per Ton | Depth Coverage |
|---|---|---|
| Crushed stone (3/4″) | $18-$25 | 80 sq ft at 4″ |
| Recycled concrete | $10-$15 | 70 sq ft at 4″ |
| Gravel (Class 5) | $12-$18 | 90 sq ft at 4″ |
Labor runs $45-$75 per hour for excavation, grading, and compaction. Pro tip: Rent a plate compactor ($100/day) if doing DIY base prep to achieve 95% compaction density.
Smart site assessment during prep work cuts surprises. Measure twice, budget once. Now let’s explore when to tackle prep yourself versus hiring asphalt pros.
DIY Vs Professional Site Preparation
Choosing between self-managed prep work versus hiring experts depends on project complexity, budget, and skill level. Let’s break down both options.
When to Handle Preparation Yourself
Homeowners with basic construction skills might manage prep for small projects. Focus on flat terrain with stable soil—sandy or gravelly types work best. You’ll need tools like a shovel, hand tamper, or rented plate compactor (3,000–5,000 lbs force). Tasks include clearing debris, minor grading (1-2% slope), or compacting existing sub-base. Costs drop by $2–$4 per square foot compared to hiring pros. Note: Skip DIY if utility lines (<6” deep) or poor drainage exists.
Benefits Of Hiring Asphalt Professionals
Contractors bring specialized equipment like laser-guided graders, vibratory rollers (10+ tons), or skid-steer loaders. They handle complex tasks—soil stabilization (testing R-values), installing geotextile fabric, or resolving standing water via French drains. Permitting support ensures compliance with local codes (e.g., 6” minimum sub-base thickness). Though labor runs $50–$75 hourly, errors like improper slope (leading to pooling) or weak compaction (80%+ density needed) get avoided. Pro tip: Many firms bundle prep with paving for $8–$15 per square foot total.
| Factor | DIY | Professional |
|---|---|---|
| Equipment Costs | $200–$500 rentals | Included |
| Time Investment | 3–5 days | 1–2 days |
| Soil Fixes | Limited | Lime stabilization, over-excavation |
Next, let’s explore how eco-conscious methods during prep work protect your property’s ecosystem.
Environmental Considerations for Asphalt Projects
Balancing driveway functionality with environmental care ensures long-term performance while minimizing ecological impact. Proper planning protects both your investment and local ecosystems.
Eco-friendly Site Preparation Practices
Opt for recycled asphalt pavement (RAP) in sub-base layers—this material contains 20-30% reclaimed binder and aggregates. Use permeable pavers along edges to manage stormwater runoff rates below 0.5 cfs (cubic feet per second). For soil stabilization, select lime or cement-based additives instead of chemical hardeners when working with clay-heavy soils. Track equipment fuel efficiency: newer compactors emit 40% fewer particulates than older models.
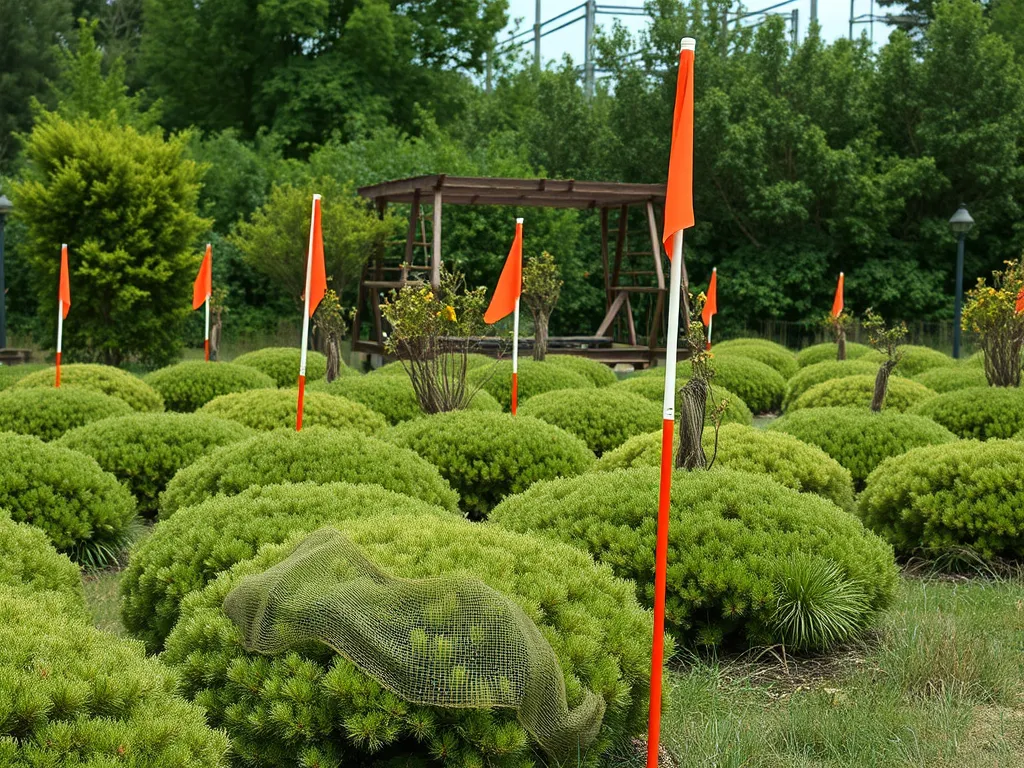
Protecting Surrounding Landscaping
Install silt fences 6 feet from tree driplines during grading to prevent root zone contamination. For mature shrubs, wrap stems with burlap before excavation to shield against debris. Designate a 10-foot buffer zone around wetlands using survey flags—this avoids fines from disturbing protected habitats. When trimming near plants, use hand tools instead of herbicides to maintain soil pH levels between 6.0 and 7.5.
With these protections established, let’s examine cost factors tied to material choices and labor demands.
Frequently Asked Questions
How Do You Properly Prepare Ground for Asphalt?
Proper ground preparation for asphalt involves several steps, including removing any vegetation and debris, ensuring adequate soil compaction, and installing a stable sub-base layer. The ground should be excavated to the appropriate depth, compacted to 95% Proctor density, and properly graded to ensure effective drainage.
What Material Should Be Placed Under Asphalt?
A well-constructed sub-base is crucial for the durability of an asphalt driveway. It is typically recommended to use 6-8 inches of crushed stone or gravel, which provides excellent drainage and load-bearing capabilities. The aggregate should consist of angular stones that interlock for stability.
What’s Included in Professional Site Preparation?
Professional site preparation generally encompasses a full assessment of the site, excavation of the existing soil, compaction, installation of appropriate sub-base materials, proper grading, and ensuring that all necessary drainage systems are in place. Additionally, professionals often conduct tests on soil stability and implement effective measures to avoid future issues.
How Much Does a Standard Driveway Installation Cost?
The cost of a standard driveway installation can vary widely based on several factors, including size, materials used, complexity of the site, and local labor rates. For a typical 20×20 asphalt driveway, costs can range from $2,800 to $4,500, which includes material and labor for proper site preparation and asphalt laying.
Final Words
Preparing your site for an asphalt driveway involves careful assessment and meticulous planning. Key factors like drainage, soil stability, and utility locations play a vital role in ensuring the longevity of your driveway.
Following the right preparation steps—such as clearing debris, compaction, and installing a proper sub-base—will set the foundation for a durable surface. Avoiding common mistakes can save you time and money in the long run.
Whether you choose a DIY approach or hire professionals, being informed about the process will lead to better outcomes. Remember to consider environmental impacts, ensuring that your project is eco-friendly.
For additional insights into asphalt projects and tools, visit Asphalt Calculator USA.
Additional Resources for You:
- American Association of State Highway and Transportation Officials (AASHTO). (2008). Mechanistic-Empirical Pavement Design Guide (MEPDG). Washington, DC: AASHTO.
- How to Build an Maintain an Asphalt Driveway for Your Home – This Old House
- 11 Simple Steps To Help With Asphalt Driveway Installation

