How to Add Decorative Elements to Asphalt: Transform Your Surface With Style
Published on: January 18, 2026 | Last Updated: April 14, 2025
Written By: George Voss
Adding decorative elements to asphalt involves using paints, overlays, borders, or embedded materials to upgrade plain pavement into visually striking surfaces. Unlike standard asphalt’s flat black appearance, decorative techniques let you add color accents, geometric patterns, or nature-inspired textures while maintaining durability. Homeowners and businesses use these methods to boost curb appeal, define parking areas, or match architectural themes. Popular options include asphalt-specific epoxy paints (lasting 3-5 years), stamped overlays with stone textures, or borders using brick pavers secured with polymer adhesives.
This guide covers surface prep, material choices, and step-by-step methods for DIY or pro projects. Learn how to clean asphalt with power washers (1,500-3,000 PSI recommended), apply UV-resistant stains, or install paver edging with 2-inch concrete anchors. Discover cost-effective options like recycled glass aggregates ($15-$30 per bag) or eco-friendly soy-based sealants. We’ll explore design trends, installation tips from industry standards like ASTM D6628 for asphalt paints, and maintenance practices to prevent fading or cracking.
Contents
Preparing the Asphalt Surface
Proper prep sets the stage for lasting asphalt decor. Skip this step, and designs may peel, fade, or crack within months.
Cleaning and Repairing Existing Asphalt
Start with a deep clean. Use a pressure washer (1,800-3,200 PSI) to blast dirt, oil spots, and loose grit. For old driveways, check for cracks wider than 1/4 inch. Fill gaps with rubberized asphalt crack filler—it bonds better than standard tar. Let repairs cure 24 hours. Sweep the area with a stiff broom to remove debris. For oil stains, scrub with a mix of trisodium phosphate (1 cup per gallon) and rinse.
Ensuring Proper Adhesion for Decorative Features
Create a grip-friendly base. Rent a floor grinder to rough up smooth asphalt—aim for a texture like 80-grit sandpaper. Apply a bonding agent like asphalt primer (3 gallons per 100 sq ft) with a roller. Let it get tacky (20-30 mins). Test with a thumb press—if it sticks but pulls clean, it’s ready. Work in temps between 50-90°F for best glue hold. Avoid damp spots; moisture blocks paint or overlays from locking in.
With the surface prepped, you’re set to add color, patterns, or textures. Next up: turning blank asphalt into art with smart paint picks and pro methods.
Decorative Painting Techniques
Transform plain asphalt with color. Use paints made for blacktop to boost curb appeal. These methods last 2-5 years with care.
Using Asphalt-specific Paints and Stains
Pick paints labeled for asphalt. Acrylic or latex types work best. Look for UV guard to stop fade. Stains seep into the surface. They show the blacktop texture but add tint. Brands like Rust-Oleum or Sherwin-Williams offer options in 20+ shades.
How to Apply Decorative Paint for Longevity
Clean the slab first. Fix cracks with filler. Use a brush or roller for thin coats. Let each layer dry 4-6 hours. Add a clear sealant after. Re-seal each year. Avoid traffic for 24 hours post-paint.
Stenciling Designs and Patterns
Stencils add flair fast. Use plastic or cardboard cutouts. Secure with tape or weights. Try shapes like leaves, stars, or waves. Pair colors for bold looks.
Step-by-Step Guide to Stenciling on Asphalt
1. Sweep the area. 2. Lay stencil flat. 3. Spray adhesive on the back. 4. Dab paint with a foam brush. 5. Lift stencil straight up. 6. Let dry 3 hours. Repeat for linked patterns.
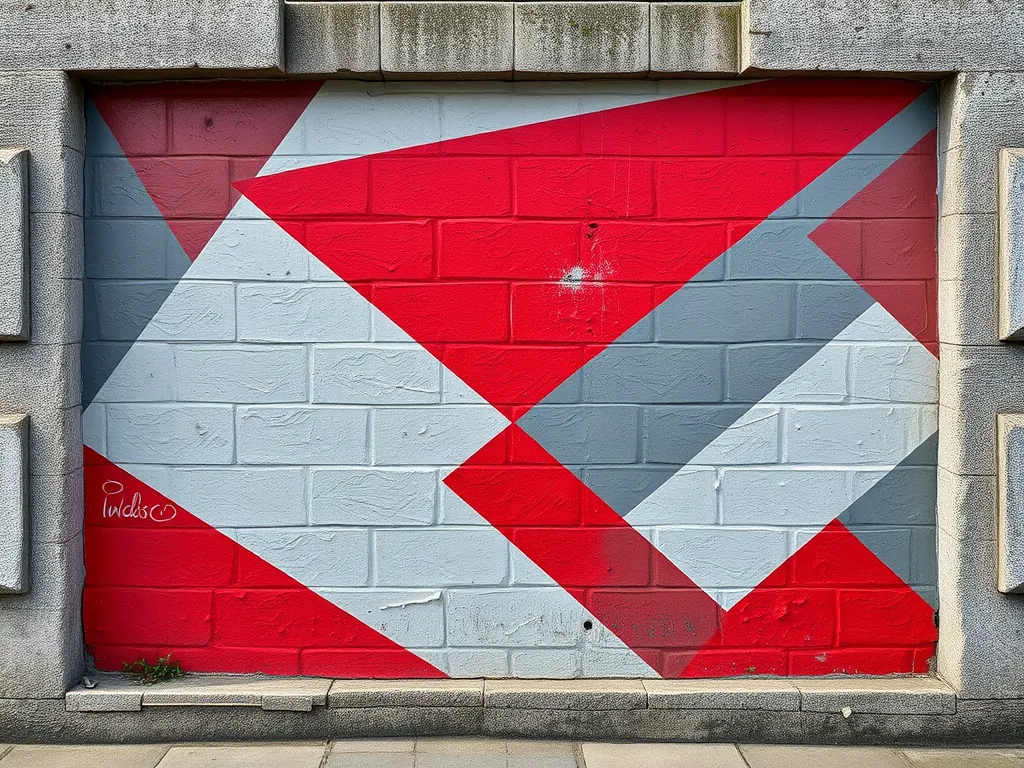
Creating Stripes and Geometric Patterns
Mark lines with chalk or tape. Use a chalk line tool for straight edges. Try chevrons, grids, or curves. Space lines 6-12 inches apart. For angles, set a guide at 45 degrees. Paint two tones (like gray and red) for depth.
Once patterns are set, borders frame the space. Stone or brick edges boost style while keeping decor in place.
Adding Borders and Edging
Frame your asphalt surface with structured edges that elevate its visual appeal. Borders transform plain pavement into defined spaces, blending function with decorative asphalt elements. Choose materials that complement your landscape while resisting shifting or cracking under load.
Installing Stone or Paver Borders
Granite cobblestones or concrete pavers create durable boundaries. Excavate a 6″-deep trench along the asphalt edge, fill with 4″ of compacted gravel, then set stones on a 1″ sand bed. Secure with concrete footings on the soil side. Use polymeric sand to lock joints while allowing drainage. Expect costs between $8-$15 per sq ft installed.
Incorporating Brick Accents Along Edges
Clay or concrete brick edging adds warmth to asphalt driveways. Cut a 2″-deep channel into the pavement edge using a concrete saw. Dry-fit bricks with ½” gaps, then anchor with construction adhesive rated for asphalt (like Henry 673 TropiCool). Space bricks every 36″ for thermal expansion. Budget $4-$8 per linear foot for materials.
DIY Tips for Anchoring Items to Asphalt
Use wedge anchors for heavy decor: drill ¼” pilot holes, insert sleeves, torque bolts to 15-20 ft-lbs. For lighter features, apply epoxy adhesives like Loctite PL 500 in zigzag patterns. Pre-heat asphalt to 50°F+ for better bond. Temporary weights (sandbags) prevent shifting during 24-hour cure times. Space anchors every 12″-16″ on linear elements.
Once borders define your space, explore decorative asphalt overlays to transform entire surfaces with color and texture.
Also See: Asphalt Project Planning Considerations for Longevity
Decorative Asphalt Overlays
Decorative asphalt overlays offer a cost-effective way to upgrade existing surfaces. These 1-2 inch layers bond to old asphalt while adding visual interest. Overlays use modified binders like PG 64-22 or polymer-modified bitumen for flexibility. Costs range from $3–$7 per square foot installed.
Types Of Overlays for Enhanced Aesthetics
Choose overlays based on design goals and traffic needs:
- Stamped overlays: Create brick or slate textures using polyurethane molds ($4.50–$6.50/sq ft)
- Colored overlays: Integrate iron oxide pigments (red, tan, gray) into hot-mix asphalt
- Exposed aggregate overlays: Wash surface to reveal stones like quartz or granite
- Microsurfacing: Polymer-enhanced slurry with ceramic beads for subtle sparkle
Design Ideas for Decorative Asphalt Overlays
Combine techniques for custom results:
- Herringbone patterns for driveways (20° angles improve traction)
- Borders with contrasting aggregates (1/4″ pea gravel vs. 3/8″ crushed stone)
- Medallions at entryways using pre-cast asphalt stamps
- Fade-resistant color blends (60% gray base + 40% terra cotta accents)
How to Apply a Decorative Asphalt Overlay
Key steps for professional-grade results:
- Clean existing asphalt with a pressure washer (3000 PSI minimum)
- Apply Tack Coat CRS-2P emulsion at 0.05 gal/sq yd
- Pour overlay mix at 300°F, spread with infrared heater for even bonding
- Stamp/texture within 15 minutes using roller molds or hand tools
- Cure for 24–48 hours before sealing with acrylic-based sealant
For DIY projects, consider cold-mix asphalt overlays with color additives like ColorPave FGS. These cure in 4–6 hours at 50°F+. Use steel trowels for smooth edges and grooving tools for drainage slopes (1/4″ per foot).
Overlays pair well with natural materials – explore embedded stones or etched patterns next to blend organic textures with asphalt’s durability.
Incorporating Natural Elements
Bring nature into asphalt designs by embedding raw materials or carving earth-inspired patterns. These techniques blend urban surfaces with organic textures while maintaining pavement durability. Let’s explore two methods for merging asphalt decor with natural elements.
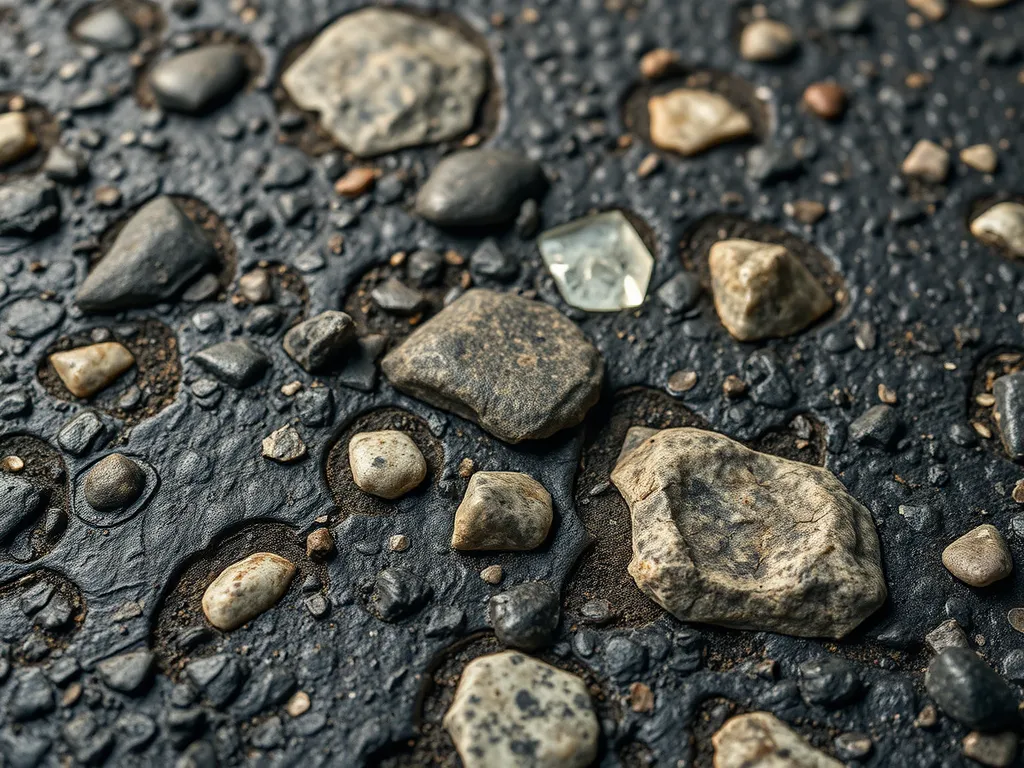
Embedding Seashells or Textured Materials
Crushed seashells, smooth river stones, or recycled glass chips create tactile decorative features for asphalt driveways. First, clean the surface with a power washer (1,500-3,000 PSI) and let it dry. Apply a polymer-modified sealant—a flexible adhesive that withstands temperature shifts from -20°F to 120°F. Press materials into the sealant at 2-4 lbs per sq ft, spacing them 1-3 inches apart. Finish with a UV-resistant clear coat to prevent yellowing. Costs average $3-$8 per sq ft for DIY projects.
Using Etching for Organic Patterns
Etching tools like angle grinders or chisels carve leaf veins, wave motifs, or fractal designs into cured asphalt. Work on surfaces aged 6-12 months for optimal hardness. Use a template spray-painted onto the asphalt as a guide. Cut 1/8″-1/4″ deep grooves, avoiding aggregate displacement. Seal etched areas with coal-tar emulsion—a durable protective layer resisting oil and water penetration. This method adds decorative designs to asphalt without compromising its 20+ year lifespan when properly maintained.
Ready to merge practicality with artistry? Next, we’ll explore how lighting and custom branding elevate decorative asphalt from functional to unforgettable.
Functional and Aesthetic Additions
Elevate plain asphalt by merging style with purpose. These upgrades boost curb appeal while solving common surface challenges – all without sacrificing durability.
Adding Monograms or Custom Logos
Thermoplastic materials offer the sharpest custom designs for driveways or commercial lots. Applied at 300-350°F, these polymer-based sheets bond permanently to asphalt. Pre-cut templates create family initials, sports team emblems, or corporate branding. Expect costs between $15-$40 per square foot installed. Seal coated surfaces hold designs 8-12 years before refresh.
Integrating Lighting for Visual Appeal
Solar-powered LED strips or recessed fixtures transform asphalt after dark. Install path lights every 6-8 feet along driveways using concrete anchors. For new builds, embed glow-in-the-dark aggregate during paving – it absorbs sunlight and emits soft light for 6+ hours. Low-voltage systems (12-24V) prevent tripping hazards while illuminating walkways.
Combining Asphalt With Patio Pavers
Break up large asphalt areas with stone or brick insets. Cut 2″ deep channels into cured pavement, then set pavers on a 4″ crushed stone base. Use polymeric sand to lock joints – it resists weeds better than regular sand. This hybrid approach reduces heat islands by 15-20°F compared to full asphalt coverage.
Looking to balance beauty with eco-smart choices? The next section explores sustainable materials for decorative asphalt projects.

Environmental Considerations
Decorative asphalt projects gain value when paired with eco-conscious choices. Balancing aesthetics with environmental responsibility ensures lasting visual impact without harming ecosystems.
Eco-friendly Paints and Sealants
Opt for low-VOC (volatile organic compounds) or water-based paints designed for asphalt surfaces. Brands like GreenSeal or Eco-Stain offer hues meeting LEED standards, emitting 50% fewer VOCs than conventional options. These formulas bond to bitumen without cracking, maintaining air quality during application. For sealants, soy-based or acrylic blends provide UV protection while allowing 90%+ rainwater permeability—critical for reducing runoff in parking lots or driveways.
Sustainable Materials for Decorative Features
Incorporate recycled or locally sourced elements to cut carbon footprints:
- Crumb rubber borders: Made from 80% recycled tires, these flexible edging options resist frost heave.
- Reclaimed glass aggregates: Add iridescent textures to overlays at $12-$18 per square foot.
- Bamboo or composite lumber: Use for planters or bench bases along paths, lasting 15+ years with minimal upkeep.
Natural stone or gravel accents boost permeability by 40%, aligning with SITES certification goals for stormwater management.
Choosing green materials not only elevates design but supports circular economies. These eco-conscious choices set the stage for tackling common questions about installation and durability in the next section.
FAQs: Adding Decorative Elements to Asphalt
How to Anchor Decorations Securely to Asphalt?
To anchor decorations securely to asphalt, use wedge anchors for heavier items or epoxy adhesives for lighter features. For heavy decorations, drill pilot holes, insert sleeves, and torque bolts according to specifications. For lighter items, apply epoxy adhesives in a zigzag pattern. Ensure the asphalt is preheated to at least 50°F for better bonding. Temporary weights can help hold items in place while the adhesive cures.
Is a Decorative Asphalt Overlay Worth the Investment?
Yes, a decorative asphalt overlay can be worth the investment as it enhances the aesthetic appeal of your asphalt surfaces and can be a cost-effective alternative to complete replacement. Overlays can transform the look of old pavement while providing additional protection against wear and tear, typically lasting several years with proper maintenance.
What Does Baking Soda Do to Asphalt Surfaces?
Baking soda is commonly used as a cleaning agent. It can help to neutralize oil stains or grease on asphalt surfaces. However, it is not typically recommended as a treatment for asphalt itself, and it’s best to use specialized asphalt cleaners for optimum results.
Can I DIY Decorative Elements on an Existing Driveway?
Yes, you can DIY decorative elements on an existing driveway. Many techniques, such as decorative painting, stenciling, and installing borders, can be done by homeowners with the right tools and materials. Just ensure you follow the proper preparation and application instructions to achieve a durable and aesthetically pleasing result.
Closing Thoughts
Transforming asphalt surfaces with decorative elements not only enhances curb appeal but also adds personal flair. From vibrant paints to elegant borders and functional accents, the possibilities are endless. Start by preparing your surface correctly to ensure a lasting finish. Explore various painting techniques, consider overlays for a fresh look, and integrate natural materials for a unique touch.
Utilizing eco-friendly products aligns your decorative efforts with sustainable practices, minimizing environmental impact. Remember to anchor decorations securely and invest wisely in features that elevate your space. With these strategies, you’ll achieve impressive results that meet aesthetic and functional needs.
For more insights and tools to help you with your asphalt projects, visit Asphalt Calculator USA.
Additional Resources for You:
- Transportation Research Board (TRB, Peer-Reviewed Research & Circulars)
- Asphalt and Art: Integrating Decorative Elements On Residential Driveways and Backyard Oasis Commercial Asphalt, Parking Lot Paving + Best in Pinellas! Anderson & Sons Asphalt of Pinellas
- Making Your Asphalt Look More Attractive – Elite Paving
- Durable and decorative – Asphalt magazine
- 30 Asphalt Driveways ideas

