Dos and Don’ts Of Using an Asphalt Infrared Heater
Published on: November 22, 2025 | Last Updated: April 14, 2025
Written By: George Voss
An asphalt infrared heater uses infrared radiation to heat asphalt surfaces for repairs like potholes or cracks, offering faster results than traditional methods. Proper use requires knowing key dos (surface preparation, temperature monitoring at 300°F–350°F, wearing fire-resistant gloves) and don’ts (avoiding overheating, skipping safety checks). Unlike open-flame tools, these heaters distribute heat evenly but demand precise control to prevent surface damage or fire risks.
This guide covers infrared heater setup, safe operation steps, and common errors like ignoring weather conditions or using wrong materials. Learn how to blend new asphalt seamlessly, maintain equipment, and reduce emissions. Get actionable tips for cost-effective repairs that last.
Contents
- Understanding Asphalt Infrared Heaters
- Step-by-step Operation Of an Infrared Asphalt Heater
- Essential Dos for Using an Asphalt Infrared Heater
- Critical Don’ts for Infrared Asphalt Heater Use
- Safety Tips for Infrared Heater Asphalt Patching
- Optimizing Infrared Heater Asphalt Applications
- Environmental Considerations
- Frequently Asked Questions (FAQ)
- Closing Thoughts
- Useful References for You:
Understanding Asphalt Infrared Heaters
Infrared heaters transform asphalt repair by targeting heat exactly where needed. These tools offer precise control, making them ideal for fixes like pothole patches or surface blending. Proper use starts with grasping their design and function.
What is an Asphalt Infrared Heater?
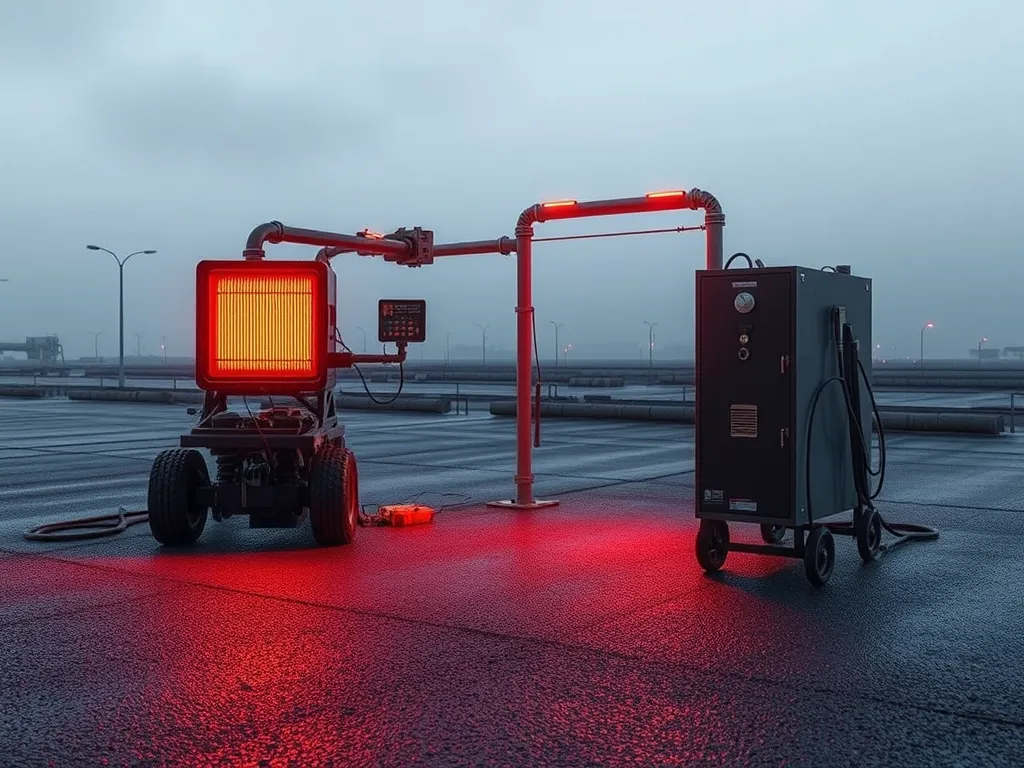
An asphalt infrared heater is a portable device with emitter panels that generate radiant heat. Powered by propane or natural gas, it warms existing asphalt without direct flame contact. This method softens the pavement’s bitumen binder, allowing workers to rework the material. Common applications include driveway repairs, road patches, and joint sealing. Units vary in size, with larger models covering up to 60 square feet per cycle.
How Infrared Heaters Work for Asphalt Repair
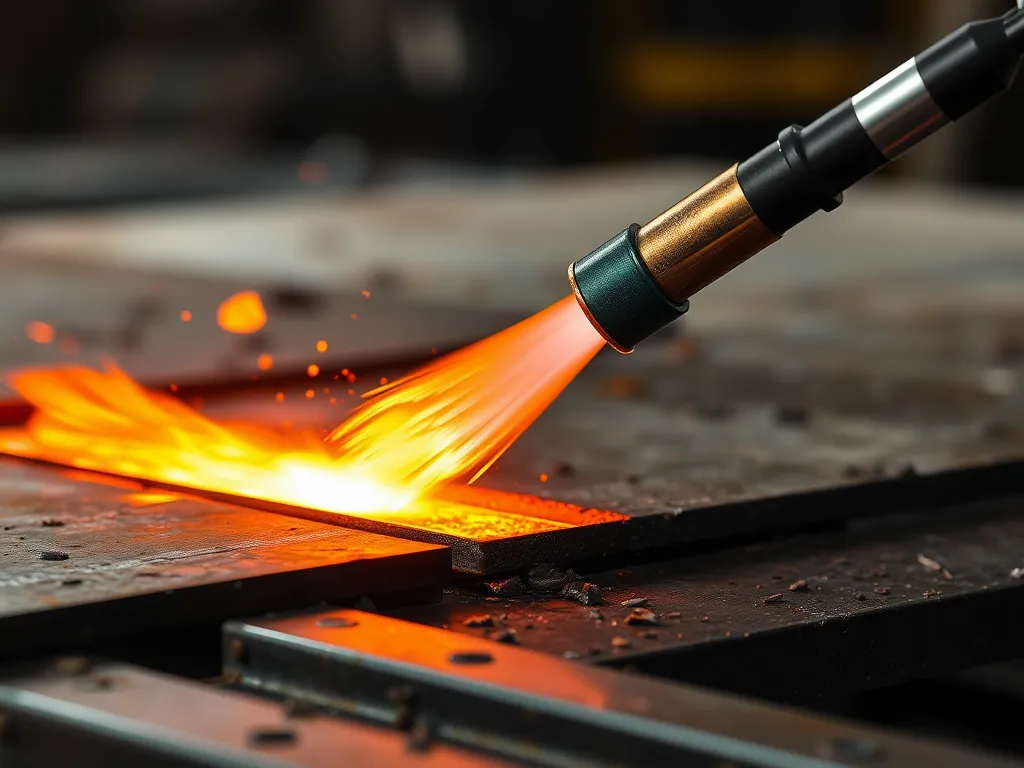
Infrared energy penetrates 2-3 inches into the asphalt surface, heating both aggregates and bitumen to 300-350°F. This reactivates the binder’s adhesive properties, creating a molten layer. Crews then mix fresh material into the heated area, forming a seamless bond. Unlike torch methods, radiant heat prevents scorching or uneven temperatures that weaken pavement. Modern heaters feature digital thermostats to maintain ±10°F accuracy during the 8-15 minute heating cycle typical for most repairs.
Ready to put this knowledge into action? Next, we’ll break down the step-by-step process for safe, effective heater operation.
Step-by-step Operation Of an Infrared Asphalt Heater
Follow these steps to maximize efficiency while avoiding common mistakes with infrared heaters. Proper technique ensures seamless repairs and extends equipment life.
Preparing the Asphalt Surface
Start by clearing debris, oil stains, or loose material from the repair area. Moisture content must stay below 3% to prevent steam pockets. For deep cracks (>1/4″), apply a tack coat (60-70% residual asphalt) to boost adhesion. Position the heater 18-24 inches above the surface for 5-7 minutes of pre-heating.
- Remove vegetation or dirt with a wire brush
- Mark repair boundaries with chalk
- Pre-heat edges to 200°F for thermal bonding
Setting Up the Infrared Heater Correctly
Place the heater on stable ground, angled 10-15 degrees toward the work zone. Verify propane tanks have at least 25% fuel to maintain consistent BTU output (typically 100,000–500,000 BTUs). Attach reflectors to direct 95% of radiant heat downward. Keep a Class B fire extinguisher within 10 feet.
Heating Asphalt to Optimal Temperature
Aim for 275°F–325°F, measured with a laser thermometer. Move the heater in 3-foot sections every 2-3 minutes—overheating above 400°F degrades bitumen. For cold mix repairs, heat existing pavement to 150°F before adding new material.
- Check depth: Heat penetrates 2 inches per 15 minutes
- Avoid scorching: Hover the heater if surface glows
Mixing and Applying Heated Asphalt
Rake heated asphalt until pliable, blending in virgin aggregate if needed. Compact within 5 minutes using a 150-lb roller. For potholes, apply layers no thicker than 1.5 inches. Seal seams with a propane torch set to 1,200°F.
Curing Time and Final Adjustments
Allow 30–60 minutes for cooling before opening to foot traffic. Check compaction density (92–96% Proctor). Apply sand or stone dust to sticky surfaces. Reheat sagging areas at 250°F for 90 seconds and re-compact.
Mastering these steps ensures durable repairs. Next, learn key guidelines to avoid costly errors during infrared heater projects.
Essential Dos for Using an Asphalt Infrared Heater
Do Inspect Equipment Before Use
Check hoses, connections, and burners before each job. Look for cracks, leaks, or worn parts. Test fuel lines and electrical components to prevent malfunctions. Follow the manufacturer’s guidelines for pre-start checks. A quick leak test with soapy water ensures no propane or gas escapes during operation.
Do Maintain Consistent Heating Distance
Keep the heater 6-12 inches above the asphalt surface. Closer distances scorch the mix; farther gaps create uneven heating. Use built-in height guides or spacer tools for precision. For larger repairs, move the heater slowly across the area to maintain uniform heat distribution. This prevents cold spots that weaken the patch.
Do Monitor Asphalt Temperature Closely
Track surface temps with an infrared thermometer. PG (Performance Grade) binders activate between 275°F and 325°F. Exceeding 350°F degrades the bitumen, while temps below 250°F fail to bond properly. Adjust the heater’s output based on weather—cold air or wind can drop asphalt temps by 20-40°F during repairs.
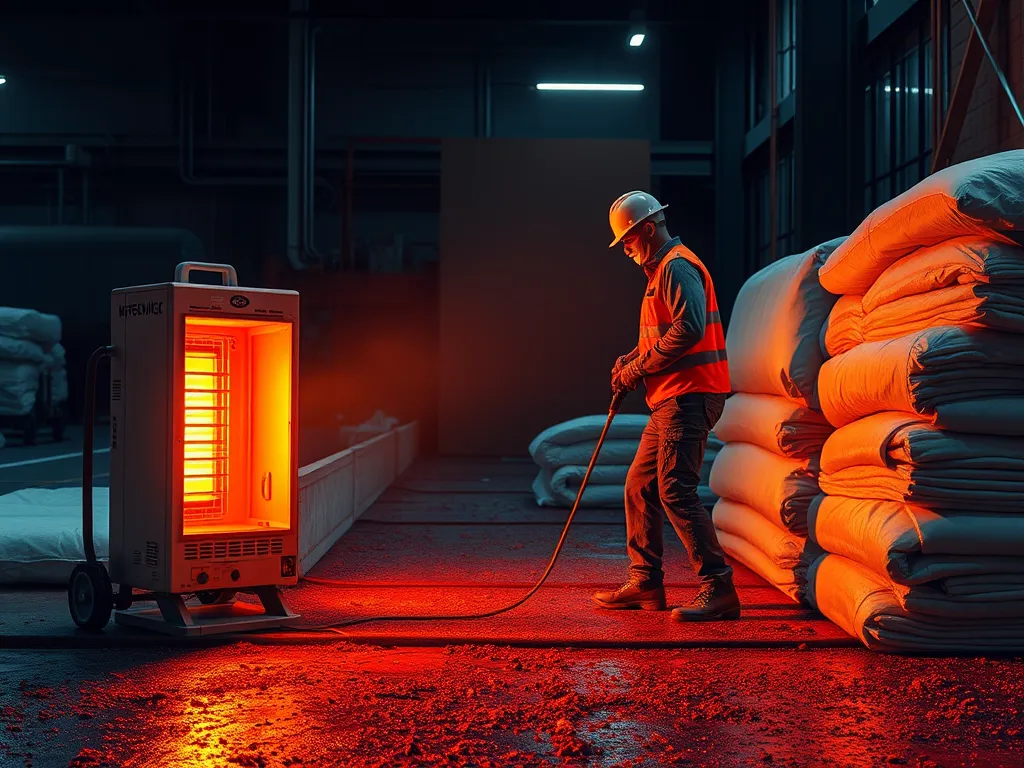
Do Use Proper Safety Gear During Operation
Wear heat-resistant gloves, ANSI-rated goggles, and steel-toe boots. Choose flame-retardant clothing to protect against sparks or radiant heat. Equip respirators when working near fumes. OSHA standards require a 10-foot clearance from flammable materials. Never operate the heater without a fire extinguisher rated for Class B fires nearby.
Do Clean and Maintain the Heater Regularly
Remove asphalt debris from reflectors after each use to avoid blockages. Check fuel lines monthly for cracks and replace clogged air filters. Lubricate moving parts with high-temp grease. Schedule annual professional inspections to calibrate thermostats and burner efficiency. Proper upkeep extends equipment life by 3-5 years and cuts fuel waste by 15%.
Following these guidelines creates a solid foundation for asphalt repairs. But even minor mistakes can derail your project. Let’s explore what to avoid when working with radiant heat systems.
Also See: How to Bond Concrete to Asphalt: Effective Methods
Critical Don’ts for Infrared Asphalt Heater Use
Avoiding common errors ensures successful repairs and extends equipment lifespan. Focus on these key prohibitions when working with asphalt infrared heaters.
Don’t Overheat or Burn the Asphalt Surface
Exceeding 350°F risks thermal degradation, releasing harmful fumes and weakening pavement structure. Use infrared thermometers to track surface temps every 2-3 minutes. Charred spots require full removal, adding 30-60 minutes to project timelines.
Don’t Skip Pre-heating Surface Preparation
Debris or moisture under 3% content causes poor bonding. Sweep thoroughly and run the heater at 200-250°F for 5-8 minutes to vaporize trapped water. Test dryness by pressing a metal trowel against the surface – no condensation should appear.
Don’t Operate Without Training or Supervision
Untrained users account for 72% of infrared heater accidents per OSHA reports. Complete manufacturer-certified courses covering heat zoning, emergency shutoffs, and propane tank handling. New operators should perform 10+ supervised patches before solo work.
Don’t Ignore Weather or Environmental Conditions
Ambient temps below 50°F or wind speeds over 12 mph reduce heating efficiency by 40-60%. Postpone work during rain – water infiltration creates voids requiring rework. Use windbreaks and schedule repairs between 10 AM and 4 PM for optimal thermal transfer.
Don’t Use Incompatible Repair Materials
Mismatched PG binder grades or aggregate sizes prevent molecular bonding. Match new mix to existing asphalt’s PG rating (e.g., PG 64-22 for most driveways). Test compatibility by heating a small batch – proper fusion shows no visible seam lines after cooling.
Steering clear of these errors sets the stage for durable repairs. Next, let’s examine proven safety protocols to protect both workers and equipment during infrared heater asphalt patching.
Safety Tips for Infrared Heater Asphalt Patching
Work safe with infrared heat by knowing key risks. Focus on fire control, air flow, and fuel care to guard your crew and job site.
Fire Prevention Measures
Keep burn risks low. Clear grass, rags, or fuel cans within 10 feet of the heater. Use Class B fire tools rated for grease or gas fires. Check hoses for cracks before each use – a small leak can spark big trouble. Never leave the heater alone while it runs.
Proper Ventilation and Workspace Setup
Run heaters in open air when you can. For indoor jobs like garages, set up fans to push fumes out. Watch for CO buildup – install detectors that sound off at 50 ppm. Mark a 15-foot zone around the unit where no one smokes or grinds metal.
Handling Fuel Sources Safely
Propane tanks need flat ground and chains to stay upright. Shut fuel valves first when turning off the heater. Store extra tanks 20 feet from heat sources. Check lines with soap mix – bubbles mean leaks. Swap worn O-rings fast to avoid flare-ups.
With these safety steps set, let’s shift to getting top results from your heater. Next up: fine-tuning heat for varied mixes and smooth seams.
Optimizing Infrared Heater Asphalt Applications
Proper technique separates basic repairs from professional-grade results. Follow these advanced methods to maximize your infrared heater’s performance.
Adjusting Heat Settings for Different Asphalt Types
Not all asphalt requires the same heat intensity. Standard mixes with PG 64-22 binder need 300-350°F, while polymer-modified PG 76-16 asphalt requires 350-400°F. Overheating by just 50°F can degrade binders, causing thermal cracking. Use an infrared thermometer to verify surface temps every 5 minutes. For porous surfaces like open-graded asphalt, reduce heat by 15% to prevent rapid binder evaporation.
Blending New and Existing Asphalt Seamlessly
Scarify heated areas to a 1/2” depth before adding fresh mix. This exposes aggregate for better mechanical bonding. Apply rejuvenating agents like RA-1 or RA-5 at 0.2 gal/yd² to reactivate aged binders. Maintain a ≤50°F temperature differential between old and new asphalt – cold joints fail 3x faster. For large patches, overlap heating zones by 4-6 inches to eliminate visible seams.
Minimizing Heat Loss During Repairs
Wind speeds above 10 mph can sap 30% of your heater’s output. Use portable windbreaks or schedule repairs during calm mornings. Insulation blankets retain heat 2-3x longer, allowing proper compaction windows. Pre-heat adjacent pavement 12” beyond the repair area to 150°F – this prevents edge cooling that leads to premature cracks. In sub-50°F weather, extend heating times by 25% but never exceed 400°F surface temps.
Mastering these methods leads to durable repairs, but equipment choices matter too. Next, we’ll examine how environmental factors influence your infrared heater’s efficiency and emissions.
Environmental Considerations
Infrared asphalt heaters impact surroundings through air quality shifts and material handling. Smart work habits cut harm while maintaining repair quality.
Reducing Emissions During Asphalt Heating
Infrared units running on propane or natural gas push out 18-23% less particulate matter than diesel burners. Follow three rules to limit pollution:
- Calibrate burners monthly to hit full combustion (look for blue flames, not orange)
- Run at 185-205°F asphalt temps – higher heats spike VOC releases
- Pick electric models in city zones; cut NOx by 40% vs fuel types
Track PM2.5 levels with on-site monitors if working near schools or hospitals. Flip off units during stagnant air alerts.
Proper Disposal Of Heated Materials
Asphalt softened by infrared rays stays 95% reusable – but only if handled right. Never dump chunks with:
- Coal tar binders (test old pavements first)
- Oil stains exceeding 3% surface area
- Lead-based paint fragments
Contaminated RAP (Reclaimed Asphalt Pavement) goes to lined landfills meeting RCRA Subtitle D rules. Mix clean scraps into fresh hot-mix at 15-30% ratios for roads or driveways.
With these protocols in mind, let’s tackle common questions about infrared heater asphalt patching.
Frequently Asked Questions (FAQ)
What Does an Infrared Asphalt Heater Do?
An infrared asphalt heater provides targeted heat to asphalt surfaces, softening the material for effective repairs, such as filling potholes or resurfacing damage. This method allows for quick and seamless blending of fresh asphalt with existing pavement without the risk of burning or uneven heating.
How Long Does It Take for Cold Asphalt to Cure?
The curing time for cold asphalt can vary depending on environmental conditions, but generally, it takes around 30 to 60 minutes to cure before it can withstand foot traffic. Full compaction may take longer, depending on moisture and ambient temperatures.
What is the Best Way to Heat Up Asphalt?
The best way to heat up asphalt is by using an infrared heater, as it evenly distributes heat while penetrating the surface. This method ensures that the asphalt reaches optimal bonding temperatures without risking damage from direct flames or excessive heat.
How Much Does Infrared Asphalt Repair Cost?
The cost of infrared asphalt repair can vary widely based on factors such as the size of the area being repaired, the extent of the damage, and local labor rates. On average, costs can range from $1 to $3 per square foot, potentially providing a cost-effective solution compared to traditional repair methods.
Closing Thoughts
Using an asphalt infrared heater can significantly enhance your asphalt repair projects. By following the dos and avoiding the don’ts outlined above, you can improve the quality of your work while maintaining safety and efficiency. Always prioritize proper preparation, consistent monitoring, and safety measures for optimal results.
Ultimately, mastering the use of an infrared heater will not only extend the lifespan of your asphalt surfaces but also streamline your repair processes.
For further information, tips, and resources, be sure to check out Asphalt Calculator USA.
Useful References for You:
- Lavin, P. (2003). Asphalt Pavements: A Practical Guide to Design, Production, and Maintenance for Engineers and Architects. London: Taylor & Francis.
- Infrared Heater for Asphalt Patching | Asphalt Kingdom
- KM 4-48: Heavy Duty Infrared Asphalt Heater – KM International
- Amazon.com: Asphalt Kingdom Infrared Asphalt Heater – R4 for Small to Medium Asphalt Repair – Patching for Driveways, Pavement, Parking Lots, and more – 45 PSI – 100,000 BTU, Blue : Everything Else
- Infrared Asphalt Repair – Why it’s Right for Your Pavement | Rose Paving

