Master Driveway Base Compaction: Key Techniques for Lasting Asphalt Surfaces
Published on: October 26, 2025 | Last Updated: April 14, 2025
Written By: George Voss
Compaction techniques for driveway base preparation compress materials like gravel or crushed stone to form a solid foundation. Unlike basic material placement, these methods use plate compactors or vibratory rollers to remove air pockets and boost density. Proper compaction stops asphalt cracking, supports heavier loads, and directs water away from the surface. Choosing the right approach depends on your base material type (angular vs rounded stone), layer depth (4-8 inches typical), and project scale.
This guide breaks down base prep from soil testing to final compaction. Explore how moisture levels impact gravel density, why 2-inch layered compaction works best, and which tools handle specific materials. Get clarity on mistakes like skipping moisture checks or using wrong equipment weights. Learn eco-friendly practices like using recycled concrete aggregate. Follow these steps to build a base that lasts 20+ years under asphalt.
Contents
- Why Proper Compaction is Critical for Asphalt Driveways
- Essential Materials for Asphalt Driveway Base Preparation
- Step-by-step Driveway Base Preparation for Asphalt
- Equipment Selection for Driveway Base Compaction
- Common Errors in Asphalt Driveway Base Compaction
- Environmental Considerations for Base Compaction
- DIY Tips for Effective Driveway Base Compaction
- FAQs: Driveway Base Compaction for Asphalt
- Closing Thoughts
- Additional Resources for You:
Why Proper Compaction is Critical for Asphalt Driveways
Driveway base compaction creates a stable foundation that directly affects asphalt performance. Without optimal density, surface layers develop premature cracks, dips, or structural failures under vehicle loads or freeze-thaw cycles.
Impact on Asphalt Longevity and Stability
Properly compacted bases achieve 95-98% Proctor density – the standard for load-bearing capacity. This minimizes voids between gravel or crushed stone particles, preventing shifting that causes asphalt deformation. Vibratory plate compactors generate 5,000-6,000 lbs of force to lock aggregates into position, creating uniform support. Tests show driveways with 95%+ density last 12-15 years versus 5-8 years with subpar compaction.
Consequences Of Inadequate Base Compaction
Loose base materials settle unevenly, creating voids beneath asphalt layers. This leads to alligator cracking (web-like fractures) or edge raveling within 2-3 years. Vehicles exert 300-500 PSI on driveways – weak bases reduce load capacity by 40%, accelerating wear. Repairs cost $3-$5 per sq.ft, compared to $0.50-$1.50 for proper initial compaction. Poor drainage from uneven surfaces also shortens asphalt life by allowing water seepage into subgrades.
With base integrity established, selecting suitable materials becomes the next priority for lasting results.
Essential Materials for Asphalt Driveway Base Preparation
Choosing the right materials determines how well your driveway base withstands traffic and weather. Base layers require specific aggregates that balance drainage, load distribution, and compaction efficiency. Let’s break down what works best under asphalt.
Optimal Base Materials for Asphalt Support
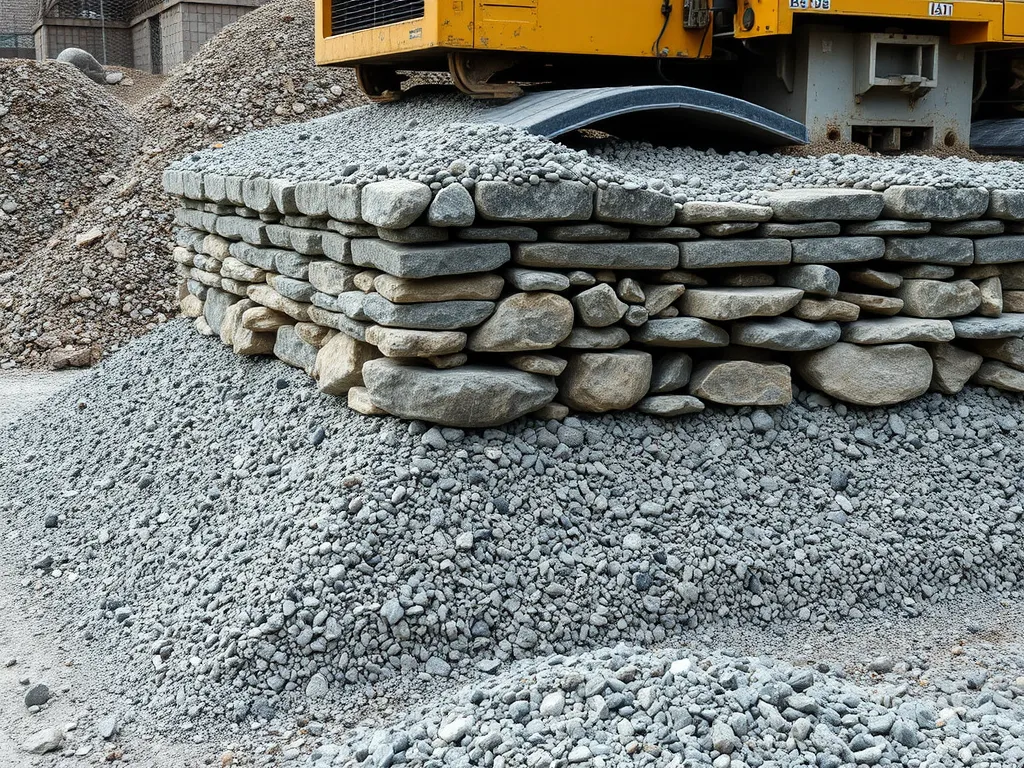
Aggregates like crushed stone (CA6 or ASTM D2940) and gravel form the backbone of durable bases. These materials create a stable platform that prevents asphalt sinking or cracking. For heavy-duty use, engineers often specify angular crushed stone with 1.5” to 2” diameters. Lighter residential driveways may use smaller ¾” gravel mixes.
Crushed Stone vs. Gravel: Compatibility with Asphalt
Crushed stone’s jagged edges interlock during compaction, achieving 95-98% density with plate compactors. Gravel’s smooth surfaces require more passes to bond, risking shifts over time. For asphalt-specific projects, crushed stone reduces voids by 15-20% compared to gravel, minimizing water infiltration that weakens pavement.
Moisture Content Requirements for Base Materials
Moisture activates the binding properties of base materials. The Proctor compaction test (ASTM D698) identifies optimal levels—typically 8-12% for crushed stone and 6-10% for gravel. Too dry? Particles won’t bond. Too wet? Saturation reduces friction between aggregates. Use a soil moisture meter to verify levels before compacting.
With materials selected and moisture levels optimized, the next phase focuses on precise layering and equipment strategies to lock everything in place.
Step-by-step Driveway Base Preparation for Asphalt
Subgrade Preparation and Compaction
Start with the soil under your base. Test soil first to check its type and strength. Poor soil can sink under asphalt. Use a proctor test (soil density check) to find if it needs help. Add lime or cement to weak soil. Compact it with a roller until it holds 95% density. This stops cracks and dips later.
Soil Testing and Stabilization Methods
Clay-rich soil? It swells when wet. Mix in gravel or sand to fix drainage. For sandy soil, add binders like polymer grids. Roll the subgrade in 6-inch layers. Check with a penetrometer – aim for 300 PSI resistance. Stabilized soil keeps the base firm for decades.
Layering Techniques for Base Materials
Spread crushed stone or gravel in thin layers. Thick piles won’t pack tight. Use a skid steer to spread evenly. Rake high spots flat. Each layer must bond to the one below. Skip this step, and gaps form under your asphalt.
Ideal Layer Thickness for Asphalt Support
Limit layers to 4-6 inches. For #57 stone (1/2”-1” size), 4 inches works best. Road base (sand-gravel mix) can go to 6 inches. Compact each layer before adding more. Thinner layers = 98% compaction. Thick layers drop to 85%, risking sinkholes.
Moisture Control During Compaction
Water is key. Too dry? Gravel won’t lock. Too wet? Mud forms. Aim for 8-12% moisture. Spray water if dust flies when raking. For road base, wet until it clumps but breaks apart when squeezed. Let it sit 30 minutes before compacting.
When to Wet Gravel or Road Base
Test with a soil probe. Dry gravel needs 1-2 gallons per square yard. Road base? Add water until a ball holds shape but crumbles under pressure. Hot days dry mix fast – spray during spreading. Cold weather? Cut water by 25% to avoid frost gaps.
Compaction Methods for Different Base Materials
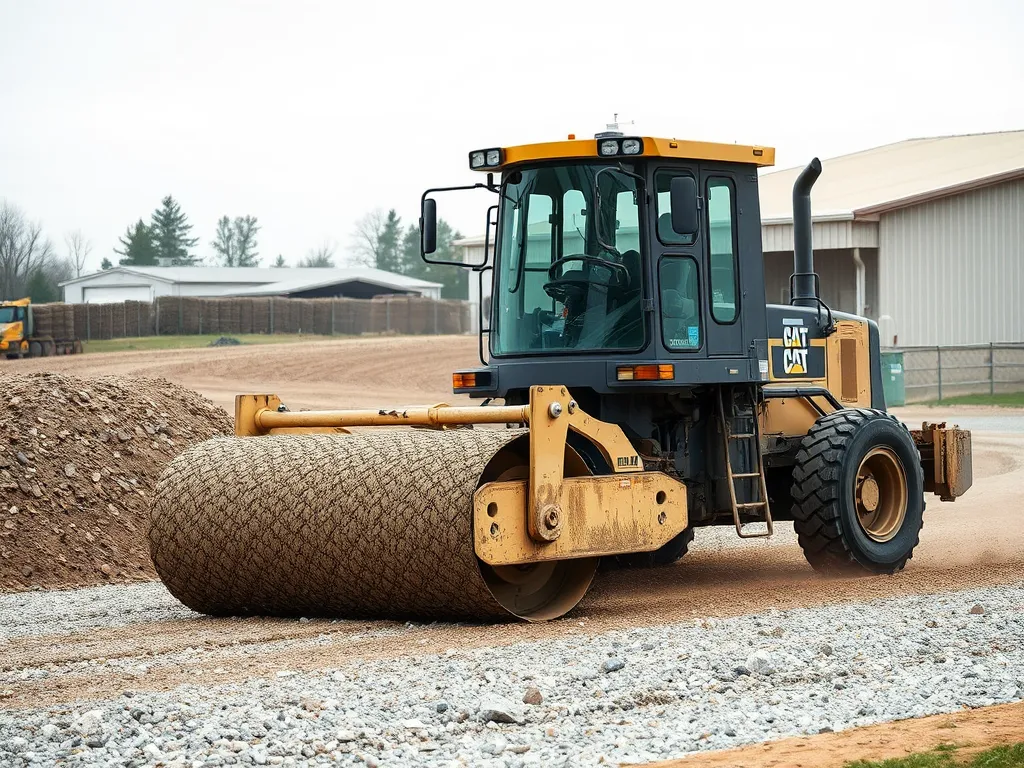
Crushed stone needs heavy force. Use a vibratory roller (10-12 ton) for deep compression. Gravel shifts sideways – plate compactors (3,000-5,000 lbs) press pieces into place. Road base? Split work: plate for edges, roller for center. Overlap passes by 1/3 to skip weak zones.
Using Plate Compactors vs. Rollers
Plate compactors cost $200/day, work in tight spots. Best for 3/4” gravel. Rollers rent for $400/day, handle large drives. Use them on #2 stone (1.5” size). Run plates at 3,500 vibrations per minute. Rollers need 2 MPH max speed. Check density with a nuclear gauge (90%+ for asphalt).
Nail these steps, and your base will carry 4,000+ cars yearly without fail. Next up: matching the right tools to your soil and stone mix.
Also See: Dynamic Modulus Test Benefits: Enhance Material Quality
Equipment Selection for Driveway Base Compaction
Selecting the right tools determines success in creating stable foundations for asphalt driveways. Proper equipment ensures uniform density, prevents settling, and supports heavy loads over time.
Choosing Between Plate Compactors and Vibratory Rollers
Plate compactors work best for granular materials like crushed stone. These machines deliver 3,000-6,000 lbs of centrifugal force, ideal for 4-6 inch lift thicknesses. Rentals cost $300-$800 weekly. Vibratory rollers handle larger areas with clay or mixed soils. Their 1,500-5,000 lb operating weights compact deeper layers (8-12 inches) at $1,500-$5,000 weekly. For asphalt-specific bases, plate compactors achieve 95% Proctor density when making 4-6 passes.
Specialized Tools for Asphalt-specific Base Layers
Polymeric grid systems require static rollers (50-80 psi contact pressure) to avoid geogrid damage. For recycled asphalt pavement (RAP) bases, padfoot rollers knead materials without crushing aggregates. Pneumatic tired rollers (25-35 psi) compact gravel-road mix blends, ensuring interlock between angular stones. Laser-guided grading systems maintain 2% slope for drainage, pairing with compaction belts to track progress in real time.
| Equipment | Best For | Force/Weight | Cost Range |
|---|---|---|---|
| Plate Compactor | Granular bases | 3,000-6,000 lbs | $300-$800 |
| Vibratory Roller | Cohesive soils | 1,500-5,000 lbs | $1,500-$5,000 |
| Padfoot Roller | RAP bases | 8-12 ton | $2,200/day |
Even with top-tier equipment, mistakes during operation can undo hours of work. Let’s examine frequent errors to avoid during driveway base compaction.
Common Errors in Asphalt Driveway Base Compaction
Even experienced contractors make mistakes during driveway base preparation. These errors create weak spots that lead to asphalt cracking, rutting, or uneven surfaces within months. Let’s break down the top three culprits.
Overlooking Moisture Content
Base materials like crushed stone or gravel require precise moisture levels for optimal density. Materials below 8% water content resist binding, while saturation above 12% turns layers into sludge. Use a soil moisture meter to test road base materials before compaction. Prolonged asphalt lifespan starts with hitting that 8-12% sweet spot – miss it, and expect 30% faster surface deterioration.
Improper Layering or Equipment Use
Thick layers or mismatched tools sabotage compaction efforts. For asphalt driveways, limit lifts to 4-6 inches per layer. Plate compactors (3,000-5,000 psi force) work for small areas, while vibratory rollers (8-12 tons) handle larger projects. Never use a hand tamper for gravel bases – it leaves pockets with 15-20% lower density. Match equipment to material type and project size for uniform support.
Insufficient Compaction Passes
Three passes per layer is the bare minimum for angular crushed stone. Rounded gravel may need five. Test density with a nuclear gauge or sand cone test between passes – target 95% modified Proctor density. Skimping on passes leaves voids that shift under asphalt loads, causing depressions. One skipped pass can reduce load-bearing capacity by 40% in high-traffic zones.
Mastering these techniques for compaction of a driveway base sets the stage for eco-friendly choices. Next, let’s explore how sustainable practices like recycled aggregates fit into the equation.
Environmental Considerations for Base Compaction
Balancing durability with eco-friendly practices ensures driveway bases support asphalt surfaces without harming surrounding ecosystems. Proper planning minimizes runoff, preserves soil integrity, and reduces resource consumption during construction.
Erosion Control and Drainage Planning
Effective compaction starts with managing water flow. Grade the subgrade to a 2% cross-slope before adding base materials to direct runoff away from the driveway. Install French drains lined with perforated PVC pipes (4-6 inches in diameter) beneath the base layer in high-moisture areas. Use geotextile fabrics meeting ASTM D6707 standards to separate soil from aggregate, preventing silt from clogging drainage paths. Pair these steps with erosion control blankets or hydroseeding adjacent slopes to stabilize loose soil during heavy rains.
Using Recycled Materials in Base Layers
Recycled asphalt pavement (RAP) and crushed concrete (Class 5 or 6 aggregate) create stable, eco-friendly bases. RAP compacts to 95% Proctor density with vibratory plate compactors, matching the performance of virgin gravel. Mix 30-50% recycled aggregate with fresh crushed stone to enhance structural capacity while cutting material costs by 20-30%. Note: Some regions mandate up to 15% recycled content in public projects. Test recycled materials for contaminants like tar or lead-based paint residues before compaction.
Integrating environmental safeguards during driveway base preparation ensures long-term asphalt performance. Now, let’s examine practical methods to execute these techniques through DIY strategies.

DIY Tips for Effective Driveway Base Compaction
Get hands-on strategies to build stable asphalt driveways that last. These field-tested methods blend material science with practical execution.
Calculating Material Quantities With Asphalt Calculators
Start with precise measurements. Online tools like Asphalt Calculator USA determine exact amounts of crushed stone or gravel needed. Enter driveway length (feet), width (feet), and base depth (inches). For example: A 20’x40’ driveway needing 6” of CA6 gravel requires 40 cubic yards. Over-ordering wastes $45-$65/ton; under-ordering risks weak spots. Target 90-95% Proctor density – the industry standard for load-bearing bases.
Achieving Uniform Density Across Layers
Consistency prevents cracks. Compact 4”-6” layers using a 5,000+ lb plate compactor. Make 3-5 overlapping passes, shifting direction each time. Check moisture: Gravel should hold shape when squeezed without dripping. Rent a nuclear density gauge ($150/day) or perform sand cone tests to verify 98% compaction. Low spots? Add material – never compact more than 6” at once.
Local Code Compliance for Asphalt Driveways
Follow regional specs or face rework. Coastal Florida requires 12” limestone bases; Colorado allows 8” recycled aggregate. Check minimums:
| Region | Base Thickness | Material Type |
|---|---|---|
| Midwest | 6” | Crushed Stone #411 |
| Northeast | 8” | DGA Gravel |
Call local building departments – 70% require permits for asphalt drives. Non-compliant jobs risk voided warranties.
Mastered these field tactics? Let’s explore equipment choices that make or break your project.
FAQs: Driveway Base Compaction for Asphalt
How Do You Compact Soil for an Asphalt Driveway Base?
To compact soil for an asphalt driveway base, start by using a plate compactor or vibratory roller, ensuring that the soil is at the optimal moisture level (typically 8-12%). Make multiple passes over the area, aiming for a target density of 95% or higher. The compacting process may involve several layers, each being compacted thoroughly before adding the next layer.
Should You Wet Road Base Before Compacting for Asphalt?
Yes, wetting the road base before compaction is recommended. Adequate moisture helps to bind the particles together, improving compaction. The moisture content should be sufficient enough to clump together when squeezed but should not be overly saturated to the extent that it turns muddy. Typically, a moisture content of 8-12% is optimal for achieving the best compaction results.
What’s the Best Method to Compact a Road Base for Asphalt Driveways?
The best method to compact a road base is to utilize a combination of a plate compactor for edges and a vibratory roller for larger surface areas. This combination allows for effective compression of both granular and cohesive materials. Ensure you make multiple passes, allowing for thorough compaction. Lightly wetting the base prior to compaction can also significantly improve the binding of the materials.
Is Gravel Moisture Critical When Preparing for Asphalt?
Absolutely, the moisture content of gravel is critical when preparing for asphalt installation. Proper moisture levels facilitate interlocking of the particles, thereby enhancing compactability. Too little moisture can result in ineffective compaction, while too much water can lead to a muddy mix that fails to bond. Monitoring and adjusting moisture to the optimal level is essential for a stable base.
Closing Thoughts
Proper compaction techniques are vital for a solid asphalt driveway base. They enhance the stability and longevity of the driveway, mitigating potential issues down the line. Each step—from selecting the right materials to ensuring adequate moisture control—plays a key role in achieving a durable surface.
Common mistakes like overlooking moisture content or improper layering can undermine your hard work. Using the right equipment, such as plate compactors and vibratory rollers, is essential for effective compaction. Remember, achieving a uniform density across layers contributes significantly to the overall performance of the asphalt.
For those embarking on DIY projects, tools like asphalt calculators can simplify material calculations, ensuring that you stay within budget while adhering to local codes. Consistent maintenance is also crucial for preserving the driveway’s integrity over time.
For more insights, check out Asphalt Calculator USA. Equip yourself with the knowledge necessary for successful driveway installation and enjoy a durable, long-lasting surface.
Additional Resources for You:
- Yoder, E. J., & Witczak, M. W. (1975). Principles of Pavement Design (2nd ed.). New York, NY: Wiley.
- How To Make A Gravel Driveway Solid
- How to Prep & Lay a Base for Pavers | DIY
- Subgrade Preparation for Concrete Slab – Dirt Connections
- What Is The Best Base For An Asphalt Driveway

