Common Asphalt Joint Issues and Solutions
Published on: October 19, 2025 | Last Updated: April 14, 2025
Written By: George Voss
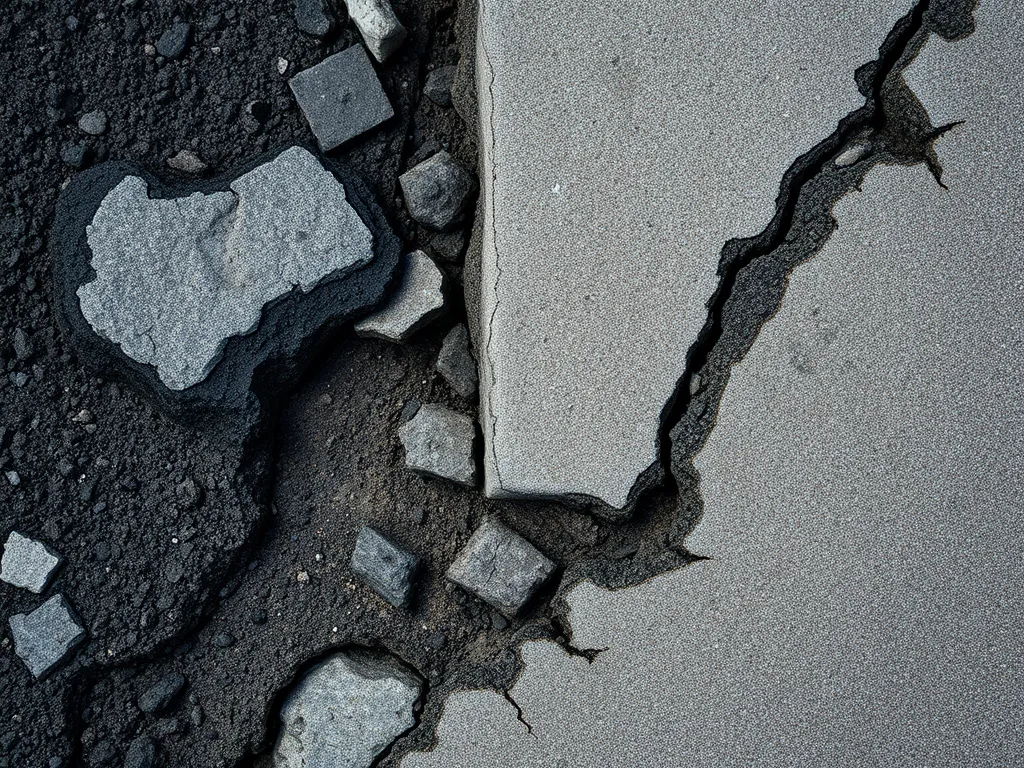
Asphalt joints—the seams between pavement sections—often develop cracks, crumbling edges, or uneven surfaces due to poor compaction, temperature shifts, or heavy traffic. These flaws allow water infiltration, accelerating pavement decay. Fixes range from hot-pour sealants for minor cracks to full-depth repairs using recycled asphalt concrete (RAC) for severe displacements.
This article breaks down four key joint failures: surface cracking, spalling (surface deterioration), separation, and vertical offsets. We explain causes like base failures or incorrect PG binder grades and detail solutions such as rubberized asphalt overlays or geotextile stabilization. You’ll also learn prevention tactics, repair material costs ($0.50-$3 per linear foot), and how freeze-thaw cycles impact joint longevity.
Contents
- Understanding Asphalt Pavement Joints
- Types Of Asphalt Joints
- Common Asphalt Joint Problems and Their Causes
- Primary Causes Of Asphalt Joint Failure
- Asphalt Joint Repair Solutions
- Preventing Asphalt Joint Issues
- Environmental Factors Affecting Asphalt Joints
- FAQs About Asphalt Joint Issues
- Closing Thoughts
- Additional Resources for You:
Understanding Asphalt Pavement Joints
Asphalt joints form critical transition points between pavement sections. These strategic breaks manage stress from temperature changes, traffic loads, and material shrinkage. Without properly designed joints, pavements face premature cracking and structural damage.
What Are Asphalt Joints?
Asphalt joints are intentional gaps between pavement sections or adjoining surfaces. Contractors create them during paving using specialized tools like joint cutters or by aligning fresh asphalt against existing edges. Common types include longitudinal joints (running parallel to traffic) and transverse joints (perpendicular to traffic). These interfaces often use PG 64-22 binders for enhanced temperature resistance.
Purpose Of Joints in Asphalt Pavements
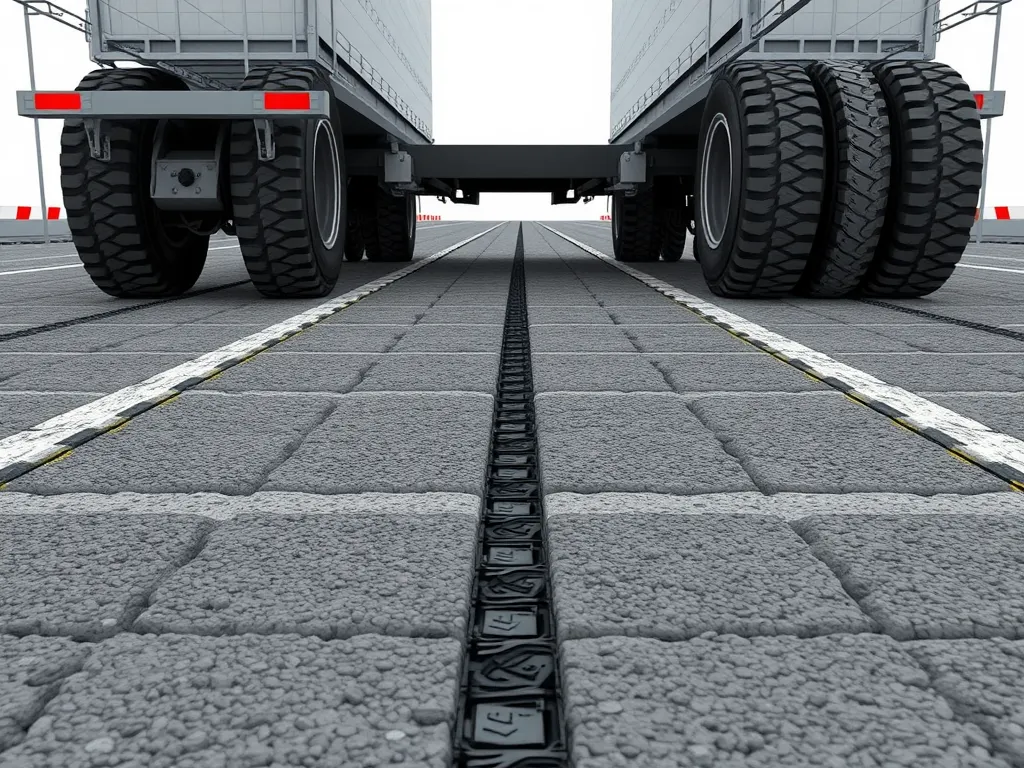
Joints prevent common asphalt joint problems like edge cracks and surface heaving. They accommodate thermal expansion in summer heat (up to 140°F pavement temperatures) and contraction during winter freezes. Proper joints also redirect water away from vulnerable edges, reducing hydrostatic pressure that causes base erosion. For high-traffic areas, joints distribute heavy vehicle loads (up to 18,000 lbs per axle) across adjacent slabs.
Next, we’ll break down the specific joint types used in modern pavement design and their role in preventing asphalt overlay joint issues.
Types Of Asphalt Joints
Asphalt joints serve as critical transition points between pavement sections. Four primary joint types dominate road construction, each with distinct roles and failure patterns. Proper design prevents common asphalt joint problems like cracking or separation.
Construction Joints
Built where paving stops and restarts, construction joints form temporary edges between fresh and existing asphalt. Poorly compacted joints develop surface gaps within 12-24 months. Use vibratory rollers at 150-160°F to fuse materials, preventing asphalt paving joint problems like edge disintegration. Longitudinal joints (parallel to traffic) fail faster than transverse joints due to tire shear forces.
Expansion Joints
These 0.5-1 inch gaps accommodate pavement growth from temperature swings. Pre-molded fiberboard or rubber strips fill the space, rated for 50-70% compression. Missing or degraded filler causes asphalt expansion joints problems, leading to buckling in regions with 30+°F daily swings. Annual inspections catch early filler erosion before adjacent slabs shift.
Contraction Joints
Saw-cut 1-2 hours after paving, contraction joints control cracking as asphalt cools. Depth should equal 25% of pavement thickness—typically 0.75 inches for 3-inch overlays. Incorrect spacing (every 15-20 feet for roads) triggers random cracks. Seal with PG 64-22 binder at 300-350°F to block water intrusion, a top cause of asphalt joint issues in freeze-thaw zones.
Butt Joints
Butt joints connect new asphalt to rigid structures like curbs or concrete slabs. A 45-degree angled edge improves load transfer. Without tack coat application (0.05 gal/sy rate), 80% of butt joints show raveling within five years. Monitor asphalt pavement edge problems here, especially near drainage systems where erosion accelerates joint wear.
Spotting early distress in these joints dictates repair strategies. Next, we’ll break down how environmental forces and installation errors turn minor gaps into major asphalt joint failures.
Common Asphalt Joint Problems and Their Causes
Asphalt joints face constant stress from traffic, weather, and material aging. Identifying specific failure patterns helps target repairs effectively. Let’s break down frequent issues and proven fixes.
Surface Cracking Around Joints
Hairline cracks near joints often signal early distress. Left unaddressed, they allow water infiltration that accelerates pavement degradation.
Causes: Poor Compaction, Thermal Stress
Inadequate compaction during installation leaves air voids near joints. Thermal stress from temperature swings (-20°F to 120°F) widens these gaps. PG 64-22 binder mixtures in northern climates reduce thermal cracking risks.
Solutions: Proper Joint Sealing Techniques
- Clean joints with air blowers before sealing
- Apply hot-pour rubberized sealant at 375°F–400°F
- Use backer rods for cracks deeper than ½ inch
Joint Spalling or Raveling
Crumbling edges along joints expose aggregates and weaken pavement structure. This issue cuts asphalt lifespan by 30–40% if untreated.
Causes: Weak Binder, Weathering
Low-quality PG 58-28 binders degrade faster under UV exposure. Freeze-thaw cycles dislodge poorly bonded aggregates. Areas with 40+ annual freeze cycles see 2x faster raveling.
Solutions: Reinforcement with Rubberized Asphalt
CRUMB rubber-modified mixes boost joint durability. A 1.5-inch overlay using AR-8000 rubber asphalt resists weathering while maintaining flexibility down to -15°F.
Joint Separation or Displacement
Gaps exceeding ¾ inch between pavement sections indicate structural failure. These create trip hazards and damage vehicle suspensions.
Causes: Base Failure, Heavy Vehicle Loads
Class 8 trucks exert 18,000-pound wheel loads – 75% higher than standard vehicles. Poorly compacted subgrades with CBR values below 5% collapse under repeated stress.
Solutions: Subgrade Stabilization
- Inject lime slurry (8–12% by weight) into weak soils
- Install geogrid reinforcement at 6-inch depth
- Compact subbase to 98% Proctor density
Vertical Offset at Joints
Height differences exceeding ¼ inch between pavement sections demand immediate attention. These offsets often develop within 2–3 years of installation.
Causes: Uneven Settlement, Poor Installation
Differential settlement accounts for 68% of vertical offsets. Rushed roller passes during placement create density variations over 5% within joint areas.
Solutions: Grinding or Overlay Adjustments
Diamond grinding removes up to 1.5 inches of raised pavement. For severe cases, apply a 2-inch SMA overlay with ¾-inch aggregate to bridge uneven joints.
Spotting these warning signs early prevents costly full-depth repairs. Next, we’ll examine how installation errors and material choices contribute to joint failures.
Also See: Asphalt and Climate Resilience: Boost Your Community
Primary Causes Of Asphalt Joint Failure
Asphalt joint failure stems from specific installation and environmental factors. Identifying these root causes helps prevent costly repairs and extends pavement life.
Poor Base Preparation
A weak subgrade or improperly compacted base creates uneven support under joints. Without 95% Proctor density in the aggregate base, joints shift under stress. Moisture intrusion from poor drainage softens the subgrade, accelerating joint separation. Always test soil bearing capacity—aim for a minimum CBR (California Bearing Ratio) of 8% for residential pavements.
Inadequate Joint Sealant Application
Thin or cracked sealant lets water seep into joint gaps, triggering base erosion. Use rubberized asphalt or hot-pour polymers at 3/8-inch thickness for optimal protection. Apply sealant when pavement temperatures range between 40°F and 100°F—outside this range, adhesion weakens. Skipping primer coatings on aged asphalt also reduces bond strength by up to 60%.
Improper Asphalt Mix Temperature During Installation
Mix cooled below 275°F before compaction fails to fuse with adjacent pavement. Temperature differentials exceeding 25°F between existing and new asphalt create weak seams. For hot mix asphalt (HMA), maintain 300°F layering temps to ensure proper density. Cold joints from delayed paving operations often show raveling within 12 months.
Excessive Load Stress From Heavy Vehicles
Frequent 18-wheelers or loads surpassing 20,000 lbs per axle crush joint edges. Repeated stress fractures binder bonds, causing vertical offsets. High-traffic areas need PG 76-22 modified binders and 6-inch base depths to resist deformation. Overloaded pavements exhibit joint displacement 3x faster than designed limits.
These factors set the stage for common asphalt joint problems. Next, targeted repair methods tackle these vulnerabilities head-on.

Asphalt Joint Repair Solutions
Damaged joints threaten pavement longevity. Targeted repair methods restore structural integrity and prevent water infiltration. Choose solutions based on joint failure severity and traffic demands.
Joint Sealing Best Practices
Sealing blocks moisture and debris. Clean joints with compressed air or routers before applying sealant. Use backer rods for cracks deeper than ½ inch to control sealant depth. Opt for polymer-modified sealants with 300% elongation capacity for flexible bonding.
Ideal Temperature for Asphalt Joint Sealing
Apply sealants between 50°F and 70°F for optimal adhesion. Below 45°F, materials become brittle; above 85°F, they slump. PG 64-22 binders work best in moderate climates. Infrared heaters pre-warm joints in cold conditions.
Cold Mix Asphalt for Temporary Repairs
Emergency fixes require fast solutions. Cold mix asphalt bonds at ambient temperatures (40°F+) and stays workable for weeks. Compact patches with 8-10 passes using a vibratory plate compactor. Expect 6-12 month durability in parking lots or low-traffic areas.
Hot Pour Crack Fillers for Long-term Stability
Rubberized asphalt fillers withstand 5+ years of freeze-thaw cycles. Heat materials to 375°F-400°F for proper flow. Install using pour pots or melter applicators. These fillers reduce crack reflection by 70% compared to cold-applied options.
Full-depth Joint Reconstruction
Severe base failures demand complete repairs. Saw-cut 6-12 inches beyond damaged edges. Remove old asphalt to subgrade level, stabilize with 6% cement-treated base, then repave with PG 76-16 polymer-modified mix. Costs average $18-$25 per square foot but extend pavement life by 15+ years.
Effective repairs set the stage for lasting results. Up next: strategies to avoid joint failures before they start.
Preventing Asphalt Joint Issues
Effective prevention targets the root causes behind common asphalt joint problems. Proactive measures cut repair costs by 40-60% compared to reactive fixes.
Proper Installation Techniques
Joint longevity starts during paving. Contractors must match joint design to pavement type—transverse construction joints need 95% compaction, while longitudinal joints require staggered rolling. ASTM D6433 standards specify tack coat application rates (0.05-0.15 gal/yd²) to prevent bond failures. Vibratory rollers set to 8-12 mph ensure edge density matches mid-panel areas.
Regular Crack Sealing Maintenance
Seal cracks ≤0.5″ wide within 2 years of pavement installation. Hot pour rubberized sealants applied at 375°F outperform cold mixes in freeze-thaw zones. Annual infrared thermography scans detect subsurface voids before surface cracks form. Budget $0.50-$1.50 per linear foot for professional sealing.
Controlling Water Drainage Near Joints
Water causes 85% of asphalt joint failures. Maintain 2% cross-slope gradients to divert runoff from edges. Install French drains 18″ below joint lines in high-water-table areas. Apply coal-tar emulsion sealants every 3 years to block capillary action. Catch basins placed every 30 feet prevent ponding near expansion joints.
Avoiding Overloading With Heavy Trucks
Limit tandem axle loads to 18,000 lbs on pavements with transverse joints. Geogrid reinforcement (30 kN/m tensile strength) under joints distributes tire forces. Post-installation traffic should follow AASHTO T283 guidelines—wait 3 days before allowing vehicles over 10,000 lbs on fresh joints.
While these strategies reduce asphalt joint issues, environmental factors still threaten pavement durability. Next, we’ll examine how temperature swings and UV exposure accelerate joint degradation.
Environmental Factors Affecting Asphalt Joints
Weather patterns directly influence asphalt joint performance. Temperature swings, moisture levels, and solar exposure create unique stress points that demand targeted solutions.
Impact Of Freeze-thaw Cycles
Water penetrates unsealed joints during rainfall, then expands by 9% when frozen. This hydraulic pressure fractures aggregate bonds, causing cracks wider than ¼ inch. Repeated cycles worsen joint separation, leading to potholes or base erosion. In northern states like Minnesota, freeze-thaw damage accounts for 38% of asphalt joint failures annually.
Preventive measures include installing PG 58-28 binders (designed for cold climates) and backer rod-supported sealants. Seal joints when pavement temperatures range between 50°F and 85°F for optimal adhesion. For existing damage, full-depth repairs using hot-mix asphalt with anti-strip additives restore structural integrity.
UV Degradation and Weathering
Sunlight oxidizes bitumen, turning flexible joints brittle. This accelerates raveling at edges and reduces load transfer efficiency by up to 60%. Arizona DOT studies show unsealed joints lose ⅓ of their strength within 5 years under intense UV exposure.
Apply coal-tar emulsion sealcoats every 24-36 months to block UV rays. Specify Superpave mixes with polymer-modified binders for high-sun regions. Infrared joint heaters can rejuvenate aged asphalt seams, restoring flexibility without full reconstruction. Pair these strategies with proper slope grading (1-2% minimum) to divert water from vulnerable joints.
Proactive maintenance combats environmental wear, but material selection plays an equal role. Next, explore answers to frequent questions about detecting and resolving joint defects before they escalate.
FAQs About Asphalt Joint Issues
Why is My New Asphalt Crumbling Near Joints?
New asphalt crumbling near joints often results from improper compaction or inadequate joint sealing. If the joints were not properly treated during installation, they may allow moisture to penetrate, leading to premature failure. It’s essential to ensure a proper sealant is applied to prevent water infiltration.
What Damages Asphalt Joints the Most?
The most damaging factors to asphalt joints include heavy vehicle loads, poor base support, and environmental conditions like freeze-thaw cycles. Each of these can exacerbate joint deterioration, causing cracks, separation, and other issues if not properly managed.
How Do You Fix a Failing Asphalt Joint?
To fix a failing asphalt joint, start by assessing the severity of the damage. Common repairs include sealing cracks with hot-pour fillers, performing full-depth joint reconstruction for severe cases, or applying overlays to address vertical offsets. Maintenance practices, such as regular sealing and proper drainage management, can also provide long-term solutions.
What’s the Best Filler for Asphalt Joint Potholes?
The best filler for asphalt joint potholes typically includes cold mix asphalt or hot-pour crack fillers. Cold mix is ideal for temporary repairs, as it can be applied in varying temperatures, while hot-pour crack fillers provide a more permanent solution when applied correctly.
How to Identify Poor-quality Asphalt Joint Installation?
Poor-quality asphalt joint installation can often be identified by visible cracks, uneven elevations, or separation between joints shortly after installation. Other signs include the presence of water pooling near joints, inconsistent surface texture, and signs of raveling or spalling. Regular inspections and adherence to installation best practices can help prevent such issues from developing.
Closing Thoughts
Addressing common asphalt joint issues is vital for maintaining the integrity of road surfaces. From surface cracking to joint spalling, recognizing these problems early can save you time and money in repairs. Employing proper installation techniques and regular maintenance ensures your asphalt lasts longer.
Solutions like cold mix asphalt for temporary fixes and hot pour crack fillers for longevity are beneficial strategies. Additionally, understanding factors like freeze-thaw cycles and UV degradation can help you plan better. Prioritize prevention to avoid costly damages from heavy vehicle loads and water drainage issues.
For more insights and tools that aid in maintaining asphalt integrity, check out Asphalt Calculator USA. Your pavement deserves the best care!

