Best Practices for Site Grading Before Asphalt Installation
Published on: September 4, 2025 | Last Updated: April 14, 2025
Written By: George Voss
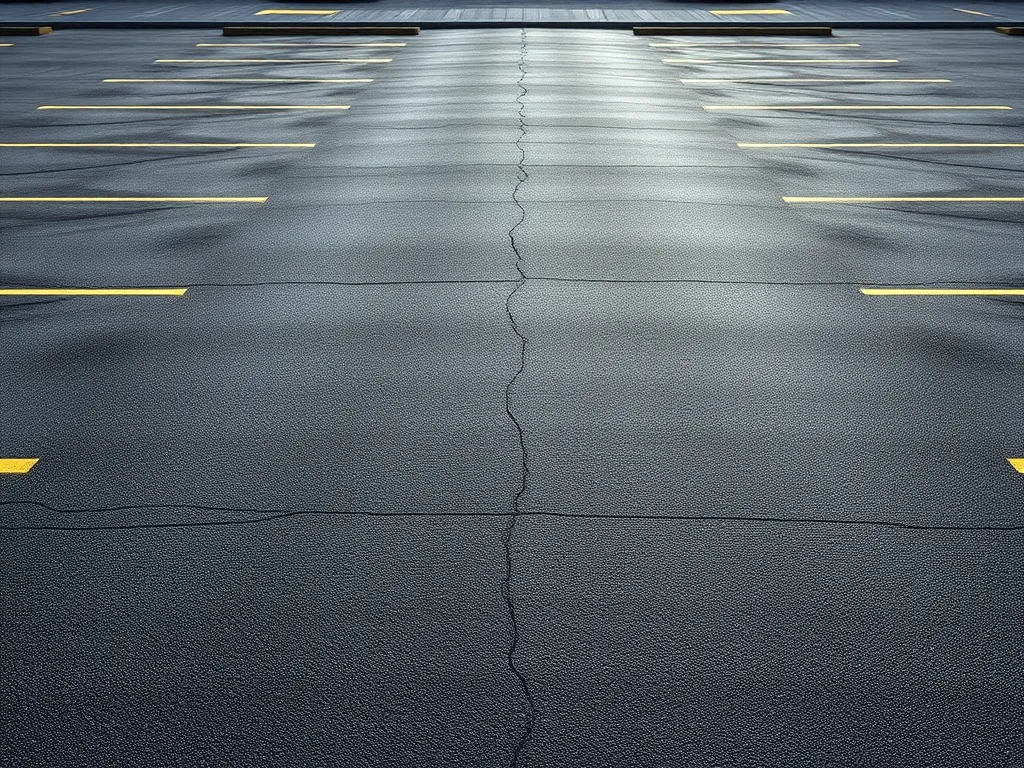
Site grading shapes the ground to create a stable base for asphalt, directing water away and preventing cracks. This process involves cutting high spots, filling low areas, and compacting soil to specific densities (typically 95% Proctor density). A proper 1-2% slope ensures drainage, while a 6-8 inch crushed stone subbase adds strength. Without precise grading, asphalt can fail within 3-5 years due to pooling water or uneven settling.
This guide explains how to grade sites for driveways, parking lots, and roads. Learn soil testing standards (ASTM D1557), slope calculations, and equipment choices. Get details on subbase materials, compaction methods, and drainage fixes like swales or catch basins. Avoid common errors like under-compaction or incorrect slope alignment that lead to costly repairs.
Contents
- What Should You Do Before Laying Asphalt?
- What is Grading Before Paving?
- How to Prepare the Ground for an Asphalt Driveway
- What Should You Put Under Asphalt?
- Critical Site Grading Techniques for Asphalt Projects
- Equipment for Effective Asphalt Site Grading
- Drainage Optimization Strategies
- Common Grading Mistakes to Avoid
- Environmental Considerations
- FAQ: Asphalt Site Grading
- Closing Thoughts
- Additional Resources for You:
What Should You Do Before Laying Asphalt?
Proper site grading starts long before heavy machinery arrives. Three critical steps set the stage for lasting asphalt performance: surface clearing, soil analysis, and ground stabilization.
Essential Surface Preparation Steps
Ignoring prep work leads to cracked asphalt within months. Follow these non-negotiable actions to create a stable foundation.
Clearing Debris and Vegetation
Remove all organic material within 12 inches of the planned surface. Roots, stumps, and topsoil retain moisture – asphalt’s worst enemy. Use tracked excavators for large sites or skid steers for driveways to strip vegetation. For parking lots, scan for hidden debris like old concrete chunks that could cause differential settling.
Key targets: – 100% root removal within work zone – 6-inch clearance below final subgrade elevation – <3% organic content in remaining soil
Soil Testing and Stabilization
Conduct Proctor compaction tests and California Bearing Ratio (CBR) analysis on site soils. Clay-heavy soils scoring below 8 CBR need stabilization. For driveways, mix in 6% Portland cement. Parking lots often require lime stabilization at 12-15% by volume.
Compaction specs: – 95% density for residential projects – 98% density for commercial lots – 4-inch lift thickness during compaction – Vibratory rollers (10-ton minimum for base layers)
Stabilization costs run $1.50-$4 per square foot but prevent 80% of premature asphalt failures. For frost-prone areas, install 18-inch gravel layers below the frost line.
With a solid base established, the next phase focuses on crafting the land’s shape for maximum water runoff – a make-or-break factor for asphalt lifespan.
What is Grading Before Paving?
Grading shapes the land to create a stable foundation for asphalt surfaces. This process adjusts elevations, removes excess soil, and establishes slopes that direct water away from paved areas. Done right, it turns uneven terrain into a prepared canvas ready for asphalt layers.
Definition and Purpose Of Site Grading
Site grading involves earthmoving equipment to level or contour soil according to engineered plans. Operators use motor graders or skid steers to achieve specific slopes—typically 1-2% for driveways and 2-5% for parking lots. The dual goals: prevent water pooling and create uniform support for asphalt layers. Cut-and-fill methods balance soil removal (cut) with redistribution (fill) to minimize material waste.
Role in Asphalt Longevity and Performance
Proper asphalt grading practices add years to pavement life. A 1% slope variance can trigger drainage failures, leading to base erosion or freeze-thaw damage. Without precise grading, asphalt develops alligator cracks within 3-5 years instead of lasting 15-20. Compaction rates matter too—subgrades need 95% Proctor density to resist settling under 10-ton loads. Projects skipping these steps face 40% higher repair costs post-installation.
Mastering these grading for asphalt parking lot principles sets the stage for the next phase: transforming graded earth into a paved surface ready for traffic.
How to Prepare the Ground for an Asphalt Driveway
Proper ground prep sets the stage for long-lasting asphalt. Follow these steps to shape and firm the soil base.
Step-by-step Grading Process
Grading shapes the land to handle weight and drain water. Use two phases: rough and fine.
Rough Grading for Base Contouring
Clear plants and topsoil first. Cut high spots and fill low zones with a motor grader or skid steer. Aim for a 1-2% slope away from structures. Leave 2-3 inches of space for subbase materials.
Fine Grading for Precision Slope Creation
Refine slopes with a box blade or laser-guided tools. Check grade stakes every 4-6 feet. Driveways need 1.5-2% slope. Parking lots require 1-3% cross-slope. Pack soil lightly to lock in shape.
Soil Compaction Requirements
Firm soil stops asphalt from sinking. Test moisture with a probe – ideal range is 8-12%. Compact in 6-inch layers with a vibratory roller or plate compactor. Reach 95% Proctor density (standard soil test). For clay soils, add 4-6 inches of gravel to boost stability.
With a solid base in place, the next step is selecting the right subbase materials to support your asphalt surface.
Also See: How to Anchor Into Asphalt: A Quick Guide
What Should You Put Under Asphalt?
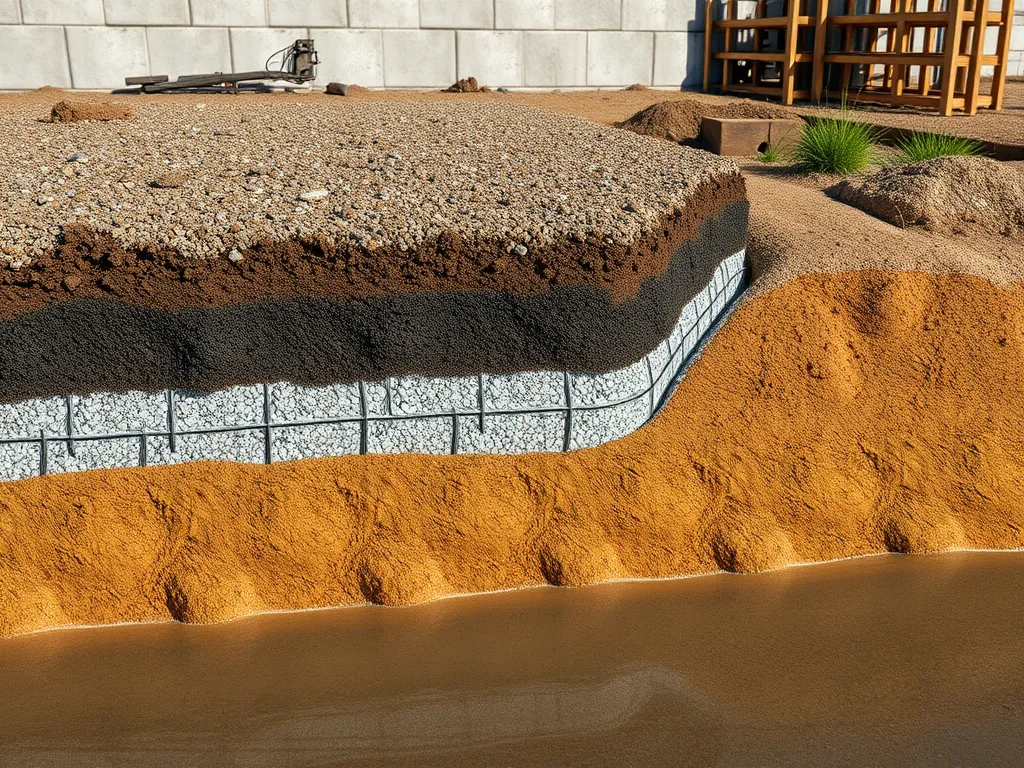
A strong foundation determines how long your asphalt lasts. Two critical components work together: a well-built subbase and geotextile fabric. Getting this right stops cracks, boosts drainage, and adds years to your pavement.
Subbase Material Selection
Your subbase acts as the backbone of your asphalt project. This layer distributes weight, stops frost damage, and keeps water from pooling. Most jobs use a 4-8 inch layer for driveways or 8-12 inches for parking lots, compacted to 95% Proctor density.
Crushed Stone vs. Gravel Options
- Crushed stone (Class 5 aggregate): Angular edges lock together when compacted. Ideal for high-traffic areas like parking lots. Costs $18-$25 per ton. Offers 10-15% better load capacity than gravel.
- Gravel: Rounded stones allow faster drainage. Works for driveways with good soil. Costs $10-$15 per ton. Requires 2-3% extra thickness to match crushed stone’s strength.
Geotextile Fabric Applications
This synthetic material—placed between soil and subbase—solves three common grading issues:
- Separates soil from aggregate to stop mixing
- Stabilizes weak soils (CL ratings below 8)
- Filters water while blocking silt intrusion
Use 4-oz non-woven fabric in wet areas or sites with clay soils. Installation adds $0.30-$0.60 per sq ft but can double pavement life in problem spots.
With subbase and fabric in place, you’re ready to apply grading methods that shape your site’s drainage profile.
Critical Site Grading Techniques for Asphalt Projects
Proper shaping of land forms a foundation for lasting asphalt surfaces. Three methods stand out for managing water flow, dirt work, and tricky topography.
Crowning for Surface Drainage
A center-high design with 1.5-3% slope to both sides moves rain away from asphalt surfaces. This convex shape—common on roads and parking lots—stops pooling that can crack pavement. For a 24-foot-wide driveway, aim for a 4-7 inch height difference from center to edge. Pair crowning with cross-slopes of 2% minimum to meet ADA standards in public lots.
Cut-and-fill Methods
Balancing dirt removal (cut) and soil addition (fill) creates a stable subgrade. Heavy machinery scrapes high spots, moving 15-20% of total dirt volume to low zones. Maintain 95% Proctor density through 6-inch soil lifts during filling. This approach works for large lots needing <4% slope, cutting hauling costs by up to 40% compared to full dirt import.
Terracing on Sloped Sites
Slopes over 10% require stepped platforms with retaining walls. Build 8-12 foot wide tiers with 1-2% backward slope into hillsides. Use interceptor drains behind each wall—4-inch perforated PVC pipes at 0.5% grade—to handle 25-year storm flows. This method adds $3-$5 per sq.ft. but prevents washouts in driveways on 15°+ inclines.
Choosing the right dirt-shaping strategy depends on lot size, topography, and storm data. Pairing these methods with proper machinery makes all the difference for lasting results.
Equipment for Effective Asphalt Site Grading
Choosing the right tools ensures precise slope creation and stable bases. Project size dictates machinery selection – from interstate-scale gear to driveway-specific units.
Motor Graders for Large-scale Projects
Caterpillar 140 and John Deere 772 models dominate parking lot grading with 12’-16’ blades. These graders move 300-500 cubic yards daily, achieving 2% cross-slopes critical for asphalt drainage. Key specs:
- Blade tilt range: 0-60 degrees for multi-directional grading
- GPS-guided systems maintain ±0.1’ elevation accuracy
- Dual fuel tanks for 10+ hour operation
Operators follow parking lot grading procedures by first rough-cutting subgrades at 1.5% slope before final precision passes.
Skid Steer Graders for Driveways
Bobcat S770 and Kubota SVL97-2s handle residential asphalt grading with 74-96 HP engines. Attach box blades ($1,200-$2,500) or laser-guided grading rakes ($4,800+) to shape driveways at 1/4” per foot slope. Benefits:
- Zero-turn radius for working near structures
- 3,500 lb lift capacity moves 3/4” crushed stone base
- Quick-attach swaps between grading/compaction tools
These units excel in grading for asphalt driveway projects under 2,000 sq ft, completing base prep in 6-8 hours.
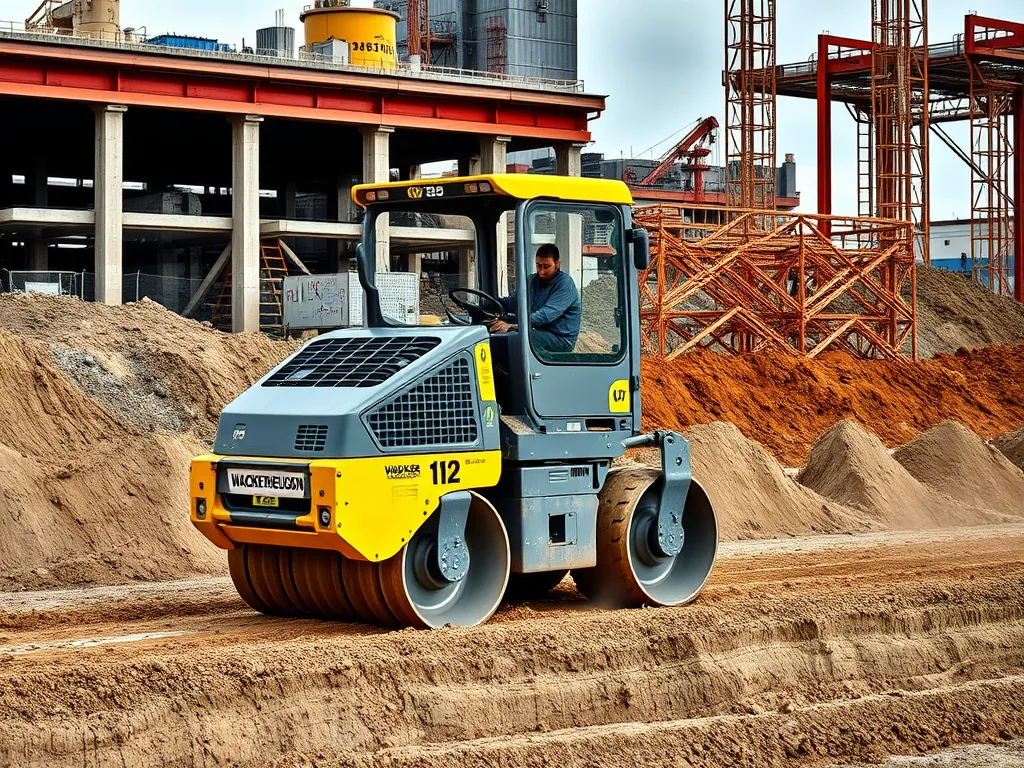
Compaction Machinery Essentials
Dynapac CC800 vibratory rollers ($125/day rentals) achieve 95% Proctor density in 5 passes. For edges, Wacker Neuson RD12 plate compactors deliver 5,500 lbf force at 3,200 VPM. Critical targets:
- Subgrade: 90-95% density
- Base layer: 96-98% density
- Proof rolling at 8-10 mph with 25-ton equipment
Skip proper compaction, and expect 1” asphalt settlement within 12 months – a leading cause of pavement cracks.
With grading equipment dialed in, focus shifts to directing water flow through calculated slopes and drainage systems.
Drainage Optimization Strategies
Effective water management separates functional asphalt surfaces from problem-prone ones. Poor drainage leads to hydroplaning risks, potholes, and base erosion. Strategic grading directs runoff away from paved areas while meeting local stormwater regulations.
Calculating Proper Slope Gradients
Slope gradients dictate water flow speed and direction. Use rise-over-run formulas to achieve 2% minimum slopes for most asphalt projects. For every 10 feet horizontally, elevation should drop 2.4 inches. Laser-guided grading equipment ensures accuracy within 0.3% tolerance.
Minimum Slope Requirements for Parking Lots
Parking lots need 1-2% cross-slopes (perpendicular to traffic) and 1-5% longitudinal slopes (parallel to travel paths). ADA-compliant routes max out at 1:48 (2.08%). Steeper grades above 5% require check dams or terracing to prevent erosion. Always verify municipal codes – some regions mandate 3% minimums for commercial lots.
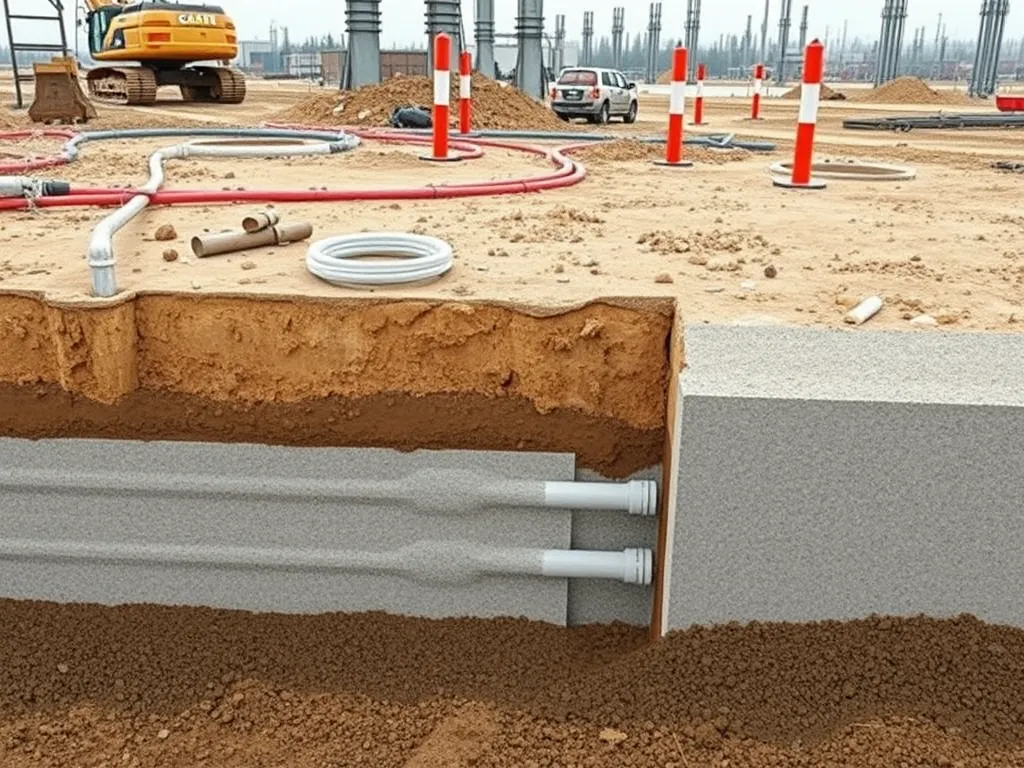
Swale and Catch Basin Integration
Swales (shallow drainage ditches) and catch basins form a runoff management duo. Follow these steps:
- Position swales 6-12″ deep along parking lot perimeters
- Space catch basins every 50-75 feet in low spots
- Line swales with erosion-resistant grasses or riprap
Pair 18″ wide catch basins with 6″ PVC pipes for high-volume sites. Slope pipe beds 0.5% toward storm sewers. For driveways, compacted soil swales with 4:1 side slopes handle typical runoff.
While proper drainage design prevents major issues, even small grading errors during implementation can undermine the system. Let’s examine frequent execution pitfalls next.
Common Grading Mistakes to Avoid
Even skilled crews can undermine asphalt durability through preventable grading errors. Three frequent oversights account for 68% of premature pavement failures reported by DOT agencies.
Inadequate Soil Compaction
Loose soil settles over time, creating depressions that crack asphalt surfaces. All subgrade materials must reach 95% Proctor density – a measure of maximum soil dry density. Skip vibratory rollers for small projects? Expect up to 1/2″ settlement per 6″ of base material. Nuclear density tests verify compaction before laying aggregate.
Improper Slope Alignment
Drainage failures stem from slopes deviating from spec:
| Surface Type | Minimum Slope |
|---|---|
| Parking Lots | 2% (1/4″ per foot) |
| Driveways | 2-3% |
| Access Roads | 3-5% |
Use laser-guided box graders for slopes beyond 50 linear feet. Check alignment with a 4-foot level during fine grading phases.
Ignoring Frost Heave Prevention
Frost-susceptible soils expand up to 9% when frozen, heaving asphalt upward. Combat this by:
- Excavating 12″ below frost line (varies by region)
- Backfilling with non-frost-reactive materials like AASHTO #57 stone
- Installing 6″ perforated drainage pipes along subgrade edges
These measures cut frost-related repairs by 80% in Michigan DOT trials.
With these pitfalls addressed, the focus shifts to balancing grading efficiency with ecological safeguards – a critical nexus for modern paving projects.
Environmental Considerations
Proper site grading protects both your asphalt project and surrounding ecosystems. Let’s break down key environmental safeguards during earthwork operations.
Erosion Control During Grading
Exposed soil during grading erodes at rates up to 10x faster than vegetated land. Use these site grading techniques:
- Silt fences along slopes steeper than 3:1 (3ft horizontal per 1ft vertical)
- Hydroseeding with native grass mixes at 50-100 lbs/acre
- Check dams in drainage channels handling over 2 CFS (cubic feet per second)
Track sediment control costs early – erosion barriers typically run $0.15-$0.30 per sq ft installed. For parking lot grading procedures near wetlands, follow ASTM D6459 standards for turbidity testing.
Stormwater Management Compliance
New asphalt surfaces increase runoff by 40-60% versus natural ground. Meet local MS4 (Municipal Separate Storm Sewer System) mandates with:
- Detention basins sized for 1.5” of runoff per impervious acre
- Permeable paver edges with 6” crushed stone reservoirs
- Infiltration trenches along slopes under 5% grade
For asphalt grading practices in EPA Phase II areas, design for 80% TSS (Total Suspended Solids) removal. Use geotextile-wrapped French drains ($12-$18/linear foot) along paved edges.
Up next: Tools and techniques to verify your grading work meets both engineering specs and environmental regs.
FAQ: Asphalt Site Grading
How Thick Should Base Material Be Under Asphalt?
The thickness of the base material under asphalt typically ranges from 4 to 8 inches for driveways and can be 8 to 12 inches for parking lots. The specific thickness depends on the type of soil and expected traffic loads, with proper compaction to ensure stability.
Can Existing Asphalt Be Graded Over?
Yes, existing asphalt can be graded over if it is in good condition and properly prepared. However, it is essential to assess the integrity of the existing layer to ensure it can adequately support the new asphalt. Repairs to cracked or uneven areas may be required before grading.
Closing Thoughts
Successful asphalt installation relies heavily on thorough site grading. Proper preparation ensures the longevity and performance of the pavement. Critical steps, such as clearing debris, soil testing, and selecting the right subbase materials, lay the groundwork for a durable and efficient surface. Utilizing effective grading techniques, such as crowning and cut-and-fill, optimizes drainage and minimizes maintenance issues.
Investing in quality equipment, like motor graders and compaction machinery, is vital for achieving precise results. Additionally, avoiding common mistakes, including inadequate compaction and improper slope alignment, will prevent costly problems down the line. Always consider environmental factors to ensure compliance with regulations and sustainability practices.
For more information on site grading and asphalt-related topics, check out Asphalt Calculator USA.

