Mastering Grading: The Foundation for Perfect Asphalt Surfaces
Published on: September 2, 2025 | Last Updated: April 14, 2025
Written By: George Voss
Proper grading before asphalt laying involves shaping the ground to precise slopes, compacting soil, and installing a stable sub-base. This process creates a durable foundation that supports pavement weight, directs water away from the surface, and prevents premature cracking. Key steps include achieving a 1-2% slope for drainage, removing unstable soil, and compacting layers to 95% density using plate compactors or rollers.
This guide breaks down grading methods, equipment choices, and common pitfalls. You’ll learn how to execute cut-and-fill grading, set laser-guided slopes, and avoid errors like inadequate compaction. We’ll also cover soil moisture testing (aim for 8-12% water content), selecting between rough grading (2-4 inch accuracy) and fine grading (0.5-inch tolerance), and using GPS systems for millimeter-level precision.
Contents
- Importance Of Proper Grading for Asphalt Surfaces
- What is Grading Before Asphalt Paving?
- Key Grading Methods for Asphalt Preparation
- Step-by-step Grading Process for Asphalt Laying
- Essential Grading Techniques for Asphalt Projects
- Recommended Equipment for Asphalt Grading
- Common Grading Mistakes to Avoid
- Professional Tips for Effective Asphalt Grading
- Preparing the Ground for an Asphalt Driveway
- Frequently Asked Questions (FAQ)
- Closing Thoughts
- Additional Resources for You:
Importance Of Proper Grading for Asphalt Surfaces
Grading forms the backbone of asphalt durability. Without precise earth shaping, even premium asphalt mixes fail prematurely. Let’s break down why this phase demands attention to detail.
Ensuring Longevity and Structural Integrity
A well-graded base distributes weight evenly across the asphalt layer. This prevents premature cracking under loads exceeding 20,000 pounds per axle. Proper cross-slopes (1-2% minimum) keep surfaces stable while maintaining 95% compaction rates in subsoil. Contractors using nuclear density gauges verify soil density meets ASTM D698 standards before laying asphalt.
| Grading Factor | Impact on Asphalt |
|---|---|
| Slope Accuracy (±0.5%) | Prevents water pooling, base erosion |
| Compaction (95% Proctor) | Reduces settling by 70% |
| Surface Evenness (≤3mm variance) | Cuts raveling risks by 40% |
Optimizing Drainage and Surface Performance
Water is asphalt’s top enemy. Grading directs runoff away from pavements using positive slopes or crown designs. For parking lots, aim for 2% slopes toward drains – this reduces hydroplaning risks by 35%. In regions with 30+ inches annual rainfall, permeable sub-base layers paired with geotextile fabrics boost drainage capacity by 50%.
Poor drainage leads to freeze-thaw damage in colder climates. Frost heave can lift asphalt layers up to 4 inches, creating potholes within 12 months. Proper grading paired with French drains or catch basins adds 8-12 years to pavement life in wet zones.
Mastering these principles sets the stage for asphalt success. Next, we’ll explore how grading methods translate theory into practice.
What is Grading Before Asphalt Paving?
Grading shapes the ground to form a solid base for asphalt. It evens out high spots, fills low zones, and preps soil to hold pavement. This step sets the stage for sub-base layers and smooth asphalt pours.
Definition and Role in Asphalt Preparation
Grading reshapes land using graders, dozers, or scrapers. It ensures slopes shed water, removes rocks or soft soil, and packs earth tight. Proper grade work stops cracks, dips, or floods in asphalt. It also lets crews add crushed stone sub-base layers for more strength.
Key Objectives Of Grading
First, grade work must move water off the pavement. A 1-2% slope directs rain to drains or soil. Second, create a dense base. Soil needs 95% compaction to hold asphalt weight. Third, level the surface. Even grades let crews lay asphalt 2-4 inches thick with no weak spots.
With these goals met, teams can pick from proven grading methods for each job site.
Key Grading Methods for Asphalt Preparation
Selecting the right grading method directly impacts pavement durability and performance. Let’s break down three core techniques used in asphalt preparation.
Cut and Fill Grading
Cut and fill balances soil removal (cut) with redistribution (fill) to create a stable base. This method minimizes material costs by reusing excavated soil, achieving up to 30% savings on large projects. Operators use GPS-guided graders to maintain a 1:1 cut-fill ratio, preventing weak spots. Proper execution requires testing soil moisture—opt for 8-12% to ensure compaction rates hit 95% Proctor density.
Rough Grading Vs. Fine Grading
Rough grading shapes the site’s macro-structure using bulldozers or scrapers, removing topsoil and setting elevation within ±2 inches. Fine grading follows, refining surfaces to ±0.5 inches with box graders or skid steers. The final layer receives laser-level checks to meet Superpave specifications for smoothness. Skipping fine grading risks asphalt thickness variations, accelerating cracks by 40%.
Sloping and Slab Grading Techniques
Sloping directs water away at 1.5-2% cross-slope for roads or 2-3% for driveways. Laser-guided screeds achieve slope accuracy within 0.1 inches per 10 feet. Slab grading flattens large areas like parking lots, requiring <0.25-inch elevation variance across 10-foot spans. For heavy-traffic zones, engineers pair slab grading with 6-inch aggregate bases to handle 20-ton axle loads.
Now that we’ve mapped grading methods, let’s walk through the step-by-step process to transform plans into pavement-ready surfaces.
Also See: Developing Hands-on Training Sessions for Asphalt Safety
Step-by-step Grading Process for Asphalt Laying
Proper grading transforms unstable ground into stable bases for long-lasting pavement. Follow these four steps to reach precise elevation targets while meeting structural needs.
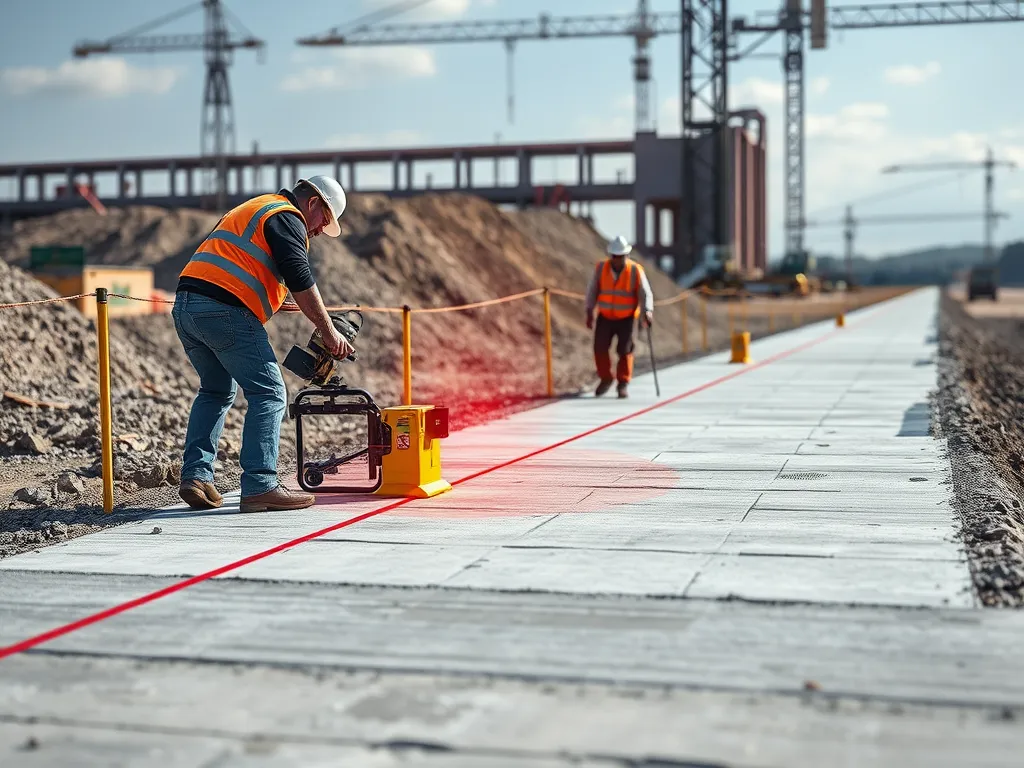
Step 1: Site Inspection and Surveying
Begin with detailed site surveys using laser levels or GPS-guided systems. Test soil composition through sieve tests to confirm load-bearing capacity. Identify soft spots needing removal. Document existing utilities, tree roots, or buried debris requiring excavation. This step sets the blueprint for grading best practices asphalt projects demand.
Step 2: Establish Drainage Slope and Elevation
Set cross-slopes between 1-2% for driveways or 2-5% for roads using transit levels. Create swales or crown profiles directing water toward drains or ditches. Follow local code requirements for runoff rates—most regions mandate ½” per foot slope minimum. Proper grading for asphalt preparation prevents ponding, which weakens pavement over time.
Step 3: Excavation and Soil Compaction
Remove unstable topsoil or organic material until reaching dense subsoil layers. Compact soil in 6″ lifts with vibratory rollers reaching 95% Proctor density. For clay-heavy soils, mix in lime stabilizers to boost strength. Install geotextile fabric over sandy bases to prevent shifting. This phase forms the core of asphalt grading best practices.
Step 4: Final Grading Adjustments
Fine-tune the surface with motor graders set to ±0.1″ elevation tolerance. Verify slopes using string lines or laser-guided screeds. Fill minor depressions with crushed stone (¾” minus) to eliminate low spots. Contractors prioritizing grading before asphalt laying reduce material costs by up to 15% through minimized waste.
With the base leveled and compacted, focus shifts to selecting methods that lock in structural stability. Next, explore techniques ensuring edges stay sharp under heavy loads while maintaining drainage efficiency.
Essential Grading Techniques for Asphalt Projects
Proper grading methods form the backbone of lasting asphalt surfaces. These three strategies address water flow, edge support, and base density – all critical factors tied to pavement performance.
Drainage-optimized Sloping
Create slopes directing water away from asphalt surfaces. The ideal 1.5-2% grade (1/8″ per foot) prevents pooling that causes base erosion or frost heave. Two proven methods:
- Crown slopes: Center-high design shedding water to both sides
- Cross slopes: Angled grades moving water toward drainage systems
Laser-guided grading boxes achieve ±0.2% slope accuracy, critical for parking lots requiring ADA-compliant surfaces. Pair with 6″ perforated PVC pipes every 50-75 feet in high-water areas.
Edge Grading for Perimeter Stability
Unsupported asphalt edges crumble under vehicle loads. Build 6-12″ compacted soil berms along perimeters at 30° angles. Key steps:
- Compact subsoil to 92% Proctor density
- Install geotextile fabric over slopes
- Add aggregate wedges or geogrid reinforcement
For driveways, extend edge grading 18″ beyond planned asphalt width to accommodate future widening. Use plate compactors with 5,000+ lbs force for tight berms.
Compaction-centric Fine Grading
Final grading demands 95% density across all soil layers. Granular base materials require 8-12 passes with 10-ton vibratory rollers. Monitor with nuclear density gauges showing real-time compaction stats.
- Optimal moisture content: ±2% of OMC (Proctor test)
- Maximum lift thickness: 6″ for clays, 8″ for sandy soils
- Proof rolling: 80 psi tire pressure checks for soft spots
Record density tests every 500 sq ft – required for commercial projects per ASTM D1557 standards. Adjust roller frequency (2,500-3,500 VPM) based on material type.
Mastering these grading practices sets the stage for selecting equipment that maintains precision from subgrade to surface.
Recommended Equipment for Asphalt Grading
Using precise tools ensures proper slope creation, soil stability, plus long-lasting pavement. Select machinery based on site size, soil type, plus design specs.
Motor Graders and Bulldozers
Motor graders shape the subgrade with blades spanning 12-16 feet. Caterpillar 140 or Volvo G900 models cut high spots plus fill depressions. Bulldozers like Komatsu D61ex push large soil volumes during rough grading. Pair both for projects needing over 500 cubic yards of earth moved.
Laser Levels and Gps-guided Systems
Laser levels set slopes within ±0.1 inches per 100 feet. Trimble or Leica systems sync with motor graders for real-time elevation corrections. GPS-guided tech reduces manual surveying by 70%, speeding up large lots. These tools fix cross-slopes between 2-5% to prevent water pooling under pavement.
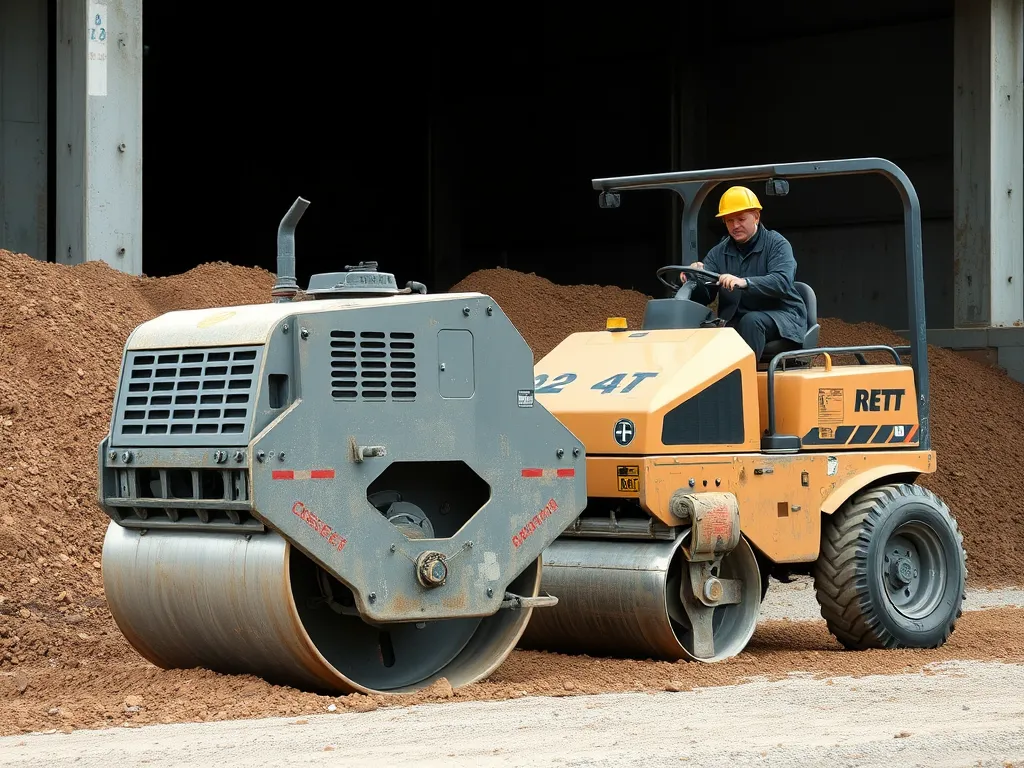
Plate Compactors and Rollers
Plate compactors reach 3,000-5,000 lbs of force for tight spaces. Ride-on rollers like Bomag BW174 achieve 95% Proctor density in granular bases. Vibratory modes work best on sandy soils, while static weights compact clay. Target 98% density testing before laying binder layers.
Proper tool selection sets the stage for smooth paving. Even with top-tier gear, execution errors derail projects. Next, let’s review frequent grading missteps plus solutions.
Common Grading Mistakes to Avoid
Even minor errors during grading compromise pavement quality. Let’s break down three frequent oversights that derail projects.
Inadequate Soil Compaction
Loose soil settles over time, creating dips or cracks in pavement. Proper compaction requires reaching 95% Proctor density with vibratory rollers or plate compactors. Skipping moisture tests or using undersized equipment leads to voids. For base layers, opt for granular fills with ≤10% fines to boost stability.
Ignoring Drainage Requirements
Flat surfaces trap water, speeding up asphalt erosion. Build slopes of 1-2% for driveways or 2-5% for roads to direct runoff. Pair crown grading with trench drains or catch basins in flood-prone zones. Neglecting these steps cuts pavement lifespan by up to 40% due to subsurface saturation.
Using Substandard Tools or Equipment
Outdated motor graders or uncalibrated laser levels create uneven subgrades. GPS-guided systems deliver ±3mm elevation precision, while hand tools introduce human error. Rent or invest in:
- 12-foot box blades for consistent cuts
- Dual-drum rollers for deep compaction
- Rotary lasers with slope sensors
Cutting corners here risks costly rework post-paving.
Steering clear of these errors sets the stage for smooth paving. Next, let’s explore expert strategies to elevate your grading workflow.
Professional Tips for Effective Asphalt Grading
Proper grading sets the stage for asphalt surfaces that last decades. Follow these field-tested methods to avoid costly rework and ensure pavement durability.
Prioritize Drainage Slope Accuracy
Aim for a 2% minimum slope away from structures – roughly 1/4-inch drop per linear foot. Even minor deviations trap water, causing premature cracks or base erosion. Use laser-guided equipment to maintain precision across large areas. For parking lots, integrate crown heights of 3-5 inches at centerlines to split runoff. Drainage errors account for 37% of asphalt failures within five years, per National Asphalt Pavement Association data.
Conduct Frequent Grade Checks
Verify elevations every 10-15 feet during grading using rotating lasers or GPS systems. Adjust cuts/fills immediately when deviations exceed 1/2-inch tolerance. Record measurements at cross-slopes, transitions, and tie-ins to existing surfaces. Contractors using automated machine guidance report 22% fewer callback claims related to pooling water or uneven surfaces.
Use Moisture Control for Soil Stability
Maintain soil moisture between 8-12% during compaction for maximum density. Test with nuclear gauges or speedy moisture testers every 500 sq ft. Dry subgrades? Aerate and mist water before compacting. Saturated soils? Mix in lime stabilizers at 3-5% by weight or delay work until moisture drops. Properly stabilized bases achieve 95% Proctor density – critical for supporting 300-500 psi asphalt loads.
With grading perfected, focus shifts to creating stable foundations. Next, we’ll break down ground preparation steps specific to driveways.

Preparing the Ground for an Asphalt Driveway
Proper groundwork determines the lifespan of asphalt surfaces. Follow these steps to create a stable base that withstands traffic loads and weather cycles.
Marking and Excavation
Start by marking boundaries with stakes and string lines. Call 811 to locate underground utilities before digging. Remove topsoil and organic matter to expose stable soil. Excavate to a depth of 6-8 inches using skid steers or mini-excavators. Verify the base elevation matches project specs with a transit level.
Sub-base Installation and Compaction
Spread a 4-6 inch layer of crushed stone (AB3 aggregate works best) across the excavated area. Compact the sub-base in 2-inch lifts using a plate compactor or vibratory roller. Aim for 95% Proctor density to prevent future settling. Test compaction with a nuclear density gauge for accuracy.
Final Grading for Driveway Slope
Shape the sub-base to a 2% slope directing water away from structures. Use laser-guided grading systems for precision. Apply a 1-inch layer of fine aggregate as a leveling course. Check for deviations with a 10-foot straightedge—gaps over ¼ inch require reworking. Verify slope consistency using a water level or digital inclinometer.
With the base graded and compacted, focus shifts to selecting the right asphalt mix for optimal performance. The next steps ensure your surface meets both functional and aesthetic demands.
Frequently Asked Questions (FAQ)
What is the Grading Method for Asphalt?
The grading method for asphalt involves techniques such as cut and fill grading, rough versus fine grading, and the application of sloping or slab grading techniques. Each of these methods aims to prepare the ground effectively for asphalt laying by creating a level and stable base, optimizing drainage, and ensuring long-term durability of the pavement.
What Should Be Done Before Laying Asphalt?
Before laying asphalt, it is essential to conduct a thorough site inspection, establish proper drainage slopes, carry out necessary excavation and soil compaction, and make final grading adjustments. These preparatory steps ensure that the ground is adequately prepared to support the asphalt and prevent future issues such as cracking or erosion.
What is Grading Before Paving?
Grading before paving refers to the process of shaping and leveling the ground to create a solid foundation for the asphalt surface. This involves removing high spots, filling in low areas, and compacting the base material to proper specifications to ensure that the asphalt laid on top remains stable and durable.
How Do You Prepare the Ground for an Asphalt Driveway?
Preparing the ground for an asphalt driveway involves a few key steps: marking and excavating the area, installing and compacting a sub-base of crushed stone, and making final grading adjustments to achieve the correct slope. Ensuring that the base is well-compacted and properly graded is crucial for the longevity and performance of the driveway.
Closing Thoughts
Grading is a vital step in asphalt preparation that directly influences the longevity and performance of the surface. Proper grading ensures an even foundation, optimizes drainage, and enhances structural integrity. By following the best practices outlined in this article, contractors can prevent common pitfalls and achieve a durable asphalt surface.
Utilizing the right equipment and techniques is crucial. Regularly checking the slope and elevations, ensuring effective soil compaction, and addressing drainage requirements are key to a successful installation. Avoiding mistakes such as inadequate compaction and substandard tools will promote trust and satisfaction among clients.
For more detailed information and resources related to asphalt projects, be sure to visit Asphalt Calculator USA.
Additional Resources for You:
- American Association of State Highway and Transportation Officials (AASHTO). (2008). Mechanistic-Empirical Pavement Design Guide (MEPDG). Washington, DC: AASHTO.
- How to Prepare for Paving – J&J Asphalt
- Asphalt Planning: Everything You Need to Know About Ground Preparation, Types of Asphalt, and the Best Time to Lay It
- Asphalt Grading Preparation – All About Driveways
- What is Asphalt Grading? | TopWest Asphalt

