Best Practices for Excavation Techniques for Asphalt Driveways
Published on: September 1, 2025 | Last Updated: April 14, 2025
Written By: George Voss
Proper asphalt driveway excavation removes old materials and preps a stable base using precise depth control, slope creation, and soil compaction. This process demands planning with tools like mini-excavators or shovels, following the 1:1 depth-to-width ratio (1 inch of depth per 1 inch of width), and sidestepping errors like poor drainage. Nailing these steps prevents cracks and extends driveway life to 15-20 years. Key tasks include clearing 6-8 inches of topsoil, verifying slopes with laser levels, and compacting crushed gravel bases to 95% density.
This guide breaks down asphalt driveway excavation into clear steps. Learn how to mark boundaries with spray paint or stakes, choose between skid steers or manual digging, and hit the ideal 8-10 inch depth for residential projects. We’ll explain why 3/4-inch angular gravel outperforms rounded stones for drainage and how a 2% slope (1/4 inch per foot) stops water pooling. You’ll also get tips on recycling old asphalt into your base layer and fixing mistakes like uneven compaction that cause dips within months.
Contents
- Understanding Asphalt Driveway Excavation Fundamentals
- Preparing for Asphalt Driveway Excavation
- Step-by-step Asphalt Driveway Excavation Techniques
- Base Preparation for Asphalt Driveways
- Common Asphalt Excavation Mistakes to Avoid
- Environmental Considerations in Asphalt Excavation
- FAQ: Asphalt Driveway Excavation Best Practices
- Closing Thoughts
- Useful References for You:
Understanding Asphalt Driveway Excavation Fundamentals
Proper groundwork sets the stage for asphalt that lasts. The right excavation methods determine whether your driveway survives freeze-thaw cycles or develops potholes within three years. Let’s break down the science beneath the surface.
Why Proper Excavation Impacts Asphalt Longevity
Asphalt driveways rely on a stable base to distribute vehicle loads evenly. Without precise digging and grading, even 3 inches of fresh asphalt can crack under a standard sedan’s weight. Experts report 80% of driveway failures stem from subpar base preparation.
Ensuring Structural Stability
Excavate to a minimum depth of 8-10 inches to accommodate both base layers and asphalt. Use angular crushed stone (like ¾” aggregate) for the sub-base, compacted to 95% density. This creates a load-bearing platform that prevents rutting. Test compaction with a nuclear density gauge or proctor test for accuracy.
Preventing Premature Cracking and Settling
A 2% cross slope directs water away from the pavement surface. Build this gradient into the excavated base to stop water pooling, which weakens underlying soils. Pair with 6-8 inches of compacted gravel to block frost heave in colder zones. Geotextile fabrics add extra protection against soil migration in clay-heavy areas.
With these excavation fundamentals mastered, you’re ready to tackle the next phase: mapping your site and gathering tools for precise execution.
Preparing for Asphalt Driveway Excavation
Proper groundwork determines whether your asphalt driveway lasts 12 years or 25. Follow these steps to set up for success.
Site Assessment and Measurement
Measure twice, dig once. Start by evaluating soil type and existing terrain. Clay soils need 8-12″ excavation depth, while sandy soils require 10-14″.
Marking Driveway Boundaries
Use wooden stakes and string lines to outline edges. Add 6-12″ beyond planned width for workspace. For curved driveways, mark arcs with spray paint every 3 feet.
Using Levels for Slope Verification
Confirm a 2% slope away from structures with laser levels. Measure every 4 feet along the length. Adjust grades before digging to prevent water pooling under asphalt layers.
Essential Tools and Equipment
Choose gear based on driveway size. Equipment accounts for 40% of project efficiency during asphalt driveway excavation.
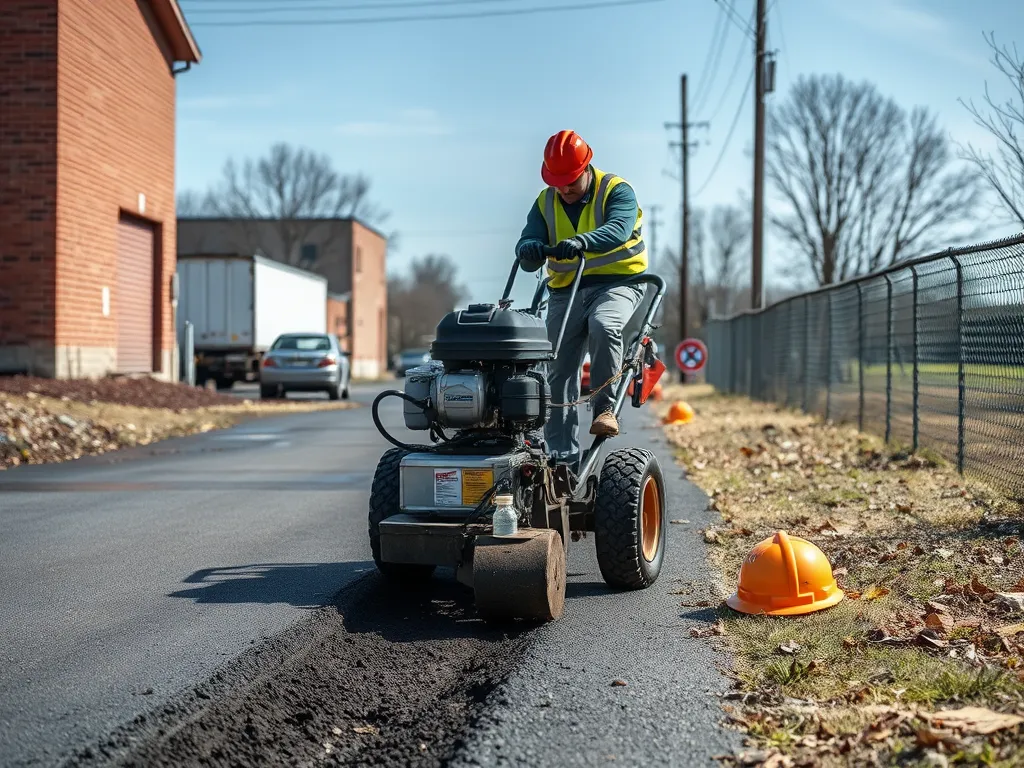
Heavy Machinery vs. Manual Tools
Mini-excavators handle 500+ sq ft areas at 200 sq ft/hour. Shovels work for small repairs under 150 sq ft. Rent walk-behind trenchers for precise edge work near structures.
Safety Gear Requirements
Wear ANSI-approved steel-toe boots and cut-resistant gloves. Use OSHA-rated ear protection (NRR 25+) with machinery. Add dusk masks when working with compacted soils.
With boundaries marked and gear ready, you’re set to execute precise asphalt driveway excavation. Next, we’ll break down the step-by-step process for removing old surfaces and prepping the base.
Step-by-step Asphalt Driveway Excavation Techniques
Follow these field-tested methods to prep your site for lasting asphalt performance. Proper excavation sets the foundation for a driveway that handles vehicles weighing up to 10,000 lbs without rutting.
Step 1: Clearing Topsoil and Debris
Start by stripping all surface materials down to stable mineral soil. Topsoil contains roots and organic matter that decompose over time, creating voids under pavement. For driveways longer than 20 feet, rent a skid-steer loader with a grading bucket to speed up the process.
Removing Sod and Organic Material
Cut sod into 1’x2′ sections for easy removal. Scrape until reaching clay or gravel layers – typically 4-6 inches below grade. Check local codes: some areas require keeping topsoil on-site for erosion control.
Step 2: Applying the 1:1 Rule for Depth-to-width Ratio
Maintain a 1:1 ratio between excavation depth and asphalt width. For a 10-inch-wide driveway section, dig 10 inches deep. This prevents edge collapse during compaction and allows space for 6 inches of crushed stone base plus 4 inches of asphalt mix.
Step 3: Achieving Optimal Excavation Depth
Measure depth every 4 feet using grade stakes and string lines. Account for future settling: excavate 0.5 inches deeper than planned for every foot of fill material. For sloped sites, add 2 inches to the low side for proper drainage.
Typical Depth Requirements for Asphalt Driveways
Residential driveways need 8-12 inches of total depth: • 4-6″ compacted subgrade • 6-8″ aggregate base (¾” crushed stone) • 2-3″ asphalt layer (PG 64-22 binder mix)
Step 4: Creating Proper Drainage Slopes
Build a 1-2% cross-slope away from structures. Use a laser level to verify 0.25-inch drop per foot. For driveways longer than 50 feet, add a center crown with 1% slope to both sides. Compact slopes with a vibratory plate compactor (90% Proctor density) before base installation.
With the site fully excavated and graded, you’re ready to focus on selecting and compacting base materials – the next critical phase in building a driveway that lasts 20+ years.
Also See: Monitoring Asphalt Quality Using Drones
Base Preparation for Asphalt Driveways
A strong base determines whether your asphalt driveway lasts 7 years or 20+ years. Proper sub-base construction prevents shifting, cracking, and water damage after excavation. Let’s break down material choices and compaction strategies.
Selecting Sub-base Materials
Use angular aggregates like crushed stone or recycled concrete for optimal load distribution. These materials lock together under pressure, creating a stable platform. Avoid rounded river rock—it shifts under heavy loads.
Gravel Types and Compaction Methods
- Item 4 (1.5″ crushed stone): Most common base layer (4-6″ compacted depth)
- 2A modified (stone dust mix): Fills voids in larger stones for better density
- 21A (3/4″ minus gravel): Surface base layer with 95% Proctor density requirement
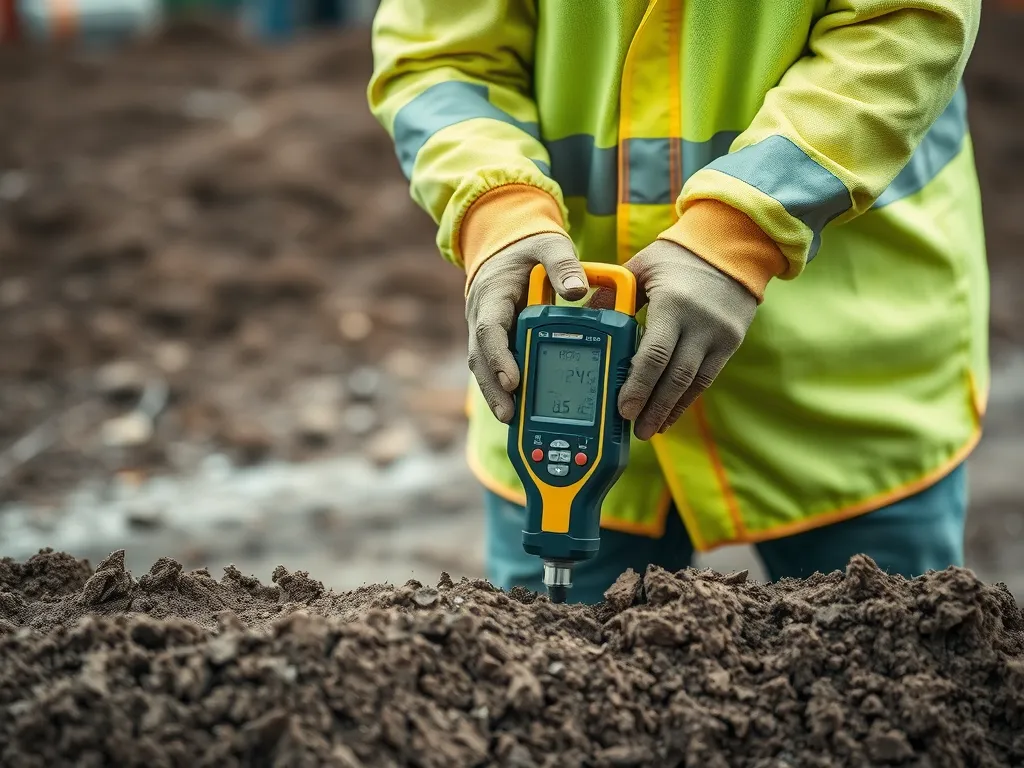
Compact layers with vibratory plate compactors (for small areas) or roller machines (for large driveways). Achieve 95% Proctor density—a standard measured by ASTM D698 testing.
Layering and Compaction Best Practices
Install sub-base materials in 4″ lifts (layers). Compact each lift before adding the next. Use a laser level to maintain the 2% slope needed for drainage. Spray water lightly during compaction—moisture activates binding agents in stone dust mixes.
Avoiding Over-Compaction Pitfalls
Excessive force from heavy rollers creates a hardpan layer that traps water. Test compaction with a penetrometer—readings above 300 PSI signal over-compaction. Stay within 95-98% Proctor density for proper water permeability.
With the base properly prepared, attention shifts to avoiding common errors during final grading and asphalt placement.
Common Asphalt Excavation Mistakes to Avoid
Quality starts with sidestepping common pitfalls during asphalt driveway prep. Three missteps account for 70% of early asphalt failures according to road construction studies.
Inadequate Soil Compaction
Loose subsoil sinks under asphalt’s weight, creating dips and cracks. A vibratory plate compactor applying 5,000-10,000 lbs of force per square foot works best. Check density with a nuclear gauge or sand cone test – aim for 95% Proctor density.
| Compaction Level | Asphalt Longevity |
|---|---|
| 85% Proctor | 3-5 years |
| 95% Proctor | 12-15 years |
Ignoring Drainage Requirements
Water pooling under asphalt causes frost heave and base washouts. Build a 2% slope away from structures – 1/4″ drop per foot works for most driveways. Add trench drains or French drains if working on flat lots. A 6″ crown in center-line designs pushes runoff to edges.
Improper Depth Measurement
Shallow digs limit aggregate base thickness, while over-excavation wastes materials. Follow the 1:1 depth-to-width ratio rule: 10″ depth for standard 10′ wide residential driveways. Double-check with laser levels after removing old asphalt.
| Vehicle Class | Minimum Depth |
|---|---|
| Cars | 8″ |
| Pickups/RVs | 12″ |
With soil prep done right, focus shifts to material choices that boost sustainability. Smart recycling cuts costs while keeping sites green.
Environmental Considerations in Asphalt Excavation
Modern asphalt driveway projects demand eco-conscious strategies. Proper handling of materials and site protection prevent long-term environmental damage while maintaining project efficiency.
Recycling Old Asphalt Materials
Reclaimed Asphalt Pavement (RAP) transforms removed driveway material into reusable aggregate. Milled asphalt gets crushed to 3/4″ minus size for blending with fresh bitumen binder. Contractors report 20-30% cost reductions using RAP mixes meeting AASHTO M323 specifications. Recycling 1 ton of asphalt saves 2 cubic yards of landfill space and reduces CO2 emissions by 20 pounds compared to virgin production.
Cold in-place recycling (CIR) machines pulverize existing driveways to 6″ depth, mixing material with stabilizing agents onsite. This asphalt driveway excavation method eliminates trucking waste, cutting transport emissions by 80% for typical residential projects.
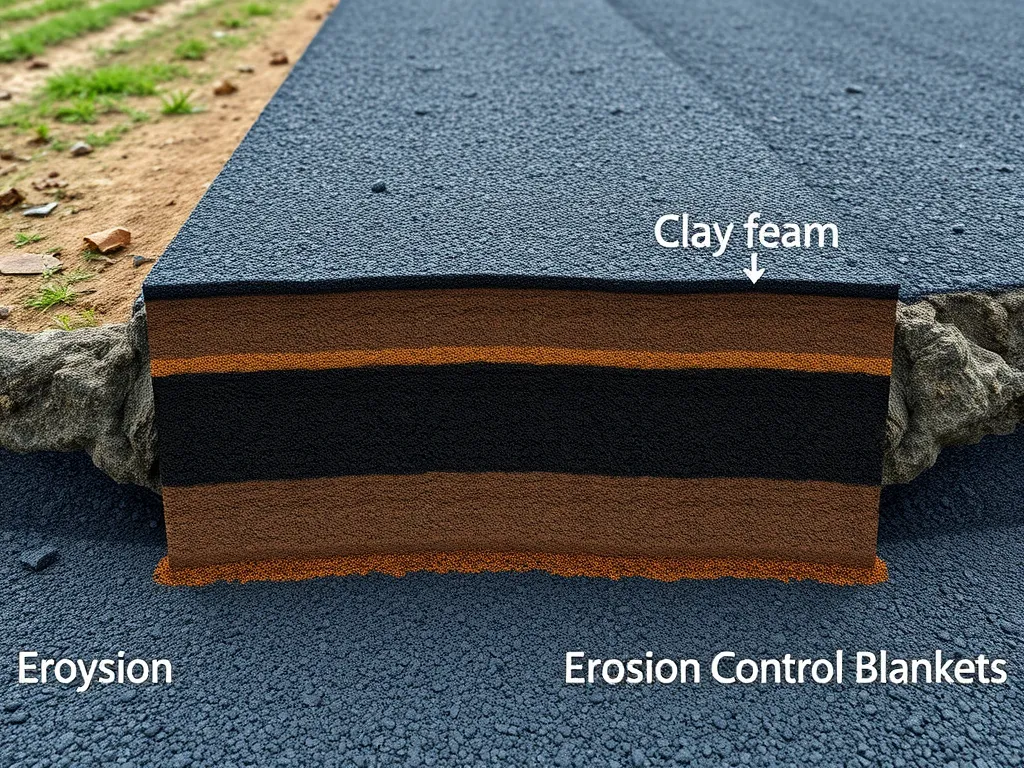
Erosion Control During Excavation
Exposed subgrades lose 5-10 tons of soil per acre daily without protection. Install silt fences with 6″ trench burials uphill of work zones. Slope breaks using straw wattles spaced every 50 feet reduce runoff velocity below 1.5 ft/s – critical for preventing rill formation in clay soils.
Hydroseed excavated areas left overnight with rye grass mixtures (4 lbs/1,000 sq ft). Temporary erosion control blankets with 85% coverage ratings anchor soil until final paving. These asphalt driveway construction techniques maintain sediment retention rates above 90% during 10-year storm events.
With material reuse and site stabilization handled, attention shifts to avoiding frequent installation errors that compromise driveway integrity.
FAQ: Asphalt Driveway Excavation Best Practices
What is the 1:1 Rule for Excavation?
The 1:1 Rule for excavation dictates that for every inch of depth you excavate, you should also maintain an equivalent width in the driveway. This ensures that the edges remain stable and prevents collapse during the subsequent compaction and installation of asphalt.
How Deep Should You Excavate for an Asphalt Driveway?
Excavation depth for an asphalt driveway typically ranges from 8 to 12 inches, depending on soil type and vehicle weight expectations. This includes a compacted subgrade layer, aggregate base, and asphalt thickness to ensure durability and performance.
What Should You Put Under Asphalt for Stability?
For stability, it is crucial to place a compacted base layer of angular gravel or crushed stone beneath the asphalt. This provides a solid foundation that distributes weight and prevents cracking and sinking under load.
How Do You Prepare the Ground for New Asphalt?
Preparing the ground for new asphalt involves several steps:
- Clearing topsoil and debris to reach stable subgrade material.
- Excavating to the required depth according to local guidelines.
- Creating sloped drainage to prevent water pooling.
- Installing an appropriate base layer and compacting it to the desired density.
Closing Thoughts
Mastering excavation techniques is vital for a durable asphalt driveway. Proper preparation, including accurate depth measurement and effective drainage management, lays a solid foundation. By avoiding common mistakes and adhering to best practices, you ensure long-term performance and stability.
As you embark on your excavation project, remember to assess the site, select appropriate materials, and apply efficient compaction methods. These steps will significantly enhance your driveway’s lifespan and appearance.
For more information and resources on asphalt driveway techniques, visit Asphalt Calculator USA.
Useful References for You:
- The Asphalt Institute. (2007). MS-4: The Asphalt Handbook. Lexington, KY: Asphalt Institute.
- Excavation for Driveways and Roads: What You Need to Know Before Breaking Ground
- Everything You Need To Know About Your Asphalt Driveway – Black Tar Construction and Asphalt Paving Company Ottawa
- How to Excavate Safely | AsphaltPro Magazine
- The Complete 7-Step Process for Asphalt Pavement Installation

